Showing posts with label custom roms. Show all posts
Showing posts with label custom roms. Show all posts
Friday, December 11, 2015
Update samsung captivate I897 to android lollipop by flashing Omni custom rom
Samsung captivate I897 was announced way back in 2010.This is a complete under powered device from samsung in current standards.If you are talking about the android updates then official last update was android d 2.3 which is gingerbread. Being an older device there are many custom roms that are available for this device.
You will find all variety of roms from gingerbread to kitkat and now lollipop entered game.There isn't much lollipop based custom roms that you can find for captivate I897 but available are stable enough for daily usage.
Since samsung captivate I897 has just 512mb of ram you might experience some sluggish while using the phone but its far better than other buggy and older version of android roms.With this rom you can update your device to latest version of android lollipop that is android 5.1.1.
Since updating your samsung captivate I897 to latest version of android using custom roms is a risky process we hold no responsibility if your brick your device.Though chances of brick are low we wont recommend it trying unless you already have experience with flashing and stuff.
About omni custom rom:
You will find all variety of roms from gingerbread to kitkat and now lollipop entered game.There isn't much lollipop based custom roms that you can find for captivate I897 but available are stable enough for daily usage.
Since samsung captivate I897 has just 512mb of ram you might experience some sluggish while using the phone but its far better than other buggy and older version of android roms.With this rom you can update your device to latest version of android lollipop that is android 5.1.1.
Since updating your samsung captivate I897 to latest version of android using custom roms is a risky process we hold no responsibility if your brick your device.Though chances of brick are low we wont recommend it trying unless you already have experience with flashing and stuff.
Update samsung captivate I897 to lollipop with Omni rom:
 |
| Update samsung captivate I897 to lollipop with Omni rom |
This is a 5.1 based custom rom aims at improving performance ,reliability and also a decent battery life over your stock They have a dedicated website too.This is not an official rom but has been compiled by an xda senior member "monfro" ,a big thanks to him for bringing this amazing custom rom for this device.
Features of this rom:
Before going further:Features of this rom:
- Omni Switch: Omni Switch is an alternative for default recents window in android.To use this Open omni switch app from app drawer and set your preferred options.It opens a floating bubble just like facebook messenger and floats on every app and actions click on it to open your recent apps.
- Performance control:This is similar to that in cyanogenmod rom.A default cpu manager app to control frequencies and governors.You can adjust cpu frequencies and also set them on boot too.
- Status bar toggles: Wifi and bluetooth toggle has a toggle to access respective settings.
- Custom Key actions: If your device has hardware buttons for navigation instead of on screen buttons you can set custom action to that buttons.
- All standard android lollipop 5.1 features.
These are some of the features of omni custom rom and you can explore rest of the features by flashing this on your samsung captivate I897.
- Check you samsung captivate model number by going into about device and confirm that you are using I897 only as flashing on other carrier variants might brick it.
- Make sure that kies (drivers) is already installed on your computer.If you don't have then do install them.
- You must have updated it to official software that is already available if you are starting from scratch.
- Root: You need to have root access on samsung captivate I897 to install cyanogenmod custom rom
- Backup:Backup all your data which includes contacts,apps,photos videos etc everything to computer or any cloud networks as Updating samsung captivate I897 to lollipop might result in loss of data.
- Backup Efs partitions: This is for those who already have twrp installed.Backup all your efs partition of your samsung device on existing rom.Just in case if you loose signal or imei you can just restore it back.
- Battery: Charge your samsung captivate so that you wont encounter any battery related problems while updating it.
- You must have a unlocked bootloader on your samsung captivate I897 to flash this rom.
- Downloads:Lollipop based omni custom rom(Onedrive) on your computer or device itself.If you want gapps download them too.
- Recovery: You need a custom recovery like twrp or cwm or philz already installed on your handset.
Update samsung captivate I897 using twrp recovery:
- Download Omni custom rom for captivate (omni-5.1.1-20150430-captivatemtd-HOMEMADE)and Gapps transfer them to sdcard or internal storage of device.
- Power of the device completely and wait for few seconds to confirm that it is completely off.
- Using button combinations reboot into twrp recovery or use quick boot app to enter recovery.
- Once you are in recovery backup existing rom first. It might about 5 to 10 minutes for backup to complete and do not interrupt backup process.
- Once backup is done click on back and now its time for you to install the rom.
- Click on install and navigate to location where you have placed your captivate i897 rom and select it.
- Swipe to confirm flash and wait for 5 minutes for process to complete.
- Again click on install and select gapps this time,swipe to confirm to flash.
- Once gapps are flashed reboot to system.Wait at least 15 minutes for initial boot to complete and once done you can explore its features.
If you don't have a twrp recovery installed on your handset then you can flash this using Clockworkmod recovery too.Go through below procedure to update your device.
Flash omni rom using Cwm recovery:
- Download Lollipop based omni rom from above link and transfer it to internal storage.
- Power off your samsung captivate I897 and wait for 10 seconds to confirm that it is off completely or remove the battery and put it back.
- Use button combinations and reboot it into cwm recovery.
- If you don't have a backup, create a nandroid backup first using the option in recovery.
- Once backup process is done click on wipe data and do a factory reset.
- Now click on install and select omni rom zip file which you have already downloaded and flash it.
- Flashing process takes lot of time to complete so don't come to a conclusion that it got stuck.
- Once flashing is done just reboot it.If you don't have cwm or philz then flash it with twrp recovery.
Points to remember:
This is an old device with just 512mb of ram and as you are updating with lollipop it might take lot of time for the initial boot process to complete and also it takes time for all the apps to get updated.This rom is very light so it will run without any lags but if you flash gapps then there might some sought of sluggishness in the user experience so it is not recommended to flash gapps.But if you cant live without gapps then flash minimal or trimmed gapps package which just has playstore and other required packages.Avoid installing heavy applications and also stay away from games which eats up lot of storage on your device.
By following the above guide you will be able to Update samsung captivate I897 to android lollipop by flashing Omni custom rom.If you have any other queries do let us know in comment section.

Install stock based Miui V7 on Lg optimus g pro E988 E980
If you are bored of regular ui that is available on all of the custom roms that are compiled for lg optimus g pro eE988 or for E980 you might have gone for a light stock based rom so that you can have a better performance while giving you a complete home experience.But who stays on a single for long time.At one point of time you will fed up with all roms and search for a firmware which has different ui and better performance.
Miui is one of those custom rom which has a complete different ui which is some what similar to Ios and give you a different a completely new experience than stock or cm based roms.Xiaomi recently announce its latest version of miui which is v7 and has all the features that v6 has to offer and has some improvements in user interface and some other features.
Before flashing this rom on your optimus g pro let me give you some information about this quadcore snapdragon s4 pro chipset device.This is lg's 2012 flagship and recently they announced android lollipop update.If you haven't received it yet you have to wait for some more time. but till then you can try this miui v7.Being a flagship it is available with many model numbers like E988,E985 and E980 depending on region of availability,There are Korean carrier variants too.
Flashing a custom rom is a very risky process and is much harder than diffusing a bomb for newbies. If you are new to flashing then let me remind you that we are not responsible if you brick your device after installing this. So be careful and follow at your own risk.
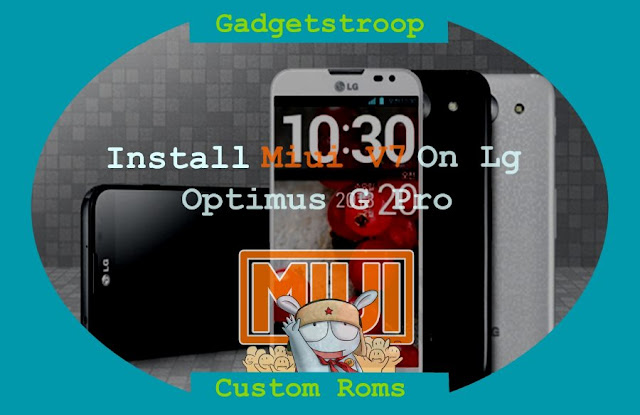 About Miui custom rom:
Miui is one of the best and awesome custom rom out there.As we all aware of it that it is a stock rom for all xiaomi devices but they open sourced it and is widely available for lot of other branded devices through official support or even ports.Recently xiaomi has announced miui v7 with lot of changes in user interface but it still has android kitkat as a base.
Coming to miui v7 for Optimus g pro e980 or e988 it is stable for daily usage and has decent battery life too.This rom is still in testing phase and is completely based on stock rom which means it stable but you will not any stock rom features here.Though all features which are essential for daily usage are working fine you might experience lot of force closes if you flash gapps.It is compiled by the developer "gtbluesky", a big thanks to him.
Features:
prerequisites:
Final words on miui v7 for optimus g pro:
By following the above three procedures you will be able to install Miui V7 on lg optimus g pro e980 or E988.If you experience any signal issue that lost your imei then you have to flash this rom with cwm recovery.If you have imei but lost signal then go to settings and then to lg settings.You will find service menu change subscription from NV to USIM.You will receive network signal again. If you have any important points to ask then do leave a comment below.
Miui is one of those custom rom which has a complete different ui which is some what similar to Ios and give you a different a completely new experience than stock or cm based roms.Xiaomi recently announce its latest version of miui which is v7 and has all the features that v6 has to offer and has some improvements in user interface and some other features.
Before flashing this rom on your optimus g pro let me give you some information about this quadcore snapdragon s4 pro chipset device.This is lg's 2012 flagship and recently they announced android lollipop update.If you haven't received it yet you have to wait for some more time. but till then you can try this miui v7.Being a flagship it is available with many model numbers like E988,E985 and E980 depending on region of availability,There are Korean carrier variants too.
Flashing a custom rom is a very risky process and is much harder than diffusing a bomb for newbies. If you are new to flashing then let me remind you that we are not responsible if you brick your device after installing this. So be careful and follow at your own risk.
Install Miui V7 on Lg optimus g pro E988 and E980:
Miui is one of the best and awesome custom rom out there.As we all aware of it that it is a stock rom for all xiaomi devices but they open sourced it and is widely available for lot of other branded devices through official support or even ports.Recently xiaomi has announced miui v7 with lot of changes in user interface but it still has android kitkat as a base.
Coming to miui v7 for Optimus g pro e980 or e988 it is stable for daily usage and has decent battery life too.This rom is still in testing phase and is completely based on stock rom which means it stable but you will not any stock rom features here.Though all features which are essential for daily usage are working fine you might experience lot of force closes if you flash gapps.It is compiled by the developer "gtbluesky", a big thanks to him.
Features:
- Face recognition: Default gallery in miui has a new feature which detects face which makes it easy to categorise all the images of a person.This is really a useful feature if you store lot of photos on your device.
- Video ringtone: If you are bored with the photo caller id and ringtone you can switch to a small video ringtone instead of just a song.when you receive a call a video which you have set will be played along with ringtone.
- Changes to interface: There are three modes for the home screen which which are focused on boys, girls and business.These modes jsut change the appearance of icons and wallpaper which might be pleasing to your eyes.
- Font size: If you don't like default font size then you can adjust its size to suit your eyes.
- Muse: One of the highlighting feature of miui is its theme engine.You can blends various elements of other themes into one.But if you are not pleased with all the themes and combinations that you can make then you can create your own them with the help of muse app.
- Performance has been improved by about 30% while decreasing the power consumption by about 25% which is nice.
- Miui Launcher: This launcher is completely different from other aosp launchers which you are familiar with.Feature no app drawer and apps resides on home screen it self.
- Traffic indicator: Network traffic indication is also available for ongoing traffic.Both download and upload speeds are displayed at same time on status bar.
- Theme engine: miui is one of the first rom to offer a theme engine.There are lacks of themes in mi store and some are paid versions too.Yo can use mi tools which is a modified xposed framework to run on miui to get all paid themes for free.With this theme engine you can change wallpapers ,boot animations,ring tones, navigation panel theme,status bar theme,lock screen theme,icons and what ever.You can even overlap individual theme elements too.
- Utility tool: This helps to clear cache,virus scan,permission etc.
- Guest mode: Guest mode is enabled by default and is locked in privacy protection.
- Notifications: Notifications appear in form of "heads up" which you must be familiar with.
- Features a do not disturb mode too.
- Status bar: It features transparent status bar as usual.There is a network monitor too for ongoing Internet traffic.You can see your upload and download speed in status bar.Swiping down from status bar will bring you notification panel and swiping left on it will take you to quick toggles.
- Unlock your phone when a trusted blue tooth device is nearby which might remind you of "MI band".
- Permission manager: You can control permissions for individual app.
These are the features of miui v7 and miui itself and you can explore rest of the features by flashing this on your optimus g pro E980 or E988.If you are on stock rom without even root access then you have to follow all the steps carefully.
- Check you Lg optimus G pro model number by going into about device and confirm that you are using E980 or E988 .This rom is actually flashable on all variants of this device.
- Make sure that lg mobile utility drivers are already installed on your computer.If you don't have then do install them.
- You must have updated it to official kitkat or lollipop that is already available if you are starting from scratch.
- Root: You need to have root access on your optimus G pro to flash Miui V7 .
- Backup:Backup all your data which includes contacts,apps,photos videos etc everything to computer or any cloud networks as Flashing miui v7 on optimus g pro might erase all the data on your device.
- Backup Efs partitions: This is for those who already have twrp installed.Backup all your efs partition of your Lg optimus G Pro e980 on current Rom or firmware.Just in case if you loose signal or imei you can just restore it back.
- Battery: Charge your Lg E980 85% so that you wont encounter any battery related problems while updating it.
- You must have a unlocked bootloader to flash this rom.
- Downloads:Lollipop based Miui v7 rom for optimus g pro on your computer or device.
- Recovery: You need a custom recovery installed on your device.If you don't have one then check this guide on installing twrp recovery on Optimus g pro.
- Download towel root apk on your device and install it.
- Enable usb debugging on your smart phone.Go to settings and then to about device.You will find build number there.Tap on it until you see a toast message yo are now a developer.Go back and you will find developer options.Click on it and mark on enable usb debugging.
- Open towel root apk and you will notice a tab which says make it ra 1n.Click on it and wait for the process to complete.
- Once the process completes just reboot the device.
- Download and install busy box and super user from playstore for full root access.
#2 Installing Twrp on Optimus g Pro e980:
- Open playstore on your handset and search for an app called freegee.
- Install app and run it.If it asks root access grant permission always.It downloads supported devices list and let it be done.
- Once list is downloaded you will see various options select backup efs first.
- Now select twrp recovery and confirm to flash it.
- Once it is flashed yo can reboot to recovery.Freegee might not install latest one so yo need to flash latest official one again using official app.For a latest recovery follow below steps.
- Open playstore app and search for twrp manager app.
- Download app and open it.
- If you are asked to grant super user permissions.Simply grant always.
- Once you grant the permissions do a swipe from the left and you will find several options.
- Choose the options "Install twrp" and you will be greeted with two more options.One is device name and other to install.
- Click device name and scroll down and you will find optimus g pro e980. Click on it.
- Now choose which version to be installed and then click on install recovery.
- App downloads it and flashes it.
- Once done you can reboot to recovery from the app itself.
Must check: Resurrection remix rom optimus g pro E980
#3 Flash Miui v7 using Twrp recovery:
- Download Miui v7 custom rom for optimus g pro and Gapps transfer them to sdcard or internal storage of device.
- Power of the device completely and wait for few seconds to confirm that it is completely off.
- Using button combinations reboot into recovery or use quick boot app to enter recovery
- Once you are in recovery backup existing rom first. It might about 5 minutes for backup to complete and do not interrupt backup process.
- Click on back and choose advance wipe option.
- Select data,system,cache,dalvik cache and swipe to confirm wipe.
- Once you have wiped required partitions go back and click on install.
- Navigate to location where you have placed your Optimus G pro rom and select it.
- Swipe to confirm flash and wait for 5 minutes for process to complete.
- Again click on install and select gapps this time,swipe to confirm to flash.
- Once gapps are flashed reboot to system.Wait at least 15 minutes for initial boot to complete and once done you can explore its features.
- If your optimus G pro fails to boot remove battery and put it back. Reboot it to recovery and this wipe system and flash the rom again.
By following the above three procedures you will be able to install Miui V7 on lg optimus g pro e980 or E988.If you experience any signal issue that lost your imei then you have to flash this rom with cwm recovery.If you have imei but lost signal then go to settings and then to lg settings.You will find service menu change subscription from NV to USIM.You will receive network signal again. If you have any important points to ask then do leave a comment below.
Lollipop based Cyanogenmod 12.1 Custom Rom for Sony Xperia Go Lotus
Update your sony xperia Go lotus to latest version of android lollipop by flashing cyanogenmod 12.1 custom rom.Sony didn't push any firmware upgrades for xperia go after 4.12 jellybean and this didn't stop developers at xda to bring lollipop for this device.
Cyanogenmod 12.1 is finally available for xperia go and good part is that most of the features are working fine and of course it has bugs too which you can ignore for sake of lollipop.Though it has only 512mb of ram with 1ghz dual core chipset ,cm runs just smooth and might experience lag if fill up internal storage with lot of apps.
Device specific codename for Xperia Go is "Lotus" and has model numbers as Sony ST27i, Sony ST27a.Check your device model number before proceeding further.Go to settings and then to about device,you will find your device model number there.
Disclaimer:
As we all know flashing a rom on xperia go or any other android device is a risky job and it might cause earthquakes,tsunamis and volcanic eruptions in our hearts in case of failure and we hold no responsibility for that.Proceed at your own risk.
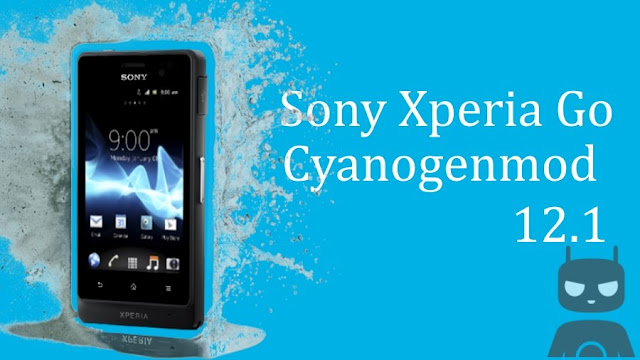 About Cyanogenmod custom rom:
This rom is compiled by a xda senior member "Hardlight"a big thanks to him for bringing this amazing firmware for xperia go lotus.Cyanogenmod is one of the best custom roms available in android development ecosystem. They support lot of devices.This is based on android open source project with lot of added features.It uses android 5.1.1 lollipop as base for now and will be updated to later versions of android when available.
 Since this is not official cm 12.1 there are some bugs like video recording doesn't work at all,a2dp too doesn't work.But if you cant resist yourself to try lollipop on your xperia go then this is only way which is left for us.
Cyanogenmod 12.1 is finally available for xperia go and good part is that most of the features are working fine and of course it has bugs too which you can ignore for sake of lollipop.Though it has only 512mb of ram with 1ghz dual core chipset ,cm runs just smooth and might experience lag if fill up internal storage with lot of apps.
Device specific codename for Xperia Go is "Lotus" and has model numbers as Sony ST27i, Sony ST27a.Check your device model number before proceeding further.Go to settings and then to about device,you will find your device model number there.
Disclaimer:
As we all know flashing a rom on xperia go or any other android device is a risky job and it might cause earthquakes,tsunamis and volcanic eruptions in our hearts in case of failure and we hold no responsibility for that.Proceed at your own risk.
Cyanogenmod 12.1 rom For Sony Xperia Go lotus:

This rom is compiled by a xda senior member "Hardlight"a big thanks to him for bringing this amazing firmware for xperia go lotus.Cyanogenmod is one of the best custom roms available in android development ecosystem. They support lot of devices.This is based on android open source project with lot of added features.It uses android 5.1.1 lollipop as base for now and will be updated to later versions of android when available.

General features of Cm 12.1:
- Trebuchet: This is a launcher that ships with cyanogenmod. But if you flash gapps then you might loose this.It is simple,fast and responsive and lacks customization a bit.
- Performance control:A default CPU manager app to control frequencies and governors . You can adjust cpu frequencies and also set them on boot too.
- Status bar Tweaks:Status bar has lot of tweaks which include a brightness slider.Slide in status bar to adjust brightness of the screen.Double tap on status bar to sleep device and also network speed indicator for on going traffic info.
- Theme engine: Theme engine is a custom feature cyanogenmod custom rom which basically changes the look user interface from lock screen to ring tones all the way up to boot animations. The speciality of the theme engine is the ability to choose individual elements of every theme you have installed.So you like the ringtones and wallpapers of one theme and icons of other theme then you can have them at a time.Just open the theme chooser and you will understand how to do it.This might reming you of theme store from miui rom.

- Software Updates: Cyanogenmod is usually available in three types one s nightlies which gets updated with new features every night and are quite stable for daily usage.second one is the snapchat which is monthly build version which will be stable version and other one is the release candidate.Some times nightlies are considered must stable than the snapshots. As of now we have android lollipop 5.1.1 in form on CM 12.1.
- If you are missing root functionality or all your root apps are not working properly then to developer settings and check if root permissions are set properly.

These are key features of cyanogenmod rom and you can explore other features by flashing this rom on your Sony Xperia Go Lotus.
Prerequisites:
- Battery: Charge your xperia go to at least 90% so that you wont encounter any battery related issues while flashing this.
- You must have updated your xperai U to latest firmware available.
- Custom recovery: You need a custom recovery like philz or cwm installed on your xperia Go.Without it you can not flash at all.
- Backup:Backup all your data which includes apps,contacts,photos videos etc everything to computer or any cloud storage as flashing Cyanogenmod on SonyXperia Go Lotus will erase all your data.
- Backup Efs partitions: Backup all your efs partition of your sony xperia go on current Rom.If you loose signal you can just restore it back.
- You must have a Unlocked bootloader for sure.
- Downloads:Cm 12.1 rom for xperia go lotus (androidfilehost mirror) and google apps. Transfer them to internal storage of your device.
Flash Cyanogenmod on Xperia go using recovery:
- Download Cm 12.1 for Xperia go and Gapps transfer it to sdcard or internal storage of your smartphone.
- Power of device completely and wait for few seconds to confirm that it is off completely.
- Press power button and when device boots up leave power button.
- While you Xperia go is powering up you you will notice led light blinks.When this happens you have to press either volume up or down continuously until it boots into recovery mode.
- Sony xperia go boots into cwm recovery.
- Once you are in cwm click on backup and select all partitions which you want to backup. It might take about 5 minutes for backup to complete. Don't interrupt backup process.
- Once backup of your existing rom is completed click on back button.Wipe data,cache and dalvik cache and wipe system partition too.
- Now select Install and navigate to location where you have placed your Rom and gapps zip files.
- Flashing rom might take about 5 minutes or so.Once flashing is complete do a factory reset again.
- Now reboot to system.Wait at least 15 minutes for initial boot to complete and once done you can explore Rom features.
After flashing cyanogenmod if xperia go didn't boot or pass boot logo then press and hold power button for about 15 seconds and you will notice that it shuts down completely and it shutdowns use volume button combinations again to boot into recovery.Wipe all required partitions again and flash rom.If it still fails to boot then restore backup.
Since this rom is in alpha stage and there are bugs you may not like it to use it as a daily driver.But most of features that are essential for daily usage like calling,messaging,mobile data are working fine which means you can actually try this rom for sure.If you have any other queries for flashing lollipop based cyanogenmod 12.1 rom on your sony xperia go lotus just leave a comment below.
Install android lollipop Euphoria os rom on sony xperia z3 leo
Xperia z3 is flashship model for sony and is expected to receive android m update in near future. Though android lollipop 5.0 is available for this device it may not receive latest version lollipop but you can experience it on your z3 by installing Euphoria os custom rom.This custom firmware is compiled by a xda senior develop "Rohan purohit". A big thanks to him for bringing this amazing rom for sony xperia z3.
You can flash this rom on D6602, D6603, D6633, D6643 variants of z3 and in case if you dont know device specific codename is "Leo".
 About Euphoria custom rom:
Euphoria os is and after market firmware based on android open source project.You will get latest android version with this rom.It comes with lot of added features over pure aosp Rom.Since we don't have official support from euphoria team we have a unofficial rom which is stable for daily usage.
Features of Euphoria os:
You can flash this rom on D6602, D6603, D6633, D6643 variants of z3 and in case if you dont know device specific codename is "Leo".
Prerequisites:
- Backup:Backup all your data which includes apps,contacts,photos videos etc everything to computer or any cloud storage as flashing Euphoria os on Sony xperia Z3 will erase all your data.
- Battery: Charge your xperia Z3 to at least 90% so that you wont encounter any battery related issues while flashing this.
- Backup Efs partitions: Backup all your efs partition of your sony xperia Z3 on current Rom.If you loose signal you can just restore it back.
- Custom recovery: You need a custom recovery like philz or cwm or twrp installed on it.Without it you can not flash at all.
- You must have a Unlocked bootloader.
- Downloads: Euphoria os for xperia z3 (androidfilehost mirror) and google apps. Transfer them to internal storage of your device.
Install Euphoria os on sony Xperia Z3 leo:

Euphoria os is and after market firmware based on android open source project.You will get latest android version with this rom.It comes with lot of added features over pure aosp Rom.Since we don't have official support from euphoria team we have a unofficial rom which is stable for daily usage.
Features of Euphoria os:
- Theme engine: It comes with a cyanogenmod mod theme engine so you can play with lot of themes.This is a great way of customizing your android device. You can theme each and every element of user interface all the way from wallpapers to boot animations.There are lot of themes available in playstore and some are premium too.

- Heads up notification: This notification system is similar to that in google'e one.Swipe left to dismiss notification and right to put it in background.Swiping down on it will open notification drawer and it merges in it.
- Wake options: Depending on the device you will have double tap to wake the device option in display settings and of course you have the option to put the device into sleep by double tapping on status bar.There is a option to wake phone after connecting charger.
- Animations: You can have custom animations for app opening and closing or while scrolling.

- Navigation: Besides device wake options you can even adjust dimensions of navigation bar and set custom actions too like long pressing back button to kill recent app.In landscape mode navigation goes left hand side and yeah there is an option to disable this too if you don't like it.
- Security: Privacy guard is available in this Rom along with blacklisting of calls and messages.
- Sound: AudioFx is available for better quality of music.Other features include increasing volume ring tone,profiles,less notifications,you can disable volume adjustable sound,separate ring tones and notifications volume as usual.
- Power: Advance reboot option is enabled by default so you can boot into recovery,fast boot,soft boot easily.
- Screen recorder: There is screen recorder option too in display settings to record your actions on your device.
- Quick settings panel is customizable and brightness control too is available.


These are noticeable features of euphoria OS Rom and there are lot of other features too which you can explore on your own by flashing this custom Rom on your Sony xperia z3 leo.
Flash Euphoria os Xperia Z3 using recovery:
- Download Euphoria for xperia z3 and Gapps transfer it to sdcard or internal storage of Z3.
- Power of device completely and wait for few seconds to confirm that it is off completely.
- Press power button and when device boots up leave power button.
- While you xperia Z3 is powering up you you will notice led light blinks.When this happens you have to press either volume up or down continuously until it boots into recovery mode.
- Sony xperia Z3 boots into cwm recovery.
- Once you are in cwm or twrp click on backup and select all partitions which you want to backup. It might take about 5 minutes for backup to complete. Don't interrupt backup process.
- Once backup of your existing rom is completed click on back button.Wipe data,cache and dalvik cache and wipe system partition too.
- Now select Install and navigate to location where you have placed your Rom and gapps zip files.
- Flashing rom might take about 5 minutes or so.Once flashing is complete do a factory reset again.
- Now reboot to system.Wait at least 15 minutes for initial boot to complete and once done you can explore Rom features.
Once it boots up you can enjoy all the features of Euphoria rom on your xperia Z3. If you experience any boot loops just do a factory reset again.Even after that rom fails to boot then restore backup which you have made earlier.
If you facing any issues while flashing Euphoria rom on your xperia Z3 leo just leave a comment below.
If you facing any issues while flashing Euphoria rom on your xperia Z3 leo just leave a comment below.
Install android lollipop Omni Custom Rom On samsung galaxy S3 mini I8190
You can now easily update your samsung galaxy s3 mini to android lollipop with Omni Custom rom.Samsung galaxy s3 mini is midrange product from samsung with nova thor chipset which is a dual core chipset clocked at 1Ghz coupled with 1gb of ram and Mali 400 GPU.It has 1gb internal storage with micro sdcard slot expansion upto 32gb.Display is of amoled type with a resolution of 480x800 translating to a pixel density of 233.Primary camera on this device is 5mp while secondary camera is VGA.Finally it is powered by a lithium ion 1500mah battery.
It was launched with android 4.1 jellybean and didn't receive updates to any future versions of android.But we are never short of custom roms.We have lot of android lollipop roms for our device.If you have rooted your galaxy s3 mini and want to flash a custom rom on it then you can flash omni rom and enjoy features of android lollipop along with some other goodies.Since this custom is specific to galaxy s3 mini with model number I8190 so try don't flash it on other model numbers as it causes brick.
Check your device model number first.To do this go to settings and then to about device,you will have your device model number.Confirm that you are using same model as mentioned above.
Prerequisites:

Omni rom features:
It was launched with android 4.1 jellybean and didn't receive updates to any future versions of android.But we are never short of custom roms.We have lot of android lollipop roms for our device.If you have rooted your galaxy s3 mini and want to flash a custom rom on it then you can flash omni rom and enjoy features of android lollipop along with some other goodies.Since this custom is specific to galaxy s3 mini with model number I8190 so try don't flash it on other model numbers as it causes brick.
Check your device model number first.To do this go to settings and then to about device,you will have your device model number.Confirm that you are using same model as mentioned above.
Prerequisites:
- Charge your device to at least 80% so that you don't run into any problems while flashing rom.
- Backup all your apps and data on your s3 mini to external sdcard or computer as flashing Omni rom will erase all the app data on your device including contacts.
- Enable usb debugging on your s3 mini.Of course you don't need to do this for sure but enable it.
- Download Omni custom rom and gapps if you need them.
- You must have a custom recovery like twrp or cwm installed on your mobile.
Install Omni Custom Rom on galaxy s3 mini I8190:

Omni rom features:
This is a 5.1 based custom rom aims at improving performance ,reliability and also a decent battery life over your stock They have a dedicated website too.
- Omni Switch: Omni Switch is an alternative for default recents window in android.To use this Open omni switch app from app drawer and set your preferred options.It opens a floating bubble just like facebook messenger and floats on every app and actions click on it to open your recent apps.
- Performance control:This is similar to that in cyanogenmod rom.A default cpu manager app to control frequencies and governors.You can adjust cpu frequencies and also set them on boot too.
- Status bar toggles: Wifi and bluetooth toggle has a toggle to access respective settings.
- Custom Key actions: If your device has hardware buttons for navigation instead of on screen buttons you can set custom action to that buttons.
- All standard android lollipop 5.1 features.
These are some of the features of the Omni and you can explore more features by flashing this custom on samsung galaxy s3 mini I8190.Most of lollipop based roms don't offers as many features of kitkat based .We still have to wait till all features of kitkat roms to be incorporated in lollipop.Omni team doesn't support samsung galaxy s3 mini officially so have only unofficial builds.
Flash Omni custom rom using twrp or CWm recovery:
Flash Omni custom rom using twrp or CWm recovery:
- Download Omni lollipop rom s3 mini and Gapps transfer it to sdcard or internal storage of device.
- Power of the device completely.
- Press volume up,power button and home key simultaneously and once you see boot loader screen release buttons.
- Using volume down as a navigation button move to recovery and click on power button to confirm action.
- Once you are in twrp or cwm recovery backup existing rom first.It might about 5 minutes for backup to complete.So just be patient.
- Wipe data,cache and dalvik cache.You may not need to wipe system.
- Flash ROM and then gapps if necessary.
- Reboot to system.Wait for at least 20 minutes for initial boot to complete and once done you can explore ROM features.If it fails to boot even after 20 minutes it has soft bricked.
Final words on Omni rom on galaxy s3 mini I8190:
This is a simple tutorial guiding you to install Omni custom rom on sasmung galaxy S3 Mini I8190..As this is meant only for this variant of the dont don't try to flash it on other variants as it might cause lot of errors or even soft brick it.Rom is still in alphastage and there may be more bugs than expected.If you got stuck in bootloop then remove the battery and wait for few seconds and then put is back.Enter recovery and restore backup which you have made earlier.If you facing any issues while flashing this rom then you can contact us by commenting here in the comment section or through our facebook page.
Install android lollipop based euphoria os rom on Oneplus one Bacon
Install android lollipop based Euphoria Os custom rom on your Oneplus one.Euphoria Os rom is custom firmware for Oneplus one.If you are bored of your stock os then flashing this rom on your oneplus one might bring a new experience.
About Oneplus one: Oneplus one is one of the best android device that you can buy at low price with flagship specs.It is powered by a snapdragon 801 chipset clocked at 2.5ghz with 3gb of ram along with 16 or 64 gb internal storage.It sports a huge 5.5 inch full Hd display which is protected by a corning gorilla glass 3 layer.Primary camera on this device is 13mp shooter while secondary camera is a 5mp which can record videos upto 1080P.
Two key selling factors of this device is its low price and it run on Cyanogenmod.This is the only device which has more than three stock roms officially released by manufacturer itself
Install EUphoria os custom roms.Oneplus One has a device code name "Bacon"
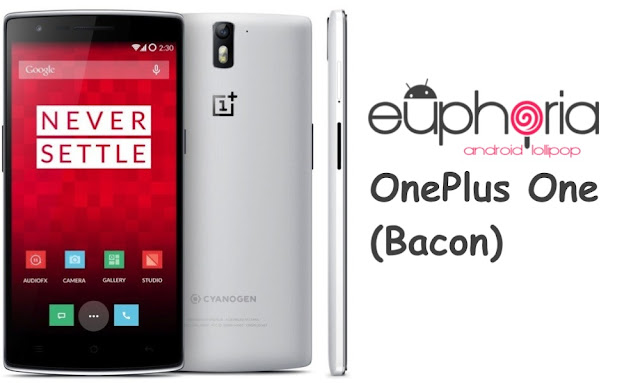
About Euphoria custom rom:
Euphoria OS is and after market firmware based on android open source project.You will get latest android version with this Rom.It comes with lot of added features over pure aosp Rom.Rom is completely stable for daily usuage.So you can flash it riaght away on oneplus one without any doubts.
Features of Euphoria OS:
About Oneplus one: Oneplus one is one of the best android device that you can buy at low price with flagship specs.It is powered by a snapdragon 801 chipset clocked at 2.5ghz with 3gb of ram along with 16 or 64 gb internal storage.It sports a huge 5.5 inch full Hd display which is protected by a corning gorilla glass 3 layer.Primary camera on this device is 13mp shooter while secondary camera is a 5mp which can record videos upto 1080P.
Two key selling factors of this device is its low price and it run on Cyanogenmod.This is the only device which has more than three stock roms officially released by manufacturer itself
Install EUphoria os custom roms.Oneplus One has a device code name "Bacon"
Install Euphoria Os rom On OnePlus One:

About Euphoria custom rom:
Euphoria OS is and after market firmware based on android open source project.You will get latest android version with this Rom.It comes with lot of added features over pure aosp Rom.Rom is completely stable for daily usuage.So you can flash it riaght away on oneplus one without any doubts.
Features of Euphoria OS:
- Theme engine: It comes with a cyanogenmod mod theme engine so you can play with lot of themes.This is a great way of customizing your android device. You can theme each and every element of user interface all the way from wallpapers to boot animations.There are lot of themes available in playstore and some are premium too.
- Heads up notification: This notification system is similar to that in google'e one.Swipe left to dismiss notification and right to put it in background.Swiping down on it will open notification drawer and it merges in it.
- Wake options: Depending on the device you will have double tap to wake the device option in display settings and of course you have the option to put the device into sleep by double tapping on status bar.There is a option to wake phone after connecting charger.
- Animations: You can have custom animations for app opening and closing or while scrolling.
- Navigation: Besides device wake options you can even adjust dimensions of navigation bar and set custom actions too like long pressing back button to kill recent app.In landscape mode navigation goes left hand side and yeah there is an option to disable this too if you don't like it.
- Security: Privacy guard is available in this Rom along with blacklisting of calls and messages.
- Sound: AudioFx is available for better quality of music.Other features include increasing volume ring tone,profiles,less notifications,you can disable volume adjustable sound,separate ring tones and notifications volume as usual.
- Power: Advance reboot option is enabled by default so you can boot into recovery,fast boot,soft boot easily.
- Screen recorder: There is screen recorder option too in display settings to record your actions on your device.
- Quick settings panel is customisable and brightness control too is available.
These are noticeable features of euphoria OS Rom and there are lot of other features too which you can explore on your own by flashing this custom Rom on your OnePlus one.
prerequisites:
prerequisites:
- Backup:Backup all your data which includes apps,contacts,photos videos etc everything to computer or any cloud storage as flashing Euphoria os custom ROM on Oneplus one will erase all your data.
- Battery: Charge your Oneplus one Bacon to at least 90% so that you wont encounter any battery related issues while flashing this.
- Backup Efs partitions: Backup all your efs partition of your oneplus one bacon on current ROM.If you loose signal you can just restore it back.
- Lock Gps:Lock your gps position on your current rom.If you use this a lot then you have to lock it so that it could work even after flashing other roms. It's easy to lock gps .Turn on gps in settings and find your current location in google maps and now now have locked on to gps.
- Custom recovery: You need a custom recovery like twrp installed on your oneplus one .Without it you can not flash roms at all.
- Downloads: Official Euphoria os rom oneplus one and google apps.Transfer them to internal storage of your device.
Flash Euphoria Os rom using Twrp recovery:
- Download Euphoria Os custom rom (Euphoria-OS-1.1-bacon-OFFICIAL-20150602.zip ) and Gapps transfer it to sdcard or internal storage of device.
- Power of the device completely.
- Press volume up,power button and Volume down simultaneously and once you see boot loader screen release buttons.
- Using volume down as a navigation button move to recovery and click on power button to confirm action.
- Once you are in twrp backup existing ROM first.It might take about 5 minutes for backup to complete.
- Wipe data,cache and dalvik cache.You may not need to wipe system.
- Flash ROM and then gapps.
- Reboot to system.Wait at least 15 minutes for initial boot to complete and once done you can explore ROM features.
Install Cyanogenmod 13 rom on Motorola Moto G 2014 aka titan
Motorola has promised to update the second Generation Moto G device to latest version of android which is android 6.0 aka marshmallow.But it might take some more time before the official marshmallow updates reaches to each and every Moto g titan.
But if you are one of those guys who like to play with their android devices by modifying then to suit their needs then you must have already unlocked its bootloader, rooted it and might have running a custom flavour of android on it.
Since this is a developer friendly device there are quite a number of custom roms already available but most of them still uses android lollipop as a base.Though slowly they might shift their base to android marshmallow ,you will definitely look into cyanogenmod rom at least once.
Good news is that Cyanogenmod's next big update is already available for public that is cyanogenmod 13 or cm 13.Since is an official one every work as expected and you might some bugs here and there which can be neglected.
If this is your first time flashing a custom rom on your Motorola moto g 2014 aka titan then I have to tell you one thing before going further.I am not at all responsible if your titan fails to boot after flashing this rom.So proceed at your own risk.
Before going further:
About Cm 13 custom rom:
Cm 13 is the latest version of cyanogenmod's major release which uses android marshmallow as a base with all the custom features of cyanognemod.Though some of the features are missing, ultimately they will make a way to cm 13 but it might take some time. All features of open source android are inherited in this rom and i have listed all the possible features of the same below which you can look into if you like.
Features of cyanogenmod 13:
Must read: Best custom roms for Moto G 2014 titan
But if you are one of those guys who like to play with their android devices by modifying then to suit their needs then you must have already unlocked its bootloader, rooted it and might have running a custom flavour of android on it.
Since this is a developer friendly device there are quite a number of custom roms already available but most of them still uses android lollipop as a base.Though slowly they might shift their base to android marshmallow ,you will definitely look into cyanogenmod rom at least once.
Good news is that Cyanogenmod's next big update is already available for public that is cyanogenmod 13 or cm 13.Since is an official one every work as expected and you might some bugs here and there which can be neglected.
If this is your first time flashing a custom rom on your Motorola moto g 2014 aka titan then I have to tell you one thing before going further.I am not at all responsible if your titan fails to boot after flashing this rom.So proceed at your own risk.
Before going further:
- Check your device model number and make sure that you are using only the titan codenamed device.Since there are lot of variants of this device flashing on other variants might brick the device.
- Backup:Backup all your data which includes apps,contacts,photos videos etc everything to computer or any cloud storage as Updating /flashing android marshmallow on moto g 2014 aka titan will erase all the data.
- Battery: Charge your moto g 2014 aka titan to at least 90% so that you wont encounter any battery related issues while flashing this.
- You need to have an unlocked bootloader to flash this rom.
- Backup Efs partitions: Backup all your efs partition of your Moto g second gen on current ROM.If you loose signal you can just restore it back.
- Lock Gps: Lock your gps position on your current rom.If you use this a lot then you have to lock it so that it could work even after flashing other roms. It's easy to lock gps .Turn on gps in settings and find your current location in google maps and now now have locked on to gps.
- Custom recovery: You need a custom recovery like twrp installed on your moto g titan .Without it you can not flash roms at all.
- Downloads: Cm13 for moto g titan and google apps. Transfer them to internal storage of your device.
Cyanogenmod 13 rom on Motorola Moto G 2014 aka titan:
 |
| Install Cyanogenmod 13 rom on Motorola Moto G 2014 aka titan |
Cm 13 is the latest version of cyanogenmod's major release which uses android marshmallow as a base with all the custom features of cyanognemod.Though some of the features are missing, ultimately they will make a way to cm 13 but it might take some time. All features of open source android are inherited in this rom and i have listed all the possible features of the same below which you can look into if you like.
Features of cyanogenmod 13:
- Theme engine: Theme engine is from the cyanogenmod custom rom which basically changes the look user interface from lock screen to ring tones all the way up to boot animations.The speciality of the theme engine is the ability to choose individual elements of every theme you have installed.So you like the ring tons and wallpapers of one theme and icons of other theme then you can have them at a time.Just open the theme chooser and you will understand how to do it.
- Software Updates: Cyanogenmod rom is usually available in three types one is nightlies which gets updated with new features every night and are quite stable for daily usage.second one is the snapchat which is monthly build version which will be stable version and other one is the release candidate.Some times nightlies are considered must stable than the snapshots.
- Status bar Tweaks:Status bar has lot of tweaks which include a brightness slider.Slide in status bar to adjust brightness of the screen.Double tap on status bar to sleep device and also network speed indicator for on going traffic info.
- If you root apps don't work then that is no response form super user it means it has been disabled and you can enable it in developer options easily.
- System ui tuner: This is new feature that let you tweak ui a bit but has been hidden just like developer option.If you want to add it to setting app,swipe down the notification panel and on top you will notice a gear icon.Press and hold it and you will notice that it starts spinning.Just leave it once you notice the vigorous spin and you will see a toast message "system ui tuner" added to settings.
- There are ton of brand new wallpapers.
- Google launcher now has vertical scrolling instead of horizontal.
- Multi window: Google finally introduced multi window concept in tablet version of os.You can run two apps in a single window.Activating multi window is also too easy.When you open recents you will notice there is another option beside the closing button on cards.Press on it and activate multi window.But this multi window is not configurable which means adjust width of apps that are running.
- Auto rotation on home screen is also added which you can find in launcher settings.
- Now on tap: If you use google now frequently this feature might help you a lot.Usually when you press and hold on home button it will take you to google now.If you enable this feature when you try to access google now on any app it load some related suggestions along with some google now card.
- Screen shot notification will also have delete button along with share option.
- Memory option: This is available in settings .It gives you memory usage on your device from last "3hrs or 6 hrs or 1 day".
- App permission manger is the major thing in android m.This lets you to block certain permission so that the app cannot access them.like if you don't want facebook to access your bluetooth you can now do it with out rooting your device.
- Phone short cut on lock screen is replaced with google now.
- Search bar in settings menu.
- New volume panel: You can now adjust volume of media, call and notification from single window .This feature is absent in previous versions of android though present in most of the oem provided firmwares.
These are the features of cyanogenmod 13 custom rom for moto g second gen aka titan and you explore the same by flashing this rom your device.
Install Cm 13 rom using twrp recovery:
- Download Cyaogennmod 13 custom rom for titan and Gapps transfer it to sdcard or internal storage of device.
- Power of the device completely and wait for few seconds to confirm that it is off completely.
- Press volume up,power button and Volume down simultaneously and once you see boot loader screen release buttons.
- Using volume down as a navigation button move to recovery and click on Volume up to confirm action.
- Moto g Titan boots into Twrp recovery.
- Once you are in twrp click on backup and select all the partitions which you want to backup. . It might take about 5 minutes for backup to complete. Don't interrupt backup process.
- Once backup of your existing rom is completed click on back button.Wipe data,cache and dalvik cache and wipe system partition too.
- Now select Install and navigate to location where you have placed your cm 13 Rom and gapps zip files.
- Flashing rom might take about 5 minutes or so.Once flashing is complete do a factory reset again.
- Now reboot to system.Wait at least 15 minutes for initial boot to complete and once done you can explore rom features.
Must read: Best custom roms for Moto G 2014 titan
Flash Cm 13 custom rom on moto g titan using cwm recovery:
- Download Cyaogennmod 13 custom rom for moto g titan and Gapps transfer it to sdcard or internal storage of device.
- Power of the device completely and wait for few seconds to confirm that it is off completely.
- Press volume up,power button simultaneously and once you see boot loader screen release buttons.
- Using volume down as a navigation button move to recovery and click on Volume up to confirm action.
- Moto g titan boots into cwm recovery.
- Once you are in CWM click on backup and select all the partitions which you want to backup. . It might take about 10 minutes for backup to complete. Don't interrupt backup process.
- Once backup of your existing rom is completed click on back button.Wipe data,cache and dalvik cache and wipe system partition too.
- Now select Install and navigate to location where you have placed your cm 13 Rom and gapps zip files.
- Flashing rom might take about 5 minutes or so.Once flashing is complete do a factory reset again.
If rom fails to boot or if it has entered bootloop then you have to boot into recovery to restore backup but to boot into recovery u have to power it off completely by removing batter.But moto g 2014 has a non-removable battery.At this point of time you have to force it to go off completely by holding power button for about 15 seconds and once the screen goes blank leave the power button else device restarts.
If you have any other queries about installing cyanogenmod 13 custom rom on Motorola mot g seconds gen aka titan do leave a comment below.
Install Android Lollipop based Carbon Rom on LG Optimus L90 D405 and D410/415
LG may not have any plans to update its budget device Optimus L90 to latest verison of Android but you can taste Android Lollipop on your L90 with the help of custom roms. Carbon rom has updated its base to Android Lollipop and good news is that it is available to Optimus L90 D405 too.
This rom is compiled by a xda senior member "GrinningFerret", a big thanks to him for making this rom available for optimus l90 D405.It is some what stable and you can use it as a daily driver.This rom is specific to above mentioned model only but it is also flashable on other models like D410 and D415 too.
Before getting started:
This rom is compiled by a xda senior member "GrinningFerret", a big thanks to him for making this rom available for optimus l90 D405.It is some what stable and you can use it as a daily driver.This rom is specific to above mentioned model only but it is also flashable on other models like D410 and D415 too.
Before getting started:
- Backup: Backup all your data which includes apps,contacts,photos videos etc everything to computer or any cloud storage as flashing carbon ROM on sLg optimus l90 will erase all your data.
- Battery: Charge your Optimus L90 to at least 90% so that you wont encounter any battery related issues while flashing this.
- Backup EFS partitions: Backup all your EFS partition of your LG optimus l90on current rom.If you loose signal you can just restore it back.
- Lock GPS: Lock your GPS position on your current rom. If you use this a lot then you have to lock it so that it could work even after flashing other roms. It's easy to lock GPS .Turn on GPS in settings and find your current location in google maps and now now have locked on to GPS.
- Custom recovery: You need a custom recovery like TWRP installed on your optimus l90. Without it you can not flash roms at all.
- Downloads: Carbon ROM (Androidfilehost Mirror) and Google apps (Minimal Edition). Transfer them to internal storage of your device.
Install Carbon rom on LG Optimus L90 D405 :

About Carbon rom for optimus l90:
Carbon rom is an after market firmware based on Cyanogenmod and Android Open Source Project. They aim at providing stable,fast and feature filled custom firmware to their users. Since this is based on Cyanogenmod all the features will be inherited in this rom along with some random cherry pics from other custom roms. All the features of carbon rom are grouped in one tab called carbon fibers.You can flash this on optimus l90 D410 and D415 model too but it observed that system ui crashed some times.If you are okay with that you can go ahead and install on them too.As this is cyanogenmod based all bugs of cm are inherited too.
Features:
- Theme Engine: Developed by Cyanogenmod is a wonderful engine to theme your Android OS from icons to boot animations.You can choose from a variety of themes and even apply individual elements of one theme over other themes too.This might remind you of MIUI theming engine.

- Animations: You can set different animations for app closing and openings.There are lot of scrolling animations too which put smile on your face while using them.These animation are cool but might hinder experience if you choose wrong one.

- Sounds: You can disable camera shutter and screen shot sounds.Increase volume in steps and volume down is lowered to a stable one when a headset is connected.
- Status bar: All the icons on status bar that is battery,signal and date are completely customizable. A Double on status bar will put the device to sleep.Brightness control can be enabled or disabled.
- App circle bar: If you enable this swiping from left or right will open a bar with apps in it.This makes it way to launch your favourite apps from anywhere but remember you will not get any Floating type apps that hover other apps.
- Network speed: On going network speed is displayed on status bar. Both upload and download speed are displayed and you can adjust time interval.
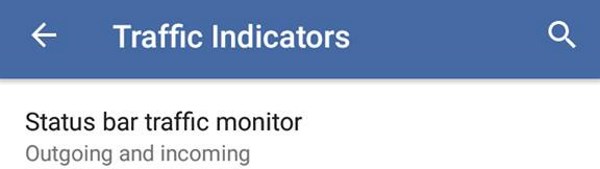
- Carrier label: Carrier label can be displayed on status bar which is displayed on to left of it and you set a custom carrier label too.
- Buttons: Enable or completely disable navigation bar to increase screen real estate.Navigation bar is completely configurable.You can set custom actions for each buttons too.Double tapping on navigation bar too will put the device to sleep.If you device have hardware keys then there is an option to enable or disable button backlight.You can end call by pressing power button and answer call by pressing home button. Volume buttons can be used to wake up the device instead of power button. Button layout too is customizable.
- Pie control: This makes navigation easy if you are habituated to it.If you disable on screen buttons then pie control can be used to navigate.Swiping from edges of screen will trigger pie and you will have all navigation required options in there.You can adjust size,color and trigger options of pie too.
- Power menu: Advance reboot option is available which includes reboot to recovery or bootloader at any time.
- Gesture any where: This lets you to launch apps or any custom actions with a gesture any moment.

- Super user: Super user in integrated into device settings so no need of any special root apps for permission management.


These are some of the features of carbon and you can explore rest of the features by flashing this rom on you lg optimus l90 D405.
Flash Carbon Rom using TWRP Recovery:
- Download Carbon ROM for L90 and Gapps transfer them to sd card or internal storage of device.
- Power of the device completely nad wait for few seconds to confirm that it is completely off.
- Using button combinations reboot into recovery or use quick boot app to enter recovery
- Once you are inTWRP recovery backup existing rom first. It might about 5 minutes for backup to complete and do not interrupt backup process.
- Click on back and choose advance wipe option.
- Select system,data,cache,dalvik cache and swipe to confirm wipe.
- Once you have wiped required partitions go back and click on install.
- Navigate to location where you have placed your Optimus L90 rom and select it.
- Swipe to confirm flash and wait for 5 minutes for process to complete.
- Again click on install and select gapps this time,swipe to confirm to flash.
- Once gapps are flashed reboot to system.Wait at least 15 minutes for initial boot to complete and once done you can explore its features.
- If your optimus l90 fails to boot Remove battery and put it back. Reboot it to recovery and this wipe system and flash the tom again.
Install Android lollipop on Htc desire S saga using cyanogenmod 12.1 custom rom
Update your Htc desire s saga to latest version of android lollipop by flashing cm 12.1 custom rom. Ics is the last major official update that it received and from then its only who showed their love on this device in form of custom roms.It received jelly bean and kitkat roms too which were stable enough enough to be used as a daily driver.
Now Desire s has also received android lollipop in form of cyanogenmod 12.1.This rom is some what stable and you try this for sure if you want to taste latest version of android lollipop.Saga is the device specific codename.
Before trying this rom let me tell you that installing roms is a highly risky process.If you have experience with flashing and stuff then only go for this.We are not responsible if you have bricked your device in this process.So be careful and flash at your own risk.
Prerequisites:
Cyanogenmod 12.1 Htc Desire s saga:
About cyanogenmod for htc desire s:
Cyanogenmod is one of the best custom roms available in android development ecosystem.They support lot of devices.This is based on android open source project with lot of added features.IT uses android 5.1.1 lollipop as base for now and will be updated to later versions of android when available.
 This rom is compiled by xda senior member "kylon", a big thanks to him for bringing this rom for our device.As this is not official rom you can expect some bug in it.Ui is somewhat laggy as it has only 768mb of ram.Despite of bugs you can try this rom on your desire s.
Now Desire s has also received android lollipop in form of cyanogenmod 12.1.This rom is some what stable and you try this for sure if you want to taste latest version of android lollipop.Saga is the device specific codename.
Before trying this rom let me tell you that installing roms is a highly risky process.If you have experience with flashing and stuff then only go for this.We are not responsible if you have bricked your device in this process.So be careful and flash at your own risk.
Prerequisites:
- Root:You must have root access on your Htc desire s saga.
- Battery: Charge your desire s to at least 90% so that you wont encounter any battery related problems while flashing this rom.
- Backup Efs partitions: Backup all your efs partition of your htc desire on current Rom or firmware.Just in case if you loose signal you can just restore it back.
- Backup:Backup all your data which includes contacts,apps,photos videos etc everything to computer or any cloud networks as flashing Cm 12.1 rom on Desire s saga will will wipe all your data.
- Custom recovery: You need a custom recovery installed on your desire s.Without it you can not flash roms at all.
- Check if you have s off or not.
- You must have a unlocked bootloader.
- Downloads: Cm 12.1 rom for Htc desire s saga and google apps and transfer them to internal storage.
Cyanogenmod 12.1 Htc Desire s saga: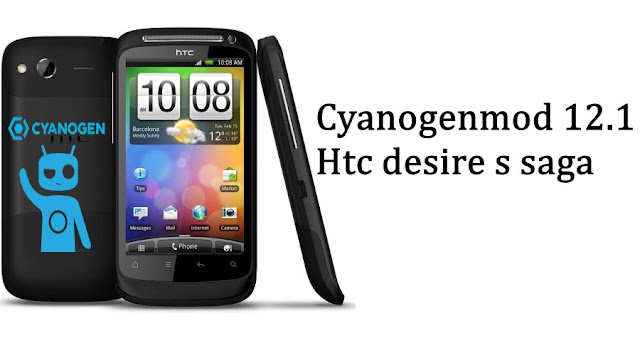

Cyanogenmod is one of the best custom roms available in android development ecosystem.They support lot of devices.This is based on android open source project with lot of added features.IT uses android 5.1.1 lollipop as base for now and will be updated to later versions of android when available.

General features of Cm 12.1:
- Trebuchet: This is the default launcher that ships with cyanogenmod. But if you flash gapps then you might loose this.It doesn't have too many features like nova or other launchers but its simple and fast.
- Status bar Tweaks:Status bar has lot of tweaks which include a brightness slider.Slide in status bar to adjust brightness of the screen.Double tap on status bar to sleep device and also network speed indicator for on going traffic info.
- Performance control:A default CPU manager app to control frequencies and governors . You can adjust cpu frequencies and also set them on boot too.
- Theme engine: Theme engine is from the cyanogenmod custom rom which basically changes the look user interface from lock screen to ring tones all the way up to boot animations.The speciality of the theme engine is the ability to choose individual elements of every theme you have installed.So you like the ring tons and wallpapers of one theme and icons of other theme then you can have them at a time.Just open the theme chooser and you will understand how to do it.
- If you are missing root functionality or all your root apps are not working properly then to developer settings and check if root permissions are set properly.
- Software Updates: Cyanogenmod is usually available in three types one s nightlies which gets updated with new features every night and are quite stable for daily usage.second one is the snapchat which is monthly build version which will be stable version and other one is the release candidate.Some times nightlies are considered must stable than the snapshots. As of now we have android lollipop 5.1.1 in form on CM 12.1.
These are key features of cyanogenmod and you can explore other features by flashing this rom on your Htc desire s saga.
Flash Cm 12.1 on desire s using Twrp recovery:
- Download Cm 12.1 rom for htc desire sand Gapps transfer it to sdcard or internal storage of your device.
- Power of device completely and wait for few seconds to confirm that it is off completely.
- Using button combinations reboot it to recovery.
- Once you are in twrp click on backup and select all partitions which you want to backup. It might take about 5 minutes for backup to complete. Don't interrupt backup process.
- Once backup of your existing rom is completed click on back button.Wipe data,cache and dalvik cache and wipe system partition too.
- Now select Install and navigate to location where you have placed your Rom and gapps zip files.
- Flashing this might take about 5 minutes or so.Once flashing is complete do a factory reset again.
- Now reboot to system.Wait at least 15 minutes for initial boot to complete and once done you can explore its features.
If you are experiencing any status 7 error then you have to update your recovery and try flashing again.After flashing rom if your desire s doesn't boot then follow the steps shown below.
- You need to have installed adb or fast boot on our laptop or computer.
- Learn some basics adb and fastboot commands first.Easy to try and use these commands.
- Extract the zip file which you have download on your computer using 7zip or winrar.
- You will find a boot image file.Copy that boot image and paste in fastboot folder which you will find in programming files in "c:\".
- Now put it in fastboot mode.
- Once you are in boot loader mode type the command "fastboot devices" to know if your device is detected.If your device is detected you will get a key before list of devices.If not reinstall fast boot drivers.
- Now Type the command " fastboot flash boot boot.img".Once you have flashed boot image then reboot it.
- This time it will boot for sure.
- If it still didn't boot than restore backup which you have made and leave a comment her.
If you have any other queries regarding "flashing cm 12.1 rom on your htc desire s saga" don't forget to leave a comment below.
Install Android 6.0 marshmallow on Sony xperia Z2 using Aosp custom rom
Its been a while since Sony has released a new android upgrade for Xperia z2 after the lollipop update.You might have receive some stability updates which of course might have improved device performance but surely wouldn't changed any user experience.Though you might have already installed custom roms on your xperia z2 for better user experience.
This snapdragon 801 processor handset is a beast when it comes to performance.But as you know without any upgrades to the software it you mayn't achieve what this device can do with that power. Even though Sony have plans to upgrade this device to android marshmallow,they didn't announce any specific release dates.
If you are obsessed with android updates and could hold any longer to taste android marshmallow on your xperia z2 then its time for you to try out the new aosp based custom rom.If you don't know to install this custom rom your smartphone then don't worry at all am here to help you out.But if its your first time to this kind of stuff then you let me introduce some precaution before going further.This is a risky process ,I and developer wont take any responsibility for any kind of damages that happen to your device if installation goes wrong and you have to proceed at your own risk.
Follow these steps before going further:
This snapdragon 801 processor handset is a beast when it comes to performance.But as you know without any upgrades to the software it you mayn't achieve what this device can do with that power. Even though Sony have plans to upgrade this device to android marshmallow,they didn't announce any specific release dates.
If you are obsessed with android updates and could hold any longer to taste android marshmallow on your xperia z2 then its time for you to try out the new aosp based custom rom.If you don't know to install this custom rom your smartphone then don't worry at all am here to help you out.But if its your first time to this kind of stuff then you let me introduce some precaution before going further.This is a risky process ,I and developer wont take any responsibility for any kind of damages that happen to your device if installation goes wrong and you have to proceed at your own risk.
Follow these steps before going further:
- Root:You must have root access on your Sony Xperia Z2 sirius.Though it is not required but to make efs backup which is important we need it.
- Battery: Charge your Xperia Z2 sirius to at least 90% so that you wont encounter any battery related problems while flashing this rom.
- Enable usb debugging on your xperia z2 by going into developer settings.
- Backup Efs partitions: Backup all your efs partition of your sony xperia Z2 sirius on current Rom or firmware.Just in case if you loose signal you can just restore it back.
- Backup:Backup all your data which includes contacts,apps,photos videos etc everything to computer or any cloud networks as flashing android marshmallow based Aosp rom on Sony Xperia Z2 sirius will wipe all your data.
- Lock Gps:Lock your gps position on your current rom.If you use this a lot then you have to lock it so that it could work even after flashing other roms.Its easy to lock gps .Turn on gps in settings and find your current location in google maps and now now have locked on to gps.
- You must have a unlocked bootloader.
- Downloads: Android marshmallow based aosp rom for xperia Z2 sirius(Mega link for system.img and for boot.img) on your computer and also you need to download fastboot driver on your computer without which you cant flash at all.
Android marshmallow based custom rom for Xperia z2 sirius:
This rom is completely based on pure aosp and we sincerely thank "rcstar6696" for bringing this to our device.Since this is in early stages of development there are some bugs like camera doesnot work properly and also video playback is not working.These bugs might get fixed in future updates and it might some time too as developer might be busy with his work life.
If you dont care about these bugs and want to taste android 6.0 marshmallow on your xperia z2 sirius before the final update from manufacture is out,you can go ahead and flash it without any hesitation.If you are un aware of major features of android 6.0 then have a look at some of them.
 |
| Android marshmallow based custom rom for Xperia z2 sirius |
Features of android marshmallow:
- System ui tuner: This is new feature that let you tweak ui a bit but has been hidden just like developer option.If you want to add it to setting app,swipe down the notification panel and on top you will notice a gear icon.Press and hold it and you will notice that it starts spinning.Just leave it once you notice the vigorous spin and you will see a toast message "system ui tuner" added to settings.
- There are ton of brand new wallpapers.
- Google launcher now has vertical scrolling instead of horizontal.
- Multi window: Google finally introduced multi window concept in tablet version of os.You can run two apps in a single window.Activating multi window is also too easy.When you open recents you will notice there is another option beside the closing button on cards.Press on it and activate multi window.But this multi window is not configurable which means adjust width of apps that are running.
- Phone short cut on lock screen is replaced with google now.
- Search bar in settings menu.
- New volume panel: You can now adjust volume of media, call and notification from single window .This feature is absent in previous versions of android though present in most of the oem provided firmwares.
- Auto rotation on home screen is also added which you can find in launcher settings.
- Now on tap: If you use google now frequently this feature might help you a lot.Usually when you press and hold on home button it will take you to google now.If you enable this feature when you try to access google now on any app it load some related suggestions along with some google now card.
- Screen shot notification will also have delete button along with share option.
- Memory option: This is available in settings .It gives you memory usage on your device from last "3hrs or 6 hrs or 1 day".
- App permission manger is the major thing in android m.This lets you to block certain permission so that the app cannot access them.like if you don't want facebook to access your bluetooth you can now do it with out rooting your device,
These are some of the newly added features in android m marshmallow and there are lot of changes beneath which could improve performance and also battery life but as you know this is an early build which might not run as you expect.
Flash android Marshmallow on Xperia z2:
- Download fastboot on our laptop or Pc and install it.You can install it any location but choose location as c: which is default location.
- open the fastboot folder which is located in "c:\programming files".Right click on empty space by holding shift and you see an option "open cmd here".
- If you don't find this option then press windows and R buttons at same time ,Run pops up and type cmd to open command prompt.
- Now go to fastboot folder and copy the location of it which you can see in address bar of folder.
- In command prompt type the command "Cd location of fastboot folder" and press enter.You will notice that fastboot appears in command line.To paste location right click on empty space in cmd and several pops up.Select paste.
- Once you press enter you will notice minimal adb and fastboot in command line instead of c or some thing.
- Once you are in fastboot window type "adb devices" and press enter.If your device is detected you will get a serial number in list of devices attached.If not uninstall drivers and install them again.
- Type the command "adb reboot bootloader" to boot into bootloader mode.If you see any pop up message on your xperia z2 about adb just accept it and mark it forever.
- Once the device is in fastboot mode,type the command fastboot devices to check if it is detected by Pc.
- Download System.img file from above link and copy the extracted img files to minimal adb and fastboot folder.
- Once you have done with copying system.img,boot.img and boot.img file(make sure that boot.img file is from second link not from first link or rename boot.img file to sirius.img from second link to avoid confusion).
- Type command "fastboot flash boot boot.img" and hit enter.
- Type the command "fastboot flash system system.img " and system img file will be flashed.It might take some time for flashing process.
- Once system.img is flashed type the command "fastboot flash boot sirius.img" (second link).
- Once flashing is done type the command fastboot reboot to boot xperia z2 normally.
Once the device reboots you can enjoy latest version of kitkat on your xperia z2 sirius.If you have anyother queries regarding this guide do leave a comment below.
Subscribe to:
Posts (Atom)