Showing posts with label HTC. Show all posts
Showing posts with label HTC. Show all posts
Saturday, December 19, 2015
hTC Desire 526G Plus Review
Review of hTC Desire 526G+ at a Glance
Desire 526G+ is one of best Entry level alluring phone from Taiwanese Handset Company HTC, The phone priced at 10400 ($170) launched in Indian Market. Display of device is 4.7 inches with dazzling visual experience. In 1.7 GHz Octa-Core Processor, you will get to experience advanced multitasking and it can run multiple applications at the same time without any hassles. The Body is made up of oval shaped Glossy plastic. We expected Gorilla glass protection for display but it’s not provided in phone. Phone is available in two colours black and white. Battery capacity is 2000 mAh not so impressive but can run for about 20 hours in moderate use.
Specification of hTC Desire 526G+
Operating SystemOS- Android
OS Version- v4.4.2 (KitKat)
Chipset
CPU - MediaTek
Clock Speed- 1.7 GHz
Core- Octa-core
GPU
Screen and Display
Type- Capacitive touchscreen
Size- 4.7 inches
Display Reinforced-
Display Density- 234 ppi
Camera
Rear- 8 MP
Front- 2 MP
Max. Video Resolution- 1080p
Max Video Frames- 30fps
Form and Dimension
Phone Dimension- 139.8 x 69.8 x 9.9 mm
Form- Bar
Weight- 154 g
Data Connection and Connectivity
4G- N/A
3G- Yes
Bluetooth- v4.0
WiFi- 802.11 b/g/n
Headphone Jack- 3.5 mm
Sensors
Proximity- Yes
Accelerometer- Yes
Light- Yes
Gyroscope
Memory and RAM
Internal (ROM)- 8/16 GB
External (SD)- 32 GB
RAM- 1 GB
SIM
SIM Type- Micro-SIM
SIM Support- Dual SIM
Battery
Capacity- 2000 mAh
Stand By- 622 h
Talktime- 15 h
Phone’s Available Colour- Black, White
Pros of hTC Desire 526G+
- Phone is slim and handy feels good in hands.
- 12 GB memory available for apps.
- Dual front Speakers
- 8 MP primary camera.
Cons of hTC Desire 526G+
- OTG Cable is not supported in the device.
- Zooming in is not upto satisfactory
- No LED indicator and no Gorilla Glass for Screen protection.
- Being a HTC phone it has no Beats Audio feature
- No video calling through network; only through skype or other video calling apps.
Solution of Problems in hTC Desire 526G+
- Hanging problem- Check the solution for hanging problem
Why to buy and Final words about hTC Desire 526G+
This phone is great deal if you are big HTC fan, phone has stunning look. Everything is fine according to configuration but the build quality of back cover is not so tightly gripped in its place in some of handsets.Price- 7880 INR
Check Minimum Price in Store
Not satisfied with features or price Check Best Smartphone for Your Budget

Friday, December 11, 2015
Install Twrp recovery on Htc One Max (gsm,sprint and verizon)
If you want to install custom roms on your htc one max then you need a recovery installed first.There are two major recoveries available for this device.One is Cwm and other is twrp.Both recoveries are the best that you can have on any android device.
Htc one max being a flagship is available in three different models.One is international or gsm model and other two are carrier one that is sprint and verizon.While flashing these you have to keep in mind that you are not suppose to choose the recovery which is not meant for your model.
Flashing custom recovery requires knowledge of some basic fastboot terms.If you are new to this we have a separate guide for you which Will help you to learn some of those commands which are used frequently.You don't need to be an expert in using these commands.They are easy to learn.
As flashing is risky process which we all know about that.So if any thing happens to your htc one max while flashing this we take no responsibility at all.So proceed at your own risk.
Before proceeding further you have to know device specific codes of each available model of current device.Gsm variant has codename as "t6ul",sprint one has "t6spr" as codename and finally verizon has "t6vzw".
About Twrp recovery:
Team win recovery project abbreviated as Twrp is one first recovery to offer a completely touch driven interface.The ui is completely xml based so you can customise the interface with different themes and also this is only recovery that supports themes.Unlike the clockworkmod recovery this recovery has the option to wipe all the data,cache,dalvik,system,internal with just only one swipe.Of course you have to choose what to be wiped on the device.
Features of Twrp:
If you have any other queries regarding twrp for htc one max (gsm,sprint and verizon) then leave a comment below.
Htc one max being a flagship is available in three different models.One is international or gsm model and other two are carrier one that is sprint and verizon.While flashing these you have to keep in mind that you are not suppose to choose the recovery which is not meant for your model.
Flashing custom recovery requires knowledge of some basic fastboot terms.If you are new to this we have a separate guide for you which Will help you to learn some of those commands which are used frequently.You don't need to be an expert in using these commands.They are easy to learn.
As flashing is risky process which we all know about that.So if any thing happens to your htc one max while flashing this we take no responsibility at all.So proceed at your own risk.
Before proceeding further you have to know device specific codes of each available model of current device.Gsm variant has codename as "t6ul",sprint one has "t6spr" as codename and finally verizon has "t6vzw".
Twrp recovery for Htc One Max (gsm,sprint,verizon):
 |
| Twrp recovery on Htc One Max (gsm,sprint and verizon) |
Team win recovery project abbreviated as Twrp is one first recovery to offer a completely touch driven interface.The ui is completely xml based so you can customise the interface with different themes and also this is only recovery that supports themes.Unlike the clockworkmod recovery this recovery has the option to wipe all the data,cache,dalvik,system,internal with just only one swipe.Of course you have to choose what to be wiped on the device.
 |
| twrp recovery |
Features of Twrp:
- Touch interface:It is the first recovery to offer a complete touch driven interface which makes navigation much easier and later cwm also had touch interface.
- Individual Backups: Creating a completely backup is a must for any flasher but this occupies a lot of portion of your internal or external storage.Twrp will let you to backup individual portions of rom, this saves lot of space on your android device.This feature comes handy when you are flashing kernels.You can backup boot img alone if you want and can restore it when flashing kernel fails.
- Advanced wipe:There are two options for wiping your device partitions one is wipe and other is advanced wipe.If you choose just wipe option it factory resets while advance wipe option will allow you to choose what to wipe and what not.
- Theme Engine: This is one of the best feature and is only available in Twrp only.Since ui of twrp is xml based you can customize its ui with already available themes or you can create your own theme if you can.
- Multi rom:As the name says you can boot more than two roms on your device and is exclusive to twrp only as of now.This feature may not be available from official twrp team and booting more than one rom requires a modified kernel by your rom developer.
Prerequisites:
- Check you model device variant first.This is essential as we don't have a universal one so that it can be flashed on all models without any issues.You have to download according to your variant.
- Make sure that Htc one max drivers that is sync is already installed on your computer.If you don't have a recovery installed as we are it to bridge connect between pc on device.
- You must have updated it to latest official software version that is available.
- Root:Do you have root access on your Htc one max if yes its fine.If not then also don't worry as we are going to start from scratch.
- Battery: Charge your one max to 100% so that you wont encounter any battery related problems while flashing this rom.
- Backup:Backup all your data which includes contacts,apps,photos videos etc everything to computer or any cloud networks as flashing twrp recovery requires bootloader unlock which wipes entire data on your device.
- You must have a unlocked bootloader.If not ,no worries.Follow our first step for this.
- .Downloads: Twrp recovery for gsm one max t6ul, Twrp recovery for sprint one max t6spr, Twrp recovery for verizon one max t6vzw .
#1: Unlock bootloader of htc one max
This is first step is to unlock bootloader which you have go through before installing any custom rom and is a simple process but it requires a computer with Internet connection.
- Download and install htc drivers on your computer if you don,t have.
- Now power off the device completely and wait for few seconds to confirm that it is completely off.
- Hold volume down and power button at same time for few seconds.When you see hboot release buttons.Using volume down for navigation select "fastboot" and click on power button to reboot into fastboot.
- Once you are in fastboot mode connect it to computer through usb cable and if you notice any driver installation process let it complete first.
- Download fastboot on our laptop or Pc and install it.You can install it any where but choose location as c: which is default location.
- open the fastboot folder which is located in "c:\programming files".Right click on empty space by holding shift and you see an option "open cmd here".
- If you don't find this option then press windows and R buttons at same time ,Run pops up and type cmd to open command prompt.
- Now go to fastboot folder and copy the location of it which you can see in address bar of folder.
- In command prompt type the command "Cd location of fastboot folder" and press enter.You will notice that fastboot appears in command line.To paste location right click on empty space in cmd and several pops up.Select paste.
- One you press enter you have to notics minimal adb and fastboot in command line instead of c or some thing.
- Once you are in fastboot window type "fastboot devices" and press enter.If your device is detected you will get a serial number in list of devices attached.If not uninstall drivers and install them again.
- Now type the command "fastboot oem get_identifier_token" and hit enter.You will get a serial key.Copy that key.
- Now open htcdev.com and register with a valid email id.
- One you sign up there.Log in to your account and you will find three options if you explore.
- Click on unlock bootloader option and select your other supported devices.
- Proceed all other steps as mentioned and you are are asked to submit Submit your key there.
- You will receive a mail from Htc which includes a unlock_code.bin file. Download it and move it to fastboot folder which is located in programming files.
- Now type the command "fastboot flash unlocktoken unlock_code.bin" and hit enter.Check your device ,you will notice a notification on one max to confirm unlocking bootloader. Click on yes.This will unlock bootloder and also erases all data of your Htc one max.
- You have a unlocked bootloader device which is ready to accept a recovery to be flashed.
#2: Install Twrp recovery on Htc one max
- Now download twrp recovery for htc one max for respective model from above link and paste it in fastboot folder.Rename img file which you have copied to fastboot folder as recovery so that it will be easy to type command.
- Put the device in fastboot mode again using button compinations.
- Type the command "fastboot flash recovery recovery.img".This will install latest twrp recovery on your htc one max .
One you have installed it just reboot it.Now that you have twrp recovery installed it time for you to try cyanogenmod 12.1 custom rom on your htc one max.
If you have any other queries regarding twrp for htc one max (gsm,sprint and verizon) then leave a comment below.
HTC Desire 816G Dual SIM Review: Pros and Cons
Review of HTC Desire 816G Dual SIM at a Glance-
13 MP Rear camera and 5.5 inch Screen the HTC comes up with attractive premium Design body having plastic across its all dimension but edges curve slightly to make it comfortable in hands, back of the device is glossy makes it susceptible to scratches. The Processor is Mediatek MT6582 with 1 GB RAM but in this price range they should provide 2GB RAM for better performance but even after handset doesn’t lag. The battery is 2600 mAh requires 1 time charging in whole day.

Specification of HTC Desire 816G-
Operating System
OS- Android
OS Version- v4.4.2 (KitKat)
Chipset
CPU- Mediatek MT6582
Clock Speed- 1.3 GHz Cortex-A7
Core- Quad-core
GPU- Mali-400MP2
Screen and Display
Type
Size- 5.5 inches 720 x 1280 pixels (267 ppi)
Display Reinforced
Camera
Rear- 13 MP
Front- 5 MP
Max. Video Resolution- 1080p
Max Video Frames- 1080 @30fps and 720p @60fps
Form and Dimension
Phone Dimension- 156.6 x 78.7 x 8 mm
Form- Bar
Weight- 158 g
Data Connection and Connectivity
4G-
3G- HSDPA 900 / 2100
Bluetooth- v4.0
WiFi- 802.11 b/g/n
Headphone Jack- 3.5mm
Sensors
Proximity- Yes
Accelerometer- Yes
Light- Yes
Gyroscope-
Compass- Yes
Memory and RAM
Internal (ROM)- 8 GB
External (SD)- 32 GB
RAM- 1 GB
SIM
SIM Type- Nano SIM
SIM Support- Dual SIM
Battery
Capacity- 2600 mAh
Stand By- 460 h (3G)
Talktime- 10 h (3G)
Phone’s Available Colour- Black, White
Pros of HTC Desire 816G-
- The BSI sensor allows you to take stunning shots even in dim-light.
- The handset is capable of recording videos in 60fps (in 720p)
- Dual SIM Smartphone features dual frontal stereo speakers.
- Its build is robust and gives you look of 30k, the build and design of this phone is awesome.
- Both Earphone and speakers deliver powerful sound with good clarity and bass.
- Supports OTG Cable.
Cons of HTC Desire 816G-
- This phone does not come with Gorilla glass.
- Video calling is not supported in phone by default; it requires 3rd party application such as Skype, Line etc.
- Only SIM 1 slot works as 3G
- The HTC Desire 816G comes with 8GB of internal storage of which about 4.33GB is available for use
- It doesn't have Extreme Power saving mode which is a key feature of HTC phones.
Solution of Problems in HTC Desire 816G (Fixed)-
- Only 8 MP Camera-
Go to Camera > Settings > Select centre option (Picture) > select Preview size (4:3)-->select Picture size(In this u will see 13 M pixels is enabled) so just enable Preview size (4:3).
- Only one speaker is working-
Go to setting>Audio profile> enable sound enhancer.
Your both speakers will work.
Why to buy and Final words about HTC Desire 816G-
The phone has nice finishing and great look suitable for the users want to own a stylish phone.
Not recommended for Game lovers because CPU is not suitable for heavy and high graphical games.
Front camera is great with BSI sensor, best for selfie lovers.
Price- 16300 INR
Check Minimum Price in Store
Check Minimum Price in Store
Not satisfied with features or price Check Best Smartphone for Your Budget
Install Android lollipop on Htc desire S saga using cyanogenmod 12.1 custom rom
Update your Htc desire s saga to latest version of android lollipop by flashing cm 12.1 custom rom. Ics is the last major official update that it received and from then its only who showed their love on this device in form of custom roms.It received jelly bean and kitkat roms too which were stable enough enough to be used as a daily driver.
Now Desire s has also received android lollipop in form of cyanogenmod 12.1.This rom is some what stable and you try this for sure if you want to taste latest version of android lollipop.Saga is the device specific codename.
Before trying this rom let me tell you that installing roms is a highly risky process.If you have experience with flashing and stuff then only go for this.We are not responsible if you have bricked your device in this process.So be careful and flash at your own risk.
Prerequisites:
Cyanogenmod 12.1 Htc Desire s saga:
About cyanogenmod for htc desire s:
Cyanogenmod is one of the best custom roms available in android development ecosystem.They support lot of devices.This is based on android open source project with lot of added features.IT uses android 5.1.1 lollipop as base for now and will be updated to later versions of android when available.
 This rom is compiled by xda senior member "kylon", a big thanks to him for bringing this rom for our device.As this is not official rom you can expect some bug in it.Ui is somewhat laggy as it has only 768mb of ram.Despite of bugs you can try this rom on your desire s.
Now Desire s has also received android lollipop in form of cyanogenmod 12.1.This rom is some what stable and you try this for sure if you want to taste latest version of android lollipop.Saga is the device specific codename.
Before trying this rom let me tell you that installing roms is a highly risky process.If you have experience with flashing and stuff then only go for this.We are not responsible if you have bricked your device in this process.So be careful and flash at your own risk.
Prerequisites:
- Root:You must have root access on your Htc desire s saga.
- Battery: Charge your desire s to at least 90% so that you wont encounter any battery related problems while flashing this rom.
- Backup Efs partitions: Backup all your efs partition of your htc desire on current Rom or firmware.Just in case if you loose signal you can just restore it back.
- Backup:Backup all your data which includes contacts,apps,photos videos etc everything to computer or any cloud networks as flashing Cm 12.1 rom on Desire s saga will will wipe all your data.
- Custom recovery: You need a custom recovery installed on your desire s.Without it you can not flash roms at all.
- Check if you have s off or not.
- You must have a unlocked bootloader.
- Downloads: Cm 12.1 rom for Htc desire s saga and google apps and transfer them to internal storage.
Cyanogenmod 12.1 Htc Desire s saga: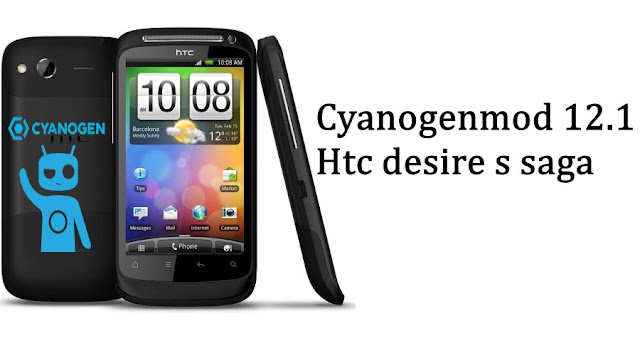

Cyanogenmod is one of the best custom roms available in android development ecosystem.They support lot of devices.This is based on android open source project with lot of added features.IT uses android 5.1.1 lollipop as base for now and will be updated to later versions of android when available.

General features of Cm 12.1:
- Trebuchet: This is the default launcher that ships with cyanogenmod. But if you flash gapps then you might loose this.It doesn't have too many features like nova or other launchers but its simple and fast.
- Status bar Tweaks:Status bar has lot of tweaks which include a brightness slider.Slide in status bar to adjust brightness of the screen.Double tap on status bar to sleep device and also network speed indicator for on going traffic info.
- Performance control:A default CPU manager app to control frequencies and governors . You can adjust cpu frequencies and also set them on boot too.
- Theme engine: Theme engine is from the cyanogenmod custom rom which basically changes the look user interface from lock screen to ring tones all the way up to boot animations.The speciality of the theme engine is the ability to choose individual elements of every theme you have installed.So you like the ring tons and wallpapers of one theme and icons of other theme then you can have them at a time.Just open the theme chooser and you will understand how to do it.
- If you are missing root functionality or all your root apps are not working properly then to developer settings and check if root permissions are set properly.
- Software Updates: Cyanogenmod is usually available in three types one s nightlies which gets updated with new features every night and are quite stable for daily usage.second one is the snapchat which is monthly build version which will be stable version and other one is the release candidate.Some times nightlies are considered must stable than the snapshots. As of now we have android lollipop 5.1.1 in form on CM 12.1.
These are key features of cyanogenmod and you can explore other features by flashing this rom on your Htc desire s saga.
Flash Cm 12.1 on desire s using Twrp recovery:
- Download Cm 12.1 rom for htc desire sand Gapps transfer it to sdcard or internal storage of your device.
- Power of device completely and wait for few seconds to confirm that it is off completely.
- Using button combinations reboot it to recovery.
- Once you are in twrp click on backup and select all partitions which you want to backup. It might take about 5 minutes for backup to complete. Don't interrupt backup process.
- Once backup of your existing rom is completed click on back button.Wipe data,cache and dalvik cache and wipe system partition too.
- Now select Install and navigate to location where you have placed your Rom and gapps zip files.
- Flashing this might take about 5 minutes or so.Once flashing is complete do a factory reset again.
- Now reboot to system.Wait at least 15 minutes for initial boot to complete and once done you can explore its features.
If you are experiencing any status 7 error then you have to update your recovery and try flashing again.After flashing rom if your desire s doesn't boot then follow the steps shown below.
- You need to have installed adb or fast boot on our laptop or computer.
- Learn some basics adb and fastboot commands first.Easy to try and use these commands.
- Extract the zip file which you have download on your computer using 7zip or winrar.
- You will find a boot image file.Copy that boot image and paste in fastboot folder which you will find in programming files in "c:\".
- Now put it in fastboot mode.
- Once you are in boot loader mode type the command "fastboot devices" to know if your device is detected.If your device is detected you will get a key before list of devices.If not reinstall fast boot drivers.
- Now Type the command " fastboot flash boot boot.img".Once you have flashed boot image then reboot it.
- This time it will boot for sure.
- If it still didn't boot than restore backup which you have made and leave a comment her.
If you have any other queries regarding "flashing cm 12.1 rom on your htc desire s saga" don't forget to leave a comment below.
Resurrection remix custom rom for Htc one x endeavoru
Update your htc one x endeavoru to latest version of android lollipop by flashing resurrection remix custom rom.Android 4.1.1 is the last update that htc one x received officially and from then custom roms took care of updates, thanks to the developers who compiled roms for this device.
Htc one x has got a lot of developer support.It was one of most sold htc devices and also had most advanced processor of that time.It had a quad core tegra cpu clocked at 1.5ghz which is supported by 1gb of ram.It comes with both 16 and 32 gb internal storage options.Endeavoru is device specific codename.
Flashing a custom rom is very risky process and we take no responsibility if your pet escaped from your house because you bricked your device by improper flashing.If you know how to flash roms then you can proceed straight away.
 About resurrection remix rom:
This Resurrection remix which your are about to install on htc one x is based on android 5.1.1 lollipop and which is in turn based on cyanogenmod,slim,omni and original remix roms.So you can all the best features of other roms are included in this too along with performance and a decent battery life.
 This is an unofficial remix firmware which means you will get less updates(mostly update when developer has free time to do).This is compiled by a xda senior member "tortellini",a big thanks to him for bringing this amazing rom to Htc one x endeavoru.
Features of this rom:
Must check: Xenonhd custom rom for htc one x endeavoru
Prerequisites:
Htc one x has got a lot of developer support.It was one of most sold htc devices and also had most advanced processor of that time.It had a quad core tegra cpu clocked at 1.5ghz which is supported by 1gb of ram.It comes with both 16 and 32 gb internal storage options.Endeavoru is device specific codename.
Flashing a custom rom is very risky process and we take no responsibility if your pet escaped from your house because you bricked your device by improper flashing.If you know how to flash roms then you can proceed straight away.
Resurrection remix custom rom for Htc one x endeavoru:
This Resurrection remix which your are about to install on htc one x is based on android 5.1.1 lollipop and which is in turn based on cyanogenmod,slim,omni and original remix roms.So you can all the best features of other roms are included in this too along with performance and a decent battery life.
Features of this rom:
- Theme enigne: Theme engine is from the cyanogenmod custom rom which basically changes the look user interface from lock screen to ring tones all the way up to boot animations.The speciality of the theme engine is the ability to choose individual elements of every theme you have installed.So you like the ring tones and wallpapers of one theme and icons of other theme then you can have them at a time.Just open the theme chooser and you will understand how to do it.

- Navigation bar tweaks: You can enable disable or navigation bar and also you can adjust the size of navigation bar.Navigation ring included toggles to in case of quick access just swipe from bottom of screen and you can access apps which you have set.
- App circle Bar:Swiping from the left or right edges of the screen an app bar pops up and you can choose what app you want to launch.This is great way of multitasking.
- Gesture anywhere: This basically lets to open any app at any time(while using other apps) with just a gesture.You have to set the gestures and use them.Though you get any floating type apps so that they can be used over other apps as multitasking its still a nice feature to have.

- Status bar tweaks: Status bar has lot of tweaks which include a brightness slider.Slide in status bar to adjust brightness of the screen.Various tweaks are available to carrier label too like color and switch.Quick and smart pull down are also present.Battery icon too has tweaks.
- Network speed: On going network speed is displayed on status bar.Both upload and download speed are displayed and you can adjust time interval.
- Lock screen mods: This includes placing of 5 shortcuts on lock screen and also set targets for the slider.
- Recent panel mods: Stock recent panel do not have an option to clear all the apps at once.In this rom you a button to clear apps and can even set the position of the button.
Must check: Xenonhd custom rom for htc one x endeavoru
Prerequisites:
- Install all Htc one x drivers on your computer if you don't have any recovery installed.
- You must have updated it to latest official software version that is android jellybean.
- Root:You must have root access on your Htc one x.
- Battery: Charge your One x to at least 70% so that you wont encounter any battery related problems while flashing this rom.
- Backup Efs partitions: Backup all your efs partition of your htc one x on current Rom or firmware.Just in case if you loose signal you can just restore it back.
- Backup:Backup all your data which includes contacts,apps,photos videos etc everything to computer or any cloud networks as flashing resurrection remix rom on htc one x wipes all your data.
- Custom recovery: You need a custom recovery installed on your device.Without it you can not flash roms at all.
- You must have a unlocked bootloader.
- Downloads: resurrection remix rom for htc one x endeavoru (androidfilehost)and google apps and transfer them to internal storage.
Flash Resurrection remix rom using twrp recovery:
- Download resurrection remix for htc one x (Resurrection-Remix-LP-v5.5.1-20150717-endeavoru.zip) and Gapps transfer it to sdcard or internal storage of your device.
- Power of device completely and wait for few seconds to confirm that it is off completely.
- Hold volume down and power button at same time for few seconds.
- When you see hboot (boot loader) release buttons.Using volume keys for navigation select recovery and click on power button to reboot into recover.
- Once you are in twrp click on backup and select all partitions which you want to backup. It might take about 5 minutes for backup to complete. Don't interrupt backup process.
- Once backup of your existing rom is completed click on back button.Wipe data,cache and dalvik cache and wipe system partition too.
- Now select Install and navigate to location where you have placed your cm 12.1 Rom and gapps zip files.
- Flashing this might take about 5 minutes or even less.Once flashing is complete do a factory reset again.
- Now reboot to system.Wait at least 15 minutes for initial boot to complete and once done you can explore its features.
Flash Resurrection remix rom using CWM recovery:
- Download resurrection remix for htc one x and transfer it to internal storage.
- Press and hold power button and when you get boot options click on boot into recovery if you have it or just click on power off.
- Using button combinations put in hboot mode and then select recovery option.
- Now reboot it to recovery and make a backup first if you don't have it.
- Once done click on wipe data and do a factory reset.
- Now click on install and select the one x rom zip file which you have downloaded and flash it.
- Once flashing is done just reboot it.If you don't have cwm on one x hen flash it with twrp recovery.
Once it boots into recovery do a factory reset again and then reboot to system.If it fails to boot this time then just restore backup which you have made.
If you have any other queries about flashing this resurrection remix custom rom on your htc one x endeavoru don't forget to leave a comment below.
hTC Desire 820S Review: Pros and Cons
Review of hTC Desire 820S Dual SIM at a Glance:-
hTC Has launched Desire 820S Predecessor of hTC Desire 820, This smartphone loaded with majestic features such as 13 MP rear & 8 MP front camera, MediaTek octa-core 64-bit processor, 5.5 inches display, 16 GB ROM & 2 GB RAM, Dual- SIM support and 2600 mAh battery.
The glossy plastic doesn’t feels so classy but the finishing of handset with blue and white colour combination makes it beautiful. The company retained its design and most of the features same as Desire 820 except MediaTek MT6752 64-bit octa-core in 820S and Qualcomm's 64-bit octa-core Snapdragon 615 SoC in 820. 32 GB expendable memory in 820S & 128 GB Expendable memory in Desire 820.

In the brain it has MediaTek MT6752 which is 64-bit true octa- core processor, can’t say that it is giving best user interface, actually along with 1.7 GHz clock speed & 2 GB RAM its smooth enough for processing most of the tasks.
The 13 MP camera with BSI sensor is not that great but it's better than many other 13 MP phones, It has good colour reproduction with satisfactory viewing angles. Low light photographs are not that good but in sufficient light it gives decent photographs. Selfie camera is also only good in sufficient lightening otherwise photos seems grainy.
The battery is of 26000 mAh capacity and can only last for 18-24 hours but we thought its acceptable for 5.5 inches phablet.
Specification of hTC Desire 820S Dual Sim
Operating System
OS- Android
OS Version- v4.4.4 (KitKat)
Chipset
CPU- Mediatek MT6752
Clock Speed- 1.7 GHz Cortex-A53
Core- Octa-core
GPU- Mali-T760MP2
Screen and Display
Type- Capacitive touchscreen
Size- 5.5 inches
Display Resolution- 720 x 1280 pixels
Display Reinforced
Display Density- 267 ppi
Camera
Rear- 13 MP
Front- 8 MP
Max. Video Resolution- 1080p
Max Video Frames- 30fps
Form and Dimension
Phone Dimension- 157.7 x 78.7 x 7.7 mm
Form- Bar
Weight- 155 grams
Data Connection and Connectivity
4G- LTE band 1(2100), 3(1800), 7(2600), 8(900), 38(2600), 39(1900), 40(2300), 41(2500)
3G- HSDPA 850 / 900 / 1900 / 2100
Bluetooth- v4.0
WiFi- 802.11 b/g/n
Headphone Jack- 3.5 mm
Sensors
Proximity- Yes
Accelerometer- Yes
Light- Yes
Gyroscope
Memory and RAM
Internal (ROM)- 16 GB
External (SD)- 32 GB
RAM- 2 GB
SIM
SIM Type- Nano-SIM
SIM Support- Dual SIM
Battery
Capacity- 2600 mAh
Stand By- 560 hours (3G)
Talktime- 12 hour 10 minutes (3G)
Phone’s Available Colour- Marble White, Milkyway Gray, Monarch Orange and Santorini White, Tuxedo Gray
Pros of hTC Desire 820S Dual SIM
- Dual frontal stereo speakers.
- Large 5.5 inches screen.
- Dual SIM support.
- Good 720p display & viewing angles and overall display is good.
- Look is premium feels Good in Hands.
Cons of hTC Desire 820S Dual Sim
- Sometime Phone gets overheated.
- OTG cable is not supported.
- Photographs taken from the camera especially in low light are not good.
Solution of Problems in hTC Desire 820S Dual Sim
How to improve Camera quality of hTC Desire-
Set antiflicker settings to 60 Hz permanently it captures good photos in daylight.
For lowlight Use d HDR options to get sharp photos.
How to enable 13 MP rear and 8 MP front camera-
Go to camera settings > preview setting
Set (4:3) and then you can select 13 MP and 8 MP camera.
Why to buy and Final words about hTC Desire 820S Dual SIM
This handset is overall nice with good performance but it may disappoint you; if you want an amazing camera in your Smartphone, after all this handset belongs to hTC desire family so it gives you uniqueness in crowd.
Price- 19900 INR
Install android lollipop based cyanogenmod custom rom on Htc One Mini M4
Install android lollipop based custom rom on htc one mini m4 using cyanogenmod custom rom.Htc one mini M4 is a miniature version of htc one m7.It is powered by a dual core snapdragon 400 chipset clocked at 1.7ghz with 1gb of ram and 16gb internal storage.It was launched with android jellybean on board and later updated to kitkat and is yet to receive lollipop update.Device code name is "M4".
If you want to taste the latest version of lollipop then then only way is to flash a custom rom on htc one mini.In this post we will guide you to install android lollipop based cyangenmod cm 12.1 rom on htc one mini m4.
Flashing a firmware is very risky process and we take no responsibility for all the emotions that evoke in your heart if your device fails to boot.You have to decide if to follow this guide or not.
This is an unofficial rom with the features what original cm 12.1 has to offer and is quite stable for daily usage too.This is compiled by xda senior member "AndroGeek974" for one mini m4,a big thanks to him.
Features:
If you want to taste the latest version of lollipop then then only way is to flash a custom rom on htc one mini.In this post we will guide you to install android lollipop based cyangenmod cm 12.1 rom on htc one mini m4.
Flashing a firmware is very risky process and we take no responsibility for all the emotions that evoke in your heart if your device fails to boot.You have to decide if to follow this guide or not.
Why to flash a custom on htc one mini m4?
- Less bloatware: Usually Carrier variants comes with lot of bloatware and unwanted stuff.This might hinder performance a bit which might result in hick ups.Custom roms will have less bloatware or no bloatware at all as a result of which you will notice its performance is much better than on stock rom.
- Better performance: Though performance can be increased by controlling cpu and Gpu with root apps you might not achieve what you want.There is better scope for performance on custom roms as developers implements different mods to make it perfect.
- Battery life: Since It comes with a smaller non removable 1800 mah battery it you get very less Battery life ans is always opposite to performance.Greater the performance least the battery life you get.In order to get a balance one between them you have to go for custom roms.
- Better customisation: Most of the apps with root access will work better on custom roms than on stock roms.For instance take xposed installer.It offers lot of modules for customisation but will work perfectly on custom roms than on stock one.
prerequisites:
- Backup:Backup all your data which includes apps,contacts,photos videos etc everything to computer or any cloud storage as flashing this cyanogenmod cm 12.1 on htc one mini m4 will erase data.
- Battery: Charge your one mini to at least 90% so that you wont encounter any battery related issues while flashing this.
- Backup Efs partitions: Backup all your efs partition of your one mini on current rom.If you loose signal you can just restore it back.
- Lock Gps:Lock your gps position on your current rom.If you use this a lot then you have to lock it so that it could work even after flashing other roms.Its easy to lock gps .Turn on gps in settings and find your current location in google maps and now now have locked on to gps.
- Custom recovery: You need a custom recovery like twrp or cwm installed on your htc one mini m4.Without it you cannot flash them at all.
- Downloads: Download cyanogenmod cm 12.1 and google apps if needed.Transfer them to internal storage.
- If you are starting from scratch then you have to follow all these 4 steps carefully.So that you dont encounter any problems while flashing.
Install cyanogenmod rom on htc one mini m4:
 |
| cyanogenmod custom rom on Htc One Mini M4 |
Cyanogenmod rom :
Cyanogenmod is one of the best custom roms available in android development ecosystem.They support lot of devices.This ROM is based on android open source project with lot of added features.As htc one mini M4 is officially supported by cyanogenmod you will get latest updates much quicker than any other custom roms. |
| cyanogenmod htc one mini m4 custom roms |
This is an unofficial rom with the features what original cm 12.1 has to offer and is quite stable for daily usage too.This is compiled by xda senior member "AndroGeek974" for one mini m4,a big thanks to him.
Features:
- Theme engine: Theme engine is from the cyanogenmod custom ROM which basically changes the look user interface from lock screen to ring tones all the way up to boot animations.The speciality of the theme engine is the ability to choose individual elements of every theme you have installed.So you like the ring tons and wallpapers of one theme and icons of other theme then you can have them at a time.Just open the theme chooser and you will understand how to do it.

- Performance control:A default cpu manager app to control frequencies and governors.You can adjust cpu frequencies and also set them on boot too.
- Trebuchet: This is the default launcher that ships with cyanogenmod rom.But if you flash gapps then you might loose this.It doesn't have too many features like nova or other launchers but its simple and fast.
- Software Updates: This one is usually available in three types one is nightlies which gets updated with new features every night and are quite stable for daily usage.second one is the snapchat which is monthly build version which will be stable version and other one is the release candidate.Some times nightlies are considered must stable than the snapshots.
- Status bar Tweaks:Status bar has lot of tweaks which include a brightness slider.Slide in status bar to adjust brightness of the screen.Double tap on status bar to sleep device and also network speed indicator for on going traffic info.
These are some of the features of cyanogenmod 12.1 custom rom for htc one Mini m4 and you can explore rest of the features by flashing this rom on your device.
If you have locked bootloder or you are on completely stock with out root and dont even have a recovery then we are going to explain you all the steps that are needed to flashing cm 12.1 on your htc one mini m4.
#1: Unlock bootloader of htc one Mini m4
This is first phase which you have go through before installing any custom rom and is a simple process but it requires a computer with internet connection.
- Install Htc sync on your laptop or pc.
- Now power off the device completely and wait for few seconds to confirm that it is completely off.
- Hold volume down and power button at same time for few seconds.When you see hboot release buttons.Using volume keys for navigation select "fastboot" and click on power button to reboot into fastboot.
- Once you are in fastboot mode connect it to computer using usb cable and if you notice any driver installation process let it complete first.
- Download fastboot on our laptop or Pc and install it.You can install it any where but choose location as c: that is default location.
- open the fastboot folder which you can find it in "c:\programming files".Right click on empty space by holding shift and you see an option "open cmd here".
- If you don't find this option then press windows and R buttons at same time and type cmd to open command prompt.
- Now go to fastboot folder and copy the location of it.
- In command prompt type the command "Cd location of fastboot folder" and press enter.You will notice that fastboot appears in command line.
- Once you are in fastboot window type "fastboot devices" and press enter.If your device is detected you will get a serial number in list of devices attached.If not uninstall drivers and install them again.
- Now type the command "fastboot oem get_identifier_token" and hit enter.You will get a serial key.Copy that key.
- Now open htcdev.com and register with your email id.
- One you sign up there.Log in to your account and you will find several options if you explore.
- Click on unlock bootloader option and select your other supported devices.
- Proceed all other steps as mentioned and you are are asked to submit Submit your key there.
- You will receive a mail from Htc which includes a unlock_code.bin file. Download it and move it to fastboot folder which is located in programming files.
- Now type the command "fastboot flash unlockcode unlock_code.bin" and hit enter.Check your device ,you will notice a notification on One mini m4 to confirm unlocking bootloader. Click on yes.This will unlock bootloder and also erases all data of your Htc one mini m4.
- You have a unlocked bootloader device which is ready to accept a recovery to be installed.
#2: Install Twrp recovery on Htc one mini m4
- Now download twrp recovery for one mini m4 from above link and paste it in fastboot folder.Rename img file which you have copied to fastboot folder as recovery so that it will be easy to type command.
- Put the device in fastboot mode again.
- Type the command "fastboot flash recovery recovery.img".This will install latest twrp recovery on your htc one mini m4.
- Once you have installed recovery reboot it and copy cyanogenmod 12.1 which you have downloaded on your computer to one mini m4 internal storage and head over to next step.
#3: Flash Cyanogenmod 1.2. rom using Twrp
- Download Cm 12.1 for htc one mini m4 (androidfilehost mirror) and Gapps transfer it to sdcard or internal storage of your device.
- Power of device completely and wait for few seconds to confirm that it is off completely.
- Hold volume down and power button at same time for few seconds.
- When you see hboot release buttons.Using volume keys for navigation select recovery and click on power button to reboot into twrp recovery.
- Once you are in twrp click on backup and select all partitions which you want to backup. It might take about 5 minutes for backup to complete. Don't interrupt backup process.
- Once backup of your existing rom is completed click on back button.Wipe data,cache and dalvik cache and wipe system partition too.
- Now select Install and navigate to location where you have placed your cyanogenmod Rom and gapps zip files.
- Flashing this might take about 5 minutes or even less.Once flashing is complete do a factory reset again.
- Now reboot to system.
#4:Flash boot img through fastboot
If you reboot your htc one mini m4 primou after flashing cm 12.1 rom zip file it either stuck at boot logo or doesn't boot at all,that is shows blank screen after rebooting.In this case you have to follow this step.If it boots up without any problem
- Extract cm 12.1 zip file which you have downloaded on your Pc.
- You will find a boot.img file copy this file to fastboot folder of step 1.
- Now power off htc one mini m4.If it stuck on boot logo or bootloop then press and hold power button for about 15 seconds.It will be forced to shut down.
- Now put it in fastboot mode again.Hold volume down and power button at same time for few seconds.When you see hboot (boot loader) release buttons.Using volume keys for navigation select "fastboot" and click on power button to reboot into fastboot.
- Now connect it to computer.
- Open fastboot again.If you don't know how to do it follow step 1.
- Type the command "fastboot flash boot boot.img" and it will be flashed in seconds.
- once done type the command fasboot reboot-system or simple disconnect it from computer and reboot it.This time it boots for sure.
Install android lollipop based Cyanogenmod custom rom on Htc desire 816 a5
Htc desire 816 is one of first device to have a snapdragon 400 processor.It is initially launched with android kitkat and is yet to receive lollipop update.Its a beautiful device from htc with 5.5 inch screen with 720p hd display.Even though lollipop is not yet out completely you can still install it on this device with the help of cyanogenmod custom rom.
Device specific code name for htc desire 816 is "a5" and you should not get confuse between model number and device code.Also this device comes in dual sims too and they have device code names as "a5dwg" and "a5dug".This rom is specific to single variant only but you can still flash this on dual sim variant of desire 816 but you will face some problems for sure.
If you have this device and don't know how to update it to latest version of android then this guide is for you.We will help you to you to unlock your bootloader, install a custom recovery and finally install cyanogenmod in three steps.You have to follow these steps carefully so that you don't encounter any problems.
Flashing a custom on your android smartphone is very risky process.If you have bricked it then there is not chance of it getting it back to normal working state.Though the chances are very low to brick it we still hold no responsibility for any sought of damage caused.
About cyanogenmod custom rom:
Before flashing this you read some information about this cm 12.0 rom for desire 816,so that you can have an idea of this one offers to you.Cyanogenmod is one of the best custom roms available in android development ecosystem.They support lot of devices.This is based on android open source project with lot of added features.IT uses android 5.1.1 lollipop as base for now and will be updated to later versions of android when available.
Though desire 816 is officially supported by cyanogenmod we still don't have cm 12.1 and you have to wait for some more time.Till then you have to completely rely on cm 12.0 only.
Features of Cm 12.0:
This is first step is to unlock bootloader which you have go through before installing any custom rom on htc desire 816 and is a simple process but it requires a computer with Internet connection.
Must read: Basic adb and fastboot commands
Device specific code name for htc desire 816 is "a5" and you should not get confuse between model number and device code.Also this device comes in dual sims too and they have device code names as "a5dwg" and "a5dug".This rom is specific to single variant only but you can still flash this on dual sim variant of desire 816 but you will face some problems for sure.
If you have this device and don't know how to update it to latest version of android then this guide is for you.We will help you to you to unlock your bootloader, install a custom recovery and finally install cyanogenmod in three steps.You have to follow these steps carefully so that you don't encounter any problems.
Flashing a custom on your android smartphone is very risky process.If you have bricked it then there is not chance of it getting it back to normal working state.Though the chances are very low to brick it we still hold no responsibility for any sought of damage caused.
Cyanogenmod custom rom for htc desire 816 a5:
 |
| Install Cyanogenmod custom on Htc desire 816 a5 |
Before flashing this you read some information about this cm 12.0 rom for desire 816,so that you can have an idea of this one offers to you.Cyanogenmod is one of the best custom roms available in android development ecosystem.They support lot of devices.This is based on android open source project with lot of added features.IT uses android 5.1.1 lollipop as base for now and will be updated to later versions of android when available.
 |
| cyanogenmod custom rom |
Features of Cm 12.0:
- Trebuchet: This is the default launcher that comes with cyanogenmod. But if you flash full gapps then you might loose this as a default launcher.It doesn't have too many features like nova or other launchers but its simple, fast and does the job want it meant for.
- Theme engine: Theme engine is from the cyanogenmod custom rom which basically changes the look user interface from lock screen to ring tones all the way up to boot animations.The speciality of the theme engine is the ability to choose individual elements of every theme you have installed.So you like the ring tons and wallpapers of one theme and icons of other theme then you can have them at a time.Just open the theme chooser and you will understand how to do it.

- Status bar Tweaks:Status bar has lot of tweaks which include a brightness slider.Slide in status bar to adjust brightness of the screen.Double tap on status bar to sleep device to sleep but you dont have knock on feature.
- Performance control:A default CPU manager app to control frequencies and governors . You can adjust cpu frequencies and also set them on boot too.
- Software Updates: Cyanogenmod is usually available in three types one is nightlies which gets updated with new features every night and are quite stable for daily usage.second one is the snapchat which is monthly build version which will be stable version and other one is the release candidate.Some times nightlies are considered must stable than the snapshots. As of now we have android lollipop in form on CM 12.0.
- Network speed: You can get insight of your network speed n status bar.This is much helpful feature when compared to other features if you browse heavily.

- If you are missing root functionality or all your root apps are not working properly then to developer settings and check if root permissions are set properly.
These are key features of official cyanogenmod 12.0 custom rom and you can explore rest of the features by flashing rom this on your htc desire 816 a5.
Prerequisites:
Prerequisites:
- Check you model device variant first.This is essential as flashing rom on other variants might cause issues
- Make sure that Htc Desire 816 drivers, that is sync is already installed on your computer.If you don't have a recovery installed then you have to install them bridge connection between pc and desire 816.
- You must have updated it to latest official software version that is available.
- Root:Do you have root access on your Htc desire 816? if yes its fine.If not then also don't worry as we are going to start from scratch.
- Backup:Backup all your data which includes contacts,apps,photos videos etc everything to computer or any cloud networks as flashing cyanogenmod 12.0 rom on htc desire 816 ,wipes all your internal storage data.
- Battery: Charge your desire 816 to 80% so that you wont encounter any battery related problems while flashing this rom.
- Backup Efs partitions: This is for those who already have twrp recovery installed.Backup all your efs partition of your htc desire 816 on current Rom or firmware.Just in case if you loose signal you can just restore it back.
- Custom recovery: You need a custom twrp recovery installed on your desire 816.Without it you can not flash roms at all.Or else you have to download twrp recovery for htc desire 816.
- You must have a unlocked bootloader.If not ,no worries.
- Downloads: cyanogenmod 12.0 for htc desire 816 a5 and google apps and transfer them to internal storage.
If you have a custom recovery installed proceed to step 3 directly.If not follow from step one.
#1: Unlock bootloader of htc Desire 816
Must read: Basic adb and fastboot commands
- Download and install htc drivers on your computer if you don't have.
- Now power off the device completely and wait for few seconds to confirm that it is completely off.
- Hold volume down and power button at same time for few seconds.When you see hboot release buttons.Using volume down for navigation select "fastboot" and click on power button to put desire 816 into fastboot.
- Once you are in fastboot mode connect it to computer through usb cable and if you notice any driver installation process let it complete first.
- Download fastboot on our laptop or Pc and install it.You can install it any location but choose location as c: which is default location.
- open the fastboot folder which is located in "c:\programming files".Right click on empty space by holding shift and you see an option "open cmd here".
- If you don't find this option then press windows and R buttons at same time ,Run pops up and type cmd to open command prompt.
- Now go to fastboot folder and copy the location of it which you can see in address bar of folder.
- In command prompt type the command "Cd location of fastboot folder" and press enter.You will notice that fastboot appears in command line.To paste location right click on empty space in cmd and several pops up.Select paste.
- One you press enter you have to notics minimal adb and fastboot in command line instead of c or some thing.
- Once you are in fastboot window type "fastboot devices" and press enter.If your device is detected you will get a serial number in list of devices attached.If not uninstall drivers and install them again.
- Now type the command "fastboot oem get_identifier_token" and hit enter.You will get a serial key.Copy that key to notepad or ms-word.
- Now open htcdev.com and register with a valid email id.
- One you sign up there.Log in to your account and you will find developer centre in top most part.
- Click on it and you will have three more options to choose from.select unlock bootloader.

Unlock bootloader of htc desire 816 a5 - Proceed all other steps as mentioned and you are are asked to submit Submit your key there.
- You will receive a mail from Htc which includes a unlock_code.bin file. Download it and move it to fastboot folder which is located in programming files.
- Now type the command "fastboot flash unlocktoken unlock_code.bin" and hit enter.Check your device ,you will notice a notification on desire 816 to confirm unlocking bootloader. Click on yes.This will unlock bootloder and also erases all data of your Htc desire 816.
- You have a unlocked bootloader device which is ready to accept a recovery to be flashed.
#2: Install Twrp recovery on Htc desire 816
- Now download twrp recovery for htc desire 816 above link and paste it in fastboot folder.Don't forget to rename it to recovery or to twrp so that you can type it easily in command.
- Put the device in fastboot mode again using button combinations.See it in step 1 if you don't know.
- Type the command "fastboot flash recovery recovery.img".This will install latest twrp recovery on your htc desire 816 .
- Once you have installed recovery reboot it and copy cyanogenmod 12.0 which you have downloaded on your computer to desire 816 internal storage and head over to next step.
#3: Flash Cyanogenmod 12.0 rom using Twrp
- Download Cm 12.0 for htc desire 816 for your model only and Gapps transfer it to sdcard or internal storage of your device.
- Power of device completely and wait for few seconds to confirm that it is off completely.
- Hold volume down and power button at same time for few seconds.
- When you see hboot release buttons.Using volume keys for navigation select recovery and click on power button to reboot into twrp recovery.
- Once you are in twrp click on backup and select all partitions which you want to backup. It might take about 5 minutes for backup to complete. Don't interrupt backup process.This step is essential if flashing is your first time.
- Once backup of your existing rom is completed click on back button.Wipe data,cache and dalvik cache and wipe system partition too.
- Now select Install and navigate to location where you have placed your cm 12.0 rom and gapps zip files.
- Flashing this might take about 5 minutes or even less.Once flashing is complete do a factory reset again.
- Now reboot to system.
Wait for at least 30 minutes for initial boot to complete and once done you explore its features.One thing you have to keep in mind that you have to make nandroid backup for sure.Just in case if it enters bootloop you can restore it back.
If you experience any bootloops then press and hold power button for about 15 seconds and you will notice that it goes off completely and now use button combination to boot into hboot and from there enter recovery again.Once you are in recovery just restore backup.
If you have any other questions regarding installing cyanogenmod 12.0 custom rom on your htc desire 816 a5 don't forget to leave a comment below.
Install Twrp recovery and root Htc one E8
One E8 is new samrphone from Htc which has similar specs to that of one M8 but has a poly carbonate shell instaed of unibody alluminium design.If you are an android enthusiast then after buying this E8 you might play with some time and then search for custom roms.But before playing with custom roms you have too root One E8 and you need a twrp recovery to flash roms. Though this device is new to android development community there isnt ay custom roms yet but we already have twrp recovery available.
If you dont know how to install ywrp recovery on your htc one E8 then dont worry we are here to help you.We will guide you to install twrp recovery on as well as root one e8 so that you can take advantage of root apps till custom roms arrives for this device.Device specific codename for Htc one e8 is simply e8.
Install Twrp and root Htc one E8:
 About Twrp recovery:
Twrp stands for team win recovery project.It is one first recovery to offer a completely touch driven interface.The ui is completely xml based so you can customise the interface with different themes and also this is only recovery that supports themes.Unlike the clockworkmod recovery this recovery has the option to wipe all the data,cache,dalvik,system,internal with just only one swipe.Of course you have to choose what to be wiped on the device.
There are two reasons why this recovery has to be chosen over other clockworkmod.First reason being the ability to restore the individual portions of the complete nandroid backup and other being the multi rom support.Only twrp has the multi rom support for now.
Prerequisites:
This is easiest way to install twrp on your Htc one E8 but this method require root access.
If you dont know how to install ywrp recovery on your htc one E8 then dont worry we are here to help you.We will guide you to install twrp recovery on as well as root one e8 so that you can take advantage of root apps till custom roms arrives for this device.Device specific codename for Htc one e8 is simply e8.
Install Twrp and root Htc one E8:

Twrp stands for team win recovery project.It is one first recovery to offer a completely touch driven interface.The ui is completely xml based so you can customise the interface with different themes and also this is only recovery that supports themes.Unlike the clockworkmod recovery this recovery has the option to wipe all the data,cache,dalvik,system,internal with just only one swipe.Of course you have to choose what to be wiped on the device.
There are two reasons why this recovery has to be chosen over other clockworkmod.First reason being the ability to restore the individual portions of the complete nandroid backup and other being the multi rom support.Only twrp has the multi rom support for now.
Prerequisites:
- You must have unlocked your device boot loader on htc.
- Enable usb debugging on your device.GO to settings and then to about device.Tap continuosly on build number until you see a toast message you are now a developer.Go back and you will find developer options click on it and mark on usb debugging.
- Download twrp for one e8 on your desktop and renemae it to recovery.img so that you can easily type the command in fastboot mode.
- Charge your htc one e8 to atleast 60%.
- Backup all your apps and data before proceeding further.
You can install twrp on your htc one m8 in many ways but here we will show to three effective methods to flash recovery.
Method 1: Using fastboot:
- Make sure that you installed adb or fast boot on our computer.
- You must be familiar with basics adb and fastboot commands to try this method.
- After enabling usb debugging on your htc one e8 and connect it to computer using a usb cable.
- Now open fastboot folder and copy and paste recovery image which you have download in from their official website..
- Type the command "adb devices" and you will notice a pop on your note 3 neo to grant access to your device.Grant permissions .
- Now type the command "adb reboot-booloader" and press enter and device enters boot loader mode.
- Once you are in boot loader mode type the command "fastboot devices" to know if your device is detected.If your device is detected you will get a key before list of devices.If not reinstall fast boot drivers.
- Now Type the command " fastboot flash recovery recovery.img" and recovery will be flashed on your phone.
- Disconnect phone from computer and using volume down key select recovery and click volume up button to confirm to boot into recovery.
- Once your device boots into recovery you can now flash roms,kernels or any other mods.
Method 2: Using DD method
- This methods requires root access along with unlocked bootloader.Since you didn't have root access yet you have to stick with first method only.
- Go to play store and search for a app call "terminal emulator".You will flooded with lot of apps just download any one of them.
- Download twrp recovery mg file from above link and place it on your internal storage.Do not place it it any folder,just copy to roots of your internal storage.If you are confused then just copy and paster in internal storage and rename it to twrp.
- Open terminal emulator and type the command "su".If you are requested to grant super user permissions then frant them.
- Type the command "dd if=/sdcard/twrp.img of=/dev/block/platform/msm_sdcc.1/by-name/recovery".
- Recovery will be flashed in few seconds just keep calm and wait for process to complete.
Method 3: Using official Twrp manager app
- Open playstore app and search for twrp maanger app.
- Download app and open it.
- Grant super user permission when asked.
- Once you grant the permissions do a swipe from the left and you will find several options.
- Choose the options "Install twrp" and you will be greeted with two more options.One being device name and other to install.
- Click device name and scroll down and you will find Htc one E8.Choose right variant of your device.
- Now choose which version to be installed and then click on install recovery.
- App downloads the recovery and flashes it.
- Once done you can reboot to recovery from the app itself.
Already by following any one of the above methods you will have twrp installed on your htc one e8.If you haven rooted your device yet then don't worry we have solution for that too.
How to root Htc one E8:
Once you have unlocked one E8 bootloader and flashed twrp recovery sing method one then its time for you to root your device.
- Download latest super user and place it in internal storage of device.
- Power off the device completely and wait for at least 10 seconds to make sure that it is completely of.
- Now using button combinations put your htc one e8 into recovery.
- Once you are in twrp recovery you will see various options, click on back up and select all the partitions and swipe to confirm backup.
- Backup process may take some time don't interrupt process in any way and it is necessary for you to make a backup for sure as we don't have stock img as of now.
- Once process is completed go back and click on "install".
- Select install from sdcard and navigate to location where you have placed supersu zip file.Select zip file and swipe to confirm flash and wait for few seconds.
- Once supersu is flashed reboot to system.
As device boots up you will have root access on your one e8.If you have queries regarding flashing twrp and rooting your htc one e8 just leave a comment below.
Subscribe to:
Posts (Atom)