Showing posts with label Sony. Show all posts
Showing posts with label Sony. Show all posts
Monday, December 14, 2015
Sony Xperia C4 Review
Review of Sony Xperia C4 Dual at a Glance:-
Many peoples these days love to take selfies from smartphhone for such people Sony has launched Xperia C4 loaded with 13 & 5 MP Cameras, 5.5 inches display, 1.7 GHz Mediatek Octa-core processor, Dual SIM support, 16 GB ROM & 2 GB ROM, Scratch-resistant Sony Mobile BRAVIA Engine 2 display and 2600 mAh battery.The body is made of quality plastic available in three colours Black, White and Mint. Metallic Volume rockers and power button located in right edge, 5-megapixel front camera boasting an LED flash and 25 mm wide-angle lens with an 80-degree lens at top right of the phone. Backlit buttons are located within the bottom of screen and the display is protected with screen resistant BRAVIA Engine 2, the design is compact and solid with premium phablet look.

Mediatek MT6752 Octa-core processor with 1.7 Ghz clock speed runs all the applications smoothly and 2 GB added RAM make it processing tasks much faster, but there is one thing to notice whenever the camera is used the phone slightly heats up.
In camera department both the cameras have Sony’s exclusive Exmor R sensor and in both sides the LED flash is fixed. Camera did good job for outdoor photography while in low light the camera doesn’t seems like Sony camera for that brand is popular among people, but some camera setting such as HDR Mode did good work.
IPS LCD capacitive touchscreen with 5.5 inches in size has 1080 x 1920 pixels (Full HD) resolution with 401 ppi display density which makes the picture clearer and sharp for human eyes, the sun readability is good in full brightness.
The 2600 mAh battery is not sufficient for a 5.5 inches Full HD display Phablet but Xperia C4 manage its battery backup for full day it also come up with Ultra STAMINA Mode limiting your phone to core functions – like calls and SMS to reduce battery drainage.
Specification of Sony Xperia C4 Dual
Operating SystemOS- Android
OS Version- v5.0 (Lollipop)
Chipset
CPU- Mediatek MT6752
Clock Speed- 1.7 GHz Cortex-A53
Core- Octa-core
GPU- Mali-T760MP2
Screen and Display
Type- IPS LCD capacitive touchscreen
Size- 5.5 inches
Display Resolution- 1080 x 1920 pixels
Display Reinforced- Scratch-resistant Sony Mobile BRAVIA Engine 2
Display Density- 401 ppi
Camera
Rear- 13 MP
Front- 5 MP
Max. Video Resolution- 1080p
Max Video Frames- 30fps
Form and Dimension
Phone Dimension- 150.3 x 77.4 x 7.9 mm
Form- Bar
Weight- 147 grams
Data Connection and Connectivity
4G- LTE band 2(1900), 4(1700/2100), 5(850), 7(2600), 28(700) - E5343
3G- HSDPA 850 / 900 / 1900 / 2100 - E5333, E5363, E5343
Bluetooth- v4.1
WiFi- 802.11 a/b/g/n
Headphone Jack- 3.5 mm
Sensors
Proximity- Yes
Accelerometer- Yes
Light-
Gyroscope- Yes
Memory and RAM
Internal (ROM)- 16 GB
External (SD)- 128 GB
RAM- 2 GB
SIM
SIM Type- Nano-SIM
SIM Support- Dual SIM
Battery
Capacity- 2600 mAh
Stand By- 682 hours (3G)
Talktime- 11 hour 30 minutes (3G)
Phone’s Available Colour- Black, White and Mint
Pros of Sony Xperia C4 Dual
- NFC is supported.
- Phone support Miracast wireless display standard designed for mirroring a Smartphone.
- It has LED Notification for SMS, Mails and Whatsapp etc.
- HDR for video has a similar effect, allowing you to capture great footage even in high contrast situations.
- Phone supports OTG cable.
- Front cam also has LED flash.
Cons of Sony Xperia C4 Dual
- The battery in the phone is non-removable.
- Phone gets heated while using camera for longer time.
- Camera is OK but not so Great.
- Doesn’t have waterproof body like Sony Xperia M4 Aqua.
- Hanging & Heating Problems.
- Sometimes Camera force closes.
Solution of Problems in Sony Xperia C4 Dual
Video recording error issue - "Recording is in progress in another app cannot record"Turn off OK Google
Why to buy and Final words about Sony Xperia C4 Dual
This phone is good for selfie enthusiastic peoples as it includes 5 MP front camera with Flash and phone can run all the application smoothly the user interface is quite good. Recommended for people wish to own 5.5 inches Sony Phablet with Dual SIM support, 13 MP camera, 2 GB RAM and a decent battery backup.Price- 20999

Friday, December 11, 2015
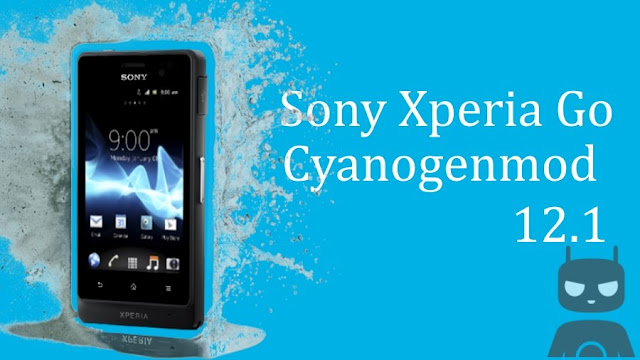
Lollipop based Cyanogenmod 12.1 Custom Rom for Sony Xperia Go Lotus
Update your sony xperia Go lotus to latest version of android lollipop by flashing cyanogenmod 12.1 custom rom.Sony didn't push any firmware upgrades for xperia go after 4.12 jellybean and this didn't stop developers at xda to bring lollipop for this device.
Cyanogenmod 12.1 is finally available for xperia go and good part is that most of the features are working fine and of course it has bugs too which you can ignore for sake of lollipop.Though it has only 512mb of ram with 1ghz dual core chipset ,cm runs just smooth and might experience lag if fill up internal storage with lot of apps.
Device specific codename for Xperia Go is "Lotus" and has model numbers as Sony ST27i, Sony ST27a.Check your device model number before proceeding further.Go to settings and then to about device,you will find your device model number there.
Disclaimer:
As we all know flashing a rom on xperia go or any other android device is a risky job and it might cause earthquakes,tsunamis and volcanic eruptions in our hearts in case of failure and we hold no responsibility for that.Proceed at your own risk.
 About Cyanogenmod custom rom:
This rom is compiled by a xda senior member "Hardlight"a big thanks to him for bringing this amazing firmware for xperia go lotus.Cyanogenmod is one of the best custom roms available in android development ecosystem. They support lot of devices.This is based on android open source project with lot of added features.It uses android 5.1.1 lollipop as base for now and will be updated to later versions of android when available.
 Since this is not official cm 12.1 there are some bugs like video recording doesn't work at all,a2dp too doesn't work.But if you cant resist yourself to try lollipop on your xperia go then this is only way which is left for us.
Cyanogenmod 12.1 is finally available for xperia go and good part is that most of the features are working fine and of course it has bugs too which you can ignore for sake of lollipop.Though it has only 512mb of ram with 1ghz dual core chipset ,cm runs just smooth and might experience lag if fill up internal storage with lot of apps.
Device specific codename for Xperia Go is "Lotus" and has model numbers as Sony ST27i, Sony ST27a.Check your device model number before proceeding further.Go to settings and then to about device,you will find your device model number there.
Disclaimer:
As we all know flashing a rom on xperia go or any other android device is a risky job and it might cause earthquakes,tsunamis and volcanic eruptions in our hearts in case of failure and we hold no responsibility for that.Proceed at your own risk.
Cyanogenmod 12.1 rom For Sony Xperia Go lotus:

This rom is compiled by a xda senior member "Hardlight"a big thanks to him for bringing this amazing firmware for xperia go lotus.Cyanogenmod is one of the best custom roms available in android development ecosystem. They support lot of devices.This is based on android open source project with lot of added features.It uses android 5.1.1 lollipop as base for now and will be updated to later versions of android when available.

General features of Cm 12.1:
- Trebuchet: This is a launcher that ships with cyanogenmod. But if you flash gapps then you might loose this.It is simple,fast and responsive and lacks customization a bit.
- Performance control:A default CPU manager app to control frequencies and governors . You can adjust cpu frequencies and also set them on boot too.
- Status bar Tweaks:Status bar has lot of tweaks which include a brightness slider.Slide in status bar to adjust brightness of the screen.Double tap on status bar to sleep device and also network speed indicator for on going traffic info.
- Theme engine: Theme engine is a custom feature cyanogenmod custom rom which basically changes the look user interface from lock screen to ring tones all the way up to boot animations. The speciality of the theme engine is the ability to choose individual elements of every theme you have installed.So you like the ringtones and wallpapers of one theme and icons of other theme then you can have them at a time.Just open the theme chooser and you will understand how to do it.This might reming you of theme store from miui rom.

- Software Updates: Cyanogenmod is usually available in three types one s nightlies which gets updated with new features every night and are quite stable for daily usage.second one is the snapchat which is monthly build version which will be stable version and other one is the release candidate.Some times nightlies are considered must stable than the snapshots. As of now we have android lollipop 5.1.1 in form on CM 12.1.
- If you are missing root functionality or all your root apps are not working properly then to developer settings and check if root permissions are set properly.

These are key features of cyanogenmod rom and you can explore other features by flashing this rom on your Sony Xperia Go Lotus.
Prerequisites:
- Battery: Charge your xperia go to at least 90% so that you wont encounter any battery related issues while flashing this.
- You must have updated your xperai U to latest firmware available.
- Custom recovery: You need a custom recovery like philz or cwm installed on your xperia Go.Without it you can not flash at all.
- Backup:Backup all your data which includes apps,contacts,photos videos etc everything to computer or any cloud storage as flashing Cyanogenmod on SonyXperia Go Lotus will erase all your data.
- Backup Efs partitions: Backup all your efs partition of your sony xperia go on current Rom.If you loose signal you can just restore it back.
- You must have a Unlocked bootloader for sure.
- Downloads:Cm 12.1 rom for xperia go lotus (androidfilehost mirror) and google apps. Transfer them to internal storage of your device.
Flash Cyanogenmod on Xperia go using recovery:
- Download Cm 12.1 for Xperia go and Gapps transfer it to sdcard or internal storage of your smartphone.
- Power of device completely and wait for few seconds to confirm that it is off completely.
- Press power button and when device boots up leave power button.
- While you Xperia go is powering up you you will notice led light blinks.When this happens you have to press either volume up or down continuously until it boots into recovery mode.
- Sony xperia go boots into cwm recovery.
- Once you are in cwm click on backup and select all partitions which you want to backup. It might take about 5 minutes for backup to complete. Don't interrupt backup process.
- Once backup of your existing rom is completed click on back button.Wipe data,cache and dalvik cache and wipe system partition too.
- Now select Install and navigate to location where you have placed your Rom and gapps zip files.
- Flashing rom might take about 5 minutes or so.Once flashing is complete do a factory reset again.
- Now reboot to system.Wait at least 15 minutes for initial boot to complete and once done you can explore Rom features.
After flashing cyanogenmod if xperia go didn't boot or pass boot logo then press and hold power button for about 15 seconds and you will notice that it shuts down completely and it shutdowns use volume button combinations again to boot into recovery.Wipe all required partitions again and flash rom.If it still fails to boot then restore backup.
Since this rom is in alpha stage and there are bugs you may not like it to use it as a daily driver.But most of features that are essential for daily usage like calling,messaging,mobile data are working fine which means you can actually try this rom for sure.If you have any other queries for flashing lollipop based cyanogenmod 12.1 rom on your sony xperia go lotus just leave a comment below.
Install android lollipop Euphoria os rom on sony xperia z3 leo
Xperia z3 is flashship model for sony and is expected to receive android m update in near future. Though android lollipop 5.0 is available for this device it may not receive latest version lollipop but you can experience it on your z3 by installing Euphoria os custom rom.This custom firmware is compiled by a xda senior develop "Rohan purohit". A big thanks to him for bringing this amazing rom for sony xperia z3.
You can flash this rom on D6602, D6603, D6633, D6643 variants of z3 and in case if you dont know device specific codename is "Leo".
 About Euphoria custom rom:
Euphoria os is and after market firmware based on android open source project.You will get latest android version with this rom.It comes with lot of added features over pure aosp Rom.Since we don't have official support from euphoria team we have a unofficial rom which is stable for daily usage.
Features of Euphoria os:
You can flash this rom on D6602, D6603, D6633, D6643 variants of z3 and in case if you dont know device specific codename is "Leo".
Prerequisites:
- Backup:Backup all your data which includes apps,contacts,photos videos etc everything to computer or any cloud storage as flashing Euphoria os on Sony xperia Z3 will erase all your data.
- Battery: Charge your xperia Z3 to at least 90% so that you wont encounter any battery related issues while flashing this.
- Backup Efs partitions: Backup all your efs partition of your sony xperia Z3 on current Rom.If you loose signal you can just restore it back.
- Custom recovery: You need a custom recovery like philz or cwm or twrp installed on it.Without it you can not flash at all.
- You must have a Unlocked bootloader.
- Downloads: Euphoria os for xperia z3 (androidfilehost mirror) and google apps. Transfer them to internal storage of your device.
Install Euphoria os on sony Xperia Z3 leo:

Euphoria os is and after market firmware based on android open source project.You will get latest android version with this rom.It comes with lot of added features over pure aosp Rom.Since we don't have official support from euphoria team we have a unofficial rom which is stable for daily usage.
Features of Euphoria os:
- Theme engine: It comes with a cyanogenmod mod theme engine so you can play with lot of themes.This is a great way of customizing your android device. You can theme each and every element of user interface all the way from wallpapers to boot animations.There are lot of themes available in playstore and some are premium too.

- Heads up notification: This notification system is similar to that in google'e one.Swipe left to dismiss notification and right to put it in background.Swiping down on it will open notification drawer and it merges in it.
- Wake options: Depending on the device you will have double tap to wake the device option in display settings and of course you have the option to put the device into sleep by double tapping on status bar.There is a option to wake phone after connecting charger.
- Animations: You can have custom animations for app opening and closing or while scrolling.

- Navigation: Besides device wake options you can even adjust dimensions of navigation bar and set custom actions too like long pressing back button to kill recent app.In landscape mode navigation goes left hand side and yeah there is an option to disable this too if you don't like it.
- Security: Privacy guard is available in this Rom along with blacklisting of calls and messages.
- Sound: AudioFx is available for better quality of music.Other features include increasing volume ring tone,profiles,less notifications,you can disable volume adjustable sound,separate ring tones and notifications volume as usual.
- Power: Advance reboot option is enabled by default so you can boot into recovery,fast boot,soft boot easily.
- Screen recorder: There is screen recorder option too in display settings to record your actions on your device.
- Quick settings panel is customizable and brightness control too is available.


These are noticeable features of euphoria OS Rom and there are lot of other features too which you can explore on your own by flashing this custom Rom on your Sony xperia z3 leo.
Flash Euphoria os Xperia Z3 using recovery:
- Download Euphoria for xperia z3 and Gapps transfer it to sdcard or internal storage of Z3.
- Power of device completely and wait for few seconds to confirm that it is off completely.
- Press power button and when device boots up leave power button.
- While you xperia Z3 is powering up you you will notice led light blinks.When this happens you have to press either volume up or down continuously until it boots into recovery mode.
- Sony xperia Z3 boots into cwm recovery.
- Once you are in cwm or twrp click on backup and select all partitions which you want to backup. It might take about 5 minutes for backup to complete. Don't interrupt backup process.
- Once backup of your existing rom is completed click on back button.Wipe data,cache and dalvik cache and wipe system partition too.
- Now select Install and navigate to location where you have placed your Rom and gapps zip files.
- Flashing rom might take about 5 minutes or so.Once flashing is complete do a factory reset again.
- Now reboot to system.Wait at least 15 minutes for initial boot to complete and once done you can explore Rom features.
Once it boots up you can enjoy all the features of Euphoria rom on your xperia Z3. If you experience any boot loops just do a factory reset again.Even after that rom fails to boot then restore backup which you have made earlier.
If you facing any issues while flashing Euphoria rom on your xperia Z3 leo just leave a comment below.
If you facing any issues while flashing Euphoria rom on your xperia Z3 leo just leave a comment below.
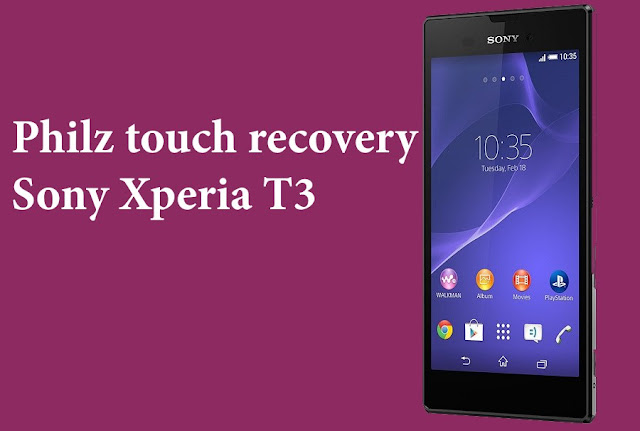
Install Philz touch Cwm recovery on Sony Xperia T3 D5103 D5102
CWM based philz touch recovery is already available for Sony xperia t3 with model numbers D5103 and D5102. IT was released back in 2014 but still there is not much development going on as result only few roms are available for this device.
If you take look at its specifications it comes with a snapdragon 400 processor clocked at 1.4gh with 1gb of and 8gb internal storage.Primary camera has 8mp sensor while secondary has just 1.1mp.It is available in 3g and 4g lte variants.We have 3 models depending on network and chipset.D5102 is 3g variant with chipset Qualcomm MSM8228 while D5103 and D5106 are lte variants with chipset Qualcomm MSM8228-2.
This recovery which you are going to flash is only for D5103 and D5102 model of xperia t3 and we take no responsibility if you have bricked your device after flashing this on D5106.
About Philz Touch cwm recovery:
This is originally developed by a xda senior member and recognised contributor phil3769 and has abandoned this project.Though recovery uses cwm as base and draws inspiration from other popular recovery too.
This recovery is compiled by Siddhesh.K15 for D5102 and by Xenon1978 for D5103, a big thanks to them for bring this recovery for our xperia T3.
Features:
Prerequisites:
If you take look at its specifications it comes with a snapdragon 400 processor clocked at 1.4gh with 1gb of and 8gb internal storage.Primary camera has 8mp sensor while secondary has just 1.1mp.It is available in 3g and 4g lte variants.We have 3 models depending on network and chipset.D5102 is 3g variant with chipset Qualcomm MSM8228 while D5103 and D5106 are lte variants with chipset Qualcomm MSM8228-2.
This recovery which you are going to flash is only for D5103 and D5102 model of xperia t3 and we take no responsibility if you have bricked your device after flashing this on D5106.
Philz touch cwm recovery on Xperia t3 D5102 & D5103:

About Philz Touch cwm recovery:
This is originally developed by a xda senior member and recognised contributor phil3769 and has abandoned this project.Though recovery uses cwm as base and draws inspiration from other popular recovery too.
This recovery is compiled by Siddhesh.K15 for D5102 and by Xenon1978 for D5103, a big thanks to them for bring this recovery for our xperia T3.
Features:
- Touch interface: User interface is completely touch driven and is very similar to cwm in navigation.
- Backup and restore:Just like twrp this recovery allows us to backup and restore individual partitions.
- Supports theme:This recovery too is based on configurable GUI which means you can flash themes if you don't like its interface.
- Modes:There are four modes to navigate between options.One is by simple touch and others double tap or semi touch and last being no touch in which you have to use volume buttons to navigate and power button to confirm.
- You can make adjustments to scrolling speed,touch accuracy and menu height.
- Set custom image as background.
- Screen brightness can be adjusted easily. you can turn off display and can adjust delay,set colours to individual elements.
- you can hide on screen button if you don't like them.
- Twrp back and restore support too is added.
- Create a custom zip file.
- set a lock to recovery so that no one can mess with it without your permissions.
- Now can now create efs backups from recovery itself.
- Aroma file manager too is available and has terminal command support too.
These are some of the features of philz touch recovery and you can explore rest you installing this on your Sony xperia t3 D5103 or D5102.
- Check Model: As we know we have three variants of xperia t3 check which variant you are using.
- You must have a unlocked bootloader.Don't try this on locked one as you might end in bricking it up.
- Battery: Charge your Xperia t3 to at least 90% so that you wont encounter any battery related issues while flashing this.
- Backup:Backup all your data which includes apps,contacts,photos videos etc everything to computer or any cloud storage as installing philz recovery might erase data on your xperia t3.
- Download:Philz recovery for xperia T3 D5103(androidfilehost ) and Xperia T3 D5102(androidfilehost mirror).
Flash CWM Philz recovery using adb or fastboot:
- Make sure that you installed adb or fast boot on our laptop or computer.
- You must be familiar with basics adb and fastboot commands to try this method.
- Enable usb debugging on your Sony xperia t3.Go to settings and then to about device.You will find build number there.Tap on it continuously until you see a toast message you are now a developer.Go back and you will find developer options.Click on it and scroll down and you will find usb debugging,mark on it.
- Now open fastboot folder and copy and paste recovery images for respective model numbers which you have downloaded and rename it to boot.img.This file is actually a modified kernel with philz recovery installed.
- Type the command "adb devices" and you will notice a pop on your xperia t3 to grant access to your device.Grant permissions .
- Now type the command "adb reboot-booloader" and press enter and device enters boot loader mode.If it fails to boot into bootloader disconnect it from computer and power off it completely.Now hold volume up button and connect it to computer.
- Once you are in boot loader mode type the command "fastboot devices" to know if your device is detected.If your device is detected you will get a key before list of devices.If not reinstall fast boot drivers.
- Now Type the command " fastboot flash boot boot.img" and recovery will be flashed on your phone.
- Once your device boots into recovery you can now flash roms,kernels or any other mods.
How to reboot to recovery?
Once you have it installed on your xperia t3.You cam enter recovery using fastboot or by button combinations.
- If you are using fastboot type the command "fastboot reboot-recovery" and hit enter.Device boots into recovery.
- If you don't want to use fasboot then power off the device completely and wait for few seconds to confirm that it is completely off.
- Press power button and release it as soon as you feel vibration.
- When you notice Sony boot logo continuously press volume down button until it boots into recovery.
By following the above guide you will be able to install philz recovery on your Sony xperia t3 d5103 and d5102 and remember that you cannot use it on D5106.If you have any other queries don't forget to leave a comment below.
Install Android 6.0 marshmallow on Sony xperia Z2 using Aosp custom rom
Its been a while since Sony has released a new android upgrade for Xperia z2 after the lollipop update.You might have receive some stability updates which of course might have improved device performance but surely wouldn't changed any user experience.Though you might have already installed custom roms on your xperia z2 for better user experience.
This snapdragon 801 processor handset is a beast when it comes to performance.But as you know without any upgrades to the software it you mayn't achieve what this device can do with that power. Even though Sony have plans to upgrade this device to android marshmallow,they didn't announce any specific release dates.
If you are obsessed with android updates and could hold any longer to taste android marshmallow on your xperia z2 then its time for you to try out the new aosp based custom rom.If you don't know to install this custom rom your smartphone then don't worry at all am here to help you out.But if its your first time to this kind of stuff then you let me introduce some precaution before going further.This is a risky process ,I and developer wont take any responsibility for any kind of damages that happen to your device if installation goes wrong and you have to proceed at your own risk.
Follow these steps before going further:
This snapdragon 801 processor handset is a beast when it comes to performance.But as you know without any upgrades to the software it you mayn't achieve what this device can do with that power. Even though Sony have plans to upgrade this device to android marshmallow,they didn't announce any specific release dates.
If you are obsessed with android updates and could hold any longer to taste android marshmallow on your xperia z2 then its time for you to try out the new aosp based custom rom.If you don't know to install this custom rom your smartphone then don't worry at all am here to help you out.But if its your first time to this kind of stuff then you let me introduce some precaution before going further.This is a risky process ,I and developer wont take any responsibility for any kind of damages that happen to your device if installation goes wrong and you have to proceed at your own risk.
Follow these steps before going further:
- Root:You must have root access on your Sony Xperia Z2 sirius.Though it is not required but to make efs backup which is important we need it.
- Battery: Charge your Xperia Z2 sirius to at least 90% so that you wont encounter any battery related problems while flashing this rom.
- Enable usb debugging on your xperia z2 by going into developer settings.
- Backup Efs partitions: Backup all your efs partition of your sony xperia Z2 sirius on current Rom or firmware.Just in case if you loose signal you can just restore it back.
- Backup:Backup all your data which includes contacts,apps,photos videos etc everything to computer or any cloud networks as flashing android marshmallow based Aosp rom on Sony Xperia Z2 sirius will wipe all your data.
- Lock Gps:Lock your gps position on your current rom.If you use this a lot then you have to lock it so that it could work even after flashing other roms.Its easy to lock gps .Turn on gps in settings and find your current location in google maps and now now have locked on to gps.
- You must have a unlocked bootloader.
- Downloads: Android marshmallow based aosp rom for xperia Z2 sirius(Mega link for system.img and for boot.img) on your computer and also you need to download fastboot driver on your computer without which you cant flash at all.
Android marshmallow based custom rom for Xperia z2 sirius:
This rom is completely based on pure aosp and we sincerely thank "rcstar6696" for bringing this to our device.Since this is in early stages of development there are some bugs like camera doesnot work properly and also video playback is not working.These bugs might get fixed in future updates and it might some time too as developer might be busy with his work life.
If you dont care about these bugs and want to taste android 6.0 marshmallow on your xperia z2 sirius before the final update from manufacture is out,you can go ahead and flash it without any hesitation.If you are un aware of major features of android 6.0 then have a look at some of them.
 |
| Android marshmallow based custom rom for Xperia z2 sirius |
Features of android marshmallow:
- System ui tuner: This is new feature that let you tweak ui a bit but has been hidden just like developer option.If you want to add it to setting app,swipe down the notification panel and on top you will notice a gear icon.Press and hold it and you will notice that it starts spinning.Just leave it once you notice the vigorous spin and you will see a toast message "system ui tuner" added to settings.
- There are ton of brand new wallpapers.
- Google launcher now has vertical scrolling instead of horizontal.
- Multi window: Google finally introduced multi window concept in tablet version of os.You can run two apps in a single window.Activating multi window is also too easy.When you open recents you will notice there is another option beside the closing button on cards.Press on it and activate multi window.But this multi window is not configurable which means adjust width of apps that are running.
- Phone short cut on lock screen is replaced with google now.
- Search bar in settings menu.
- New volume panel: You can now adjust volume of media, call and notification from single window .This feature is absent in previous versions of android though present in most of the oem provided firmwares.
- Auto rotation on home screen is also added which you can find in launcher settings.
- Now on tap: If you use google now frequently this feature might help you a lot.Usually when you press and hold on home button it will take you to google now.If you enable this feature when you try to access google now on any app it load some related suggestions along with some google now card.
- Screen shot notification will also have delete button along with share option.
- Memory option: This is available in settings .It gives you memory usage on your device from last "3hrs or 6 hrs or 1 day".
- App permission manger is the major thing in android m.This lets you to block certain permission so that the app cannot access them.like if you don't want facebook to access your bluetooth you can now do it with out rooting your device,
These are some of the newly added features in android m marshmallow and there are lot of changes beneath which could improve performance and also battery life but as you know this is an early build which might not run as you expect.
Flash android Marshmallow on Xperia z2:
- Download fastboot on our laptop or Pc and install it.You can install it any location but choose location as c: which is default location.
- open the fastboot folder which is located in "c:\programming files".Right click on empty space by holding shift and you see an option "open cmd here".
- If you don't find this option then press windows and R buttons at same time ,Run pops up and type cmd to open command prompt.
- Now go to fastboot folder and copy the location of it which you can see in address bar of folder.
- In command prompt type the command "Cd location of fastboot folder" and press enter.You will notice that fastboot appears in command line.To paste location right click on empty space in cmd and several pops up.Select paste.
- Once you press enter you will notice minimal adb and fastboot in command line instead of c or some thing.
- Once you are in fastboot window type "adb devices" and press enter.If your device is detected you will get a serial number in list of devices attached.If not uninstall drivers and install them again.
- Type the command "adb reboot bootloader" to boot into bootloader mode.If you see any pop up message on your xperia z2 about adb just accept it and mark it forever.
- Once the device is in fastboot mode,type the command fastboot devices to check if it is detected by Pc.
- Download System.img file from above link and copy the extracted img files to minimal adb and fastboot folder.
- Once you have done with copying system.img,boot.img and boot.img file(make sure that boot.img file is from second link not from first link or rename boot.img file to sirius.img from second link to avoid confusion).
- Type command "fastboot flash boot boot.img" and hit enter.
- Type the command "fastboot flash system system.img " and system img file will be flashed.It might take some time for flashing process.
- Once system.img is flashed type the command "fastboot flash boot sirius.img" (second link).
- Once flashing is done type the command fastboot reboot to boot xperia z2 normally.
Once the device reboots you can enjoy latest version of kitkat on your xperia z2 sirius.If you have anyother queries regarding this guide do leave a comment below.
Update Sony xperia SP to android marshmallow using Cyanogenmod cm 13 custom rom
Xperia Sp is one of the most popular mid range handsets from Sony.Though most of its flagship devices failed in terms of numbers.Sony some how managed to sell this in good numbers.This device though doesn't come with high end hardware at that time it got enough updates from manufactures so that it could maintain its legacy for some years.
But as you know as time passes there are lot changes are introduced in android making it more efficient.As a result latest version of android could run on even low end device without any critical errors.Android 6.0 that is marshmallow which is already out to the open source development has seen new iteration and is already available to some of the Sony flagship as a third party software i.e custom roms.
Though you might not receive any official update of marshmallow for xperia sp, an update is already available in the form of cyanogenmod that is cm 13.This is not an official version from cyanogenmod itself its unofficial one which uses cyanogenmod framework with google's android open source code.
So if you want to update your Xperia sp to android marshmallow then you have to flash this rom .If you don't know how to do it then don't worry at all.In this post I will guide you to update your Xperia sp to android marshmallow using cm 13 custom rom.But as you know modifying android device is a risky process and there is a chance of breaking hardware permanently of it fail.So no one here hold any responsibility for any kind of damage that happen to your device.Proceed at your own risk.
About Cyanogenmod custom rom:
This is one of the best custom rom that you can get in android development market.It comes with lot of added features which improved device customisation and performance.This rom which you get here for xperia sp is not stable yet but you can still try it on our device without any hesitation.If you don't know the features of the same do check it out.
Features of cyanogenmod 13:
Must check: Blisspop custom rom for Sony xperia SP Huashan
Before going further:
But as you know as time passes there are lot changes are introduced in android making it more efficient.As a result latest version of android could run on even low end device without any critical errors.Android 6.0 that is marshmallow which is already out to the open source development has seen new iteration and is already available to some of the Sony flagship as a third party software i.e custom roms.
Though you might not receive any official update of marshmallow for xperia sp, an update is already available in the form of cyanogenmod that is cm 13.This is not an official version from cyanogenmod itself its unofficial one which uses cyanogenmod framework with google's android open source code.
So if you want to update your Xperia sp to android marshmallow then you have to flash this rom .If you don't know how to do it then don't worry at all.In this post I will guide you to update your Xperia sp to android marshmallow using cm 13 custom rom.But as you know modifying android device is a risky process and there is a chance of breaking hardware permanently of it fail.So no one here hold any responsibility for any kind of damage that happen to your device.Proceed at your own risk.
Update xperia SP to marshmallow using cm 13 custom rom:
 |
| Update Xperia SP to marshmallow by Cyanogenmod cm 13 custom rom |
This is one of the best custom rom that you can get in android development market.It comes with lot of added features which improved device customisation and performance.This rom which you get here for xperia sp is not stable yet but you can still try it on our device without any hesitation.If you don't know the features of the same do check it out.
Features of cyanogenmod 13:
- Theme engine: Theme engine is from the cyanogenmod custom rom which basically changes the look user interface from lock screen to ring tones all the way up to boot animations.The speciality of the theme engine is the ability to choose individual elements of every theme you have installed.So you like the ring tons and wallpapers of one theme and icons of other theme then you can have them at a time.Just open the theme chooser and you will understand how to do it.
- Software Updates: Cyanogenmod rom is usually available in three types one is nightlies which gets updated with new features every night and are quite stable for daily usage.second one is the snapchat which is monthly build version which will be stable version and other one is the release candidate.Some times nightlies are considered must stable than the snapshots.
- Status bar Tweaks:Status bar has lot of tweaks which include a brightness slider.Slide in status bar to adjust brightness of the screen.Double tap on status bar to sleep device and also network speed indicator for on going traffic info.
- If you root apps dont work then that is no response form super user it means it has been disabled and you can enable it in developer options easily.
- System ui tuner: This is new feature that let you tweak ui a bit but has been hidden just like developer option.If you want to add it to setting app,swipe down the notification panel and on top you will notice a gear icon.Press and hold it and you will notice that it starts spinning.Just leave it once you notice the vigorous spin and you will see a toast message "system ui tuner" added to settings.
- There are ton of brand new wallpapers.
- Google launcher now has vertical scrolling instead of horizontal.
- Multi window: Google finally introduced multi window concept in tablet version of os.You can run two apps in a single window.Activating multi window is also too easy.When you open recents you will notice there is another option beside the closing button on cards.Press on it and activate multi window.But this multi window is not configurable which means adjust width of apps that are running.
- Phone short cut on lock screen is replaced with google now.
- Search bar in settings menu.
- New volume panel: You can now adjust volume of media, call and notification from single window .This feature is absent in previous versions of android though present in most of the oem provided firmwares.
- Auto rotation on home screen is also added which you can find in launcher settings.
- Now on tap: If you use google now frequently this feature might help you a lot.Usually when you press and hold on home button it will take you to google now.If you enable this feature when you try to access google now on any app it load some related suggestions along with some google now card.
- Screen shot notification will also have delete button along with share option.
- Memory option: This is available in settings .It gives you memory usage on your device from last "3hrs or 6 hrs or 1 day".
- App permission manger is the major thing in android m.This lets you to block certain permission so that the app cannot access them.like if you don't want facebook to access your bluetooth you can now do it with out rooting your device,
These are all the features of Cyanogenmod 13 and android marshmallow.If they are tempting you then do flash the rom for sure.
Must check: Blisspop custom rom for Sony xperia SP Huashan
Before going further:
- Backup:Backup all your data which includes apps,contacts,photos videos etc everything to computer or any cloud storage as flashing cm13 Rom on Sony xperia Sp Huashan will erase all your data.
- Enable usb debugging on your xperia sp huashan by going into developer options.
- Battery: Charge your mobile to at least 90% so that you wont encounter any battery related issues while flashing this.
- Backup Efs partitions: Backup all your efs partition of your sony xperia Sp Huashan on current Rom.If you loose signal you can just restore it back.
- Custom recovery: You need a custom recovery like twrp or cwm installed on it.Without it you can not flash roms at all.
- Root: You need to have root access on your Xperia Sp to install Cm 13 custom rom.
- Download Cyanogenmod 13 for xperia sp huashan and transfer it to sdcard using usb cable.
Flash Cm 13 on Xperia Sp using Twrp recovery:
- Download Cm 13 rom for xperia Sp huashan (cm-13-20151101-UNOFFICIAL-huashan.zip)and Gapps transfer it to sdcard or internal storage of device.
- Power of device completely and wait for few seconds to confirm that it is off completely.
- Press power button and when device boots up leave power button.
- While you xperia Sp is powering up you you will notice led light blinks.When this happens you have to press either volume up or down continuously until it boots into recovery mode.
- Sony xperia Sp boots into Twrp or cwm recovery.
- Once you are in twrp or cwm click on backup and select all partitions which you want to backup. It might take about 5 minutes for backup to complete. Don't interrupt backup process.
- Once backup of your existing rom is completed click on back button.Wipe data,cache and dalvik cache and wipe system partition too.
- Now select Install and navigate to location where you have placed your Rom and gapps zip files.
- Flashing rom might take about 5 minutes or so.Once flashing is complete do a factory reset again.
- Now reboot to system.Wait at least 15 minutes for initial boot to complete and once done you can explore Rom features.
Initial boot may take sometime and don't conclude it as bootloop if it doesn't boot even after 10 minutes.wait for 20 minutes before marking it as bootloop.If this happens then reboot to recovery and then wipe cache,data and dalvik cache and reboot again to see if it boots.Once the device boots up successfully you will have your xperia sp updated with android marshmallow.If you have any other queries do leave a comment below.
Sony Xperia E4 Review: Pros and Cons
Review of Sony Xperia E4 at a Glance:-
E4 is Entry level phone loaded with the Mediatek 1.3 GHz Quad-core processor, 5 MP rear and 2 MP front camera, 1 GB RAM and 2300 mAh battery. The body is made up of plastic having candy bar design with rounded corners seems slightly bulkier design but fits in hands. The IPS display is 5 inches in size protected with Scratch-resistant glass the display resolution is not 720x 1280 (HD) or Full HD, its 540 x 960 (qHD) can be a downside. The display density is slightly lower (220 ppi) than handsets of same price range but screen is crystal clear sharp with good colour production having wide viewing angles.CPU powered with Mediatek MT6582 Quad-core processor with 1 GB of RAM runs most of games of applications but struggles in running high end games such as Asphalt. The battery of this handset is really impressive runs for more than one day for moderate to heavy uses.

Specification of Sony Xperia E4
Operating SystemOS- Android
OS Version- v4.4.4 (KitKat)
Chipset
CPU- Mediatek MT6582
Clock Speed- 1.3 GHz Cortex-A7
Core- Quad-core
GPU- Mali-400 MP2
Screen and Display
Type- IPS capacitive touchscreen
Size- 5.0 inches
Display Reinforced- Scratch-resistant glass
Display Density- 220 ppi
Camera
Rear- 5 MP
Front- 2 MP
Max. Video Resolution- 1080p
Max Video Frames- 30fps
Form and Dimension
Phone Dimension- 137 x 74.6 x 10.5 mm
Form- Bar
Weight- 144 g
Data Connection and Connectivity
4G- LTE band 1(2100), 2(1900), 3(1800), 5(850), 7(2600), 8(900), 20(800)
3G- HSDPA 850 / 1900 / 2100
Bluetooth- v4.1
WiFi- Wi-Fi 802.11 b/g/n
Headphone Jack- 3.5 mm
Sensors
Proximity- Yes
Accelerometer- Yes
Light- Yes
Gyroscope
Memory and RAM
Internal (ROM)- 8 GB
External (SD)- 32 GB
RAM- 1 GB
SIM
SIM Type- Micro
SIM Support- Dual SIM
Battery
Capacity- 2300 mAh
Stand By- 653 hours
Talktime- 12 hours 40 min
Phone’s Available Colour- Black and White
Pros of Sony Xperia E4
- Sony STAMINA Mode, Extended standby mode, Ultra STAMINA Mode is useful to increase battery backup.
- Both front and rear Camera are able to capture decent quality pictures.
- The xLOUD™ loudness enhancement engine for better sound quality.
- The 2300 mAh Battery is giving good battery backup.
- It is able to record and play Full HD (1080p) Videos.
Cons of Sony Xperia E4
- Low screen resolution 540 x 960 pixels (qHD).
- No Gorilla glass protection for the display.
- NFC is not supported.
- Battery is non removable.
- OTG Cable is not supported.
Why to buy and Final words about Sony Xperia E4
This handset is good option under budget segment, if you are fan of Sony Smartphone having Great music quality. This handset doesn’t have any special feature that can set a benchmark but all the features provided in this phone from camera, battery, display clarity to CPU are decent and runs smoothly .Price- 7999 INR
Check Minimum Price in Store
Not satisfied with features or price Check Best Smartphone for Your Budget
Install Crdroid custom rom On Sony Xperia Z2 tablet Castor and Castor_windy
Install latest version of android lollipop on your Sony xperia z2 tablet with the help of crdroid custom. Xperia z2 tablet is premium device with high end specs.Being a a typical Sony flagship it water resistant too.
It has a snapdragon 801 processor clocked at 2.2ghz with adreno 330gpu.It has 3gb of ram with 16gb internal storage and is expandable upto 64gb through microsd card slot.Primary camera on this tablet is 8.1mp while secondary camera is 2.2mp which can record videos upto 1080p.
Being tablet it is available in two different variants, one with only wifi support which has device specific code name as castor_windy while the other one comes with lte which has device specific code name as castor.
 About crdroid:
It is based on latest version of cyanogenmod with lot of added features.Since this is based off cyanogenmod you will get latest android version bundled in it.This is compiled by a xda recognized member "davidteri91", a big thanks to him for bringing this amazing rom for both wifi and lte variants of xperia Z2 tablet.
Features of crdroid rom:
Before proceeding further:
Even after factory reset if it fails to boot then reboot to recovery and restore backup.Don't try to flash wifi variant rom on lte one as it might brick it.If you have any other queries in flashing Crdroid custom rom On Sony Xperia Z2 tablet (Castor and Castor_windy) leave a comment below.
It has a snapdragon 801 processor clocked at 2.2ghz with adreno 330gpu.It has 3gb of ram with 16gb internal storage and is expandable upto 64gb through microsd card slot.Primary camera on this tablet is 8.1mp while secondary camera is 2.2mp which can record videos upto 1080p.
Being tablet it is available in two different variants, one with only wifi support which has device specific code name as castor_windy while the other one comes with lte which has device specific code name as castor.
Crdroid rom On Sony Xperia Z2 tablet wifi and lte:

It is based on latest version of cyanogenmod with lot of added features.Since this is based off cyanogenmod you will get latest android version bundled in it.This is compiled by a xda recognized member "davidteri91", a big thanks to him for bringing this amazing rom for both wifi and lte variants of xperia Z2 tablet.
Features of crdroid rom:
- Theme engine: Theme engine is quite common in all custom roms now a days.It is from cyanogenmod and lets you change look of your user interface with themes.There are lot of themes available in playstore.

- Search bar in recents can be disabled.
- App bar: Swiping from the lest will display launch app bar which includes your favourite apps but floating mode for apps doesn't work.It just launches app.
- Quick settings: All tiles in quick settings panel is customizable you can enable heptic feedback too.
- Navigation bar: You can enable or disable navigation bar and shit its position to left hand side when you rotate screen in landscape mode.Size of navigation bar can also be adjusted.
- Long pressing on back button will kill recent app.
- Gesture anywhere: This feature lets you access you favourite apps by drawing a gesture.

- Enable or disable media scanner at boot.
- Omni switch: This feature is drawn from omni rom and is an alternative to default recent menu.Once you enable it a floating bubble pops up and when you open it your recent accessed apps with be displayed.You can either access them or clear them.Omni switch is customizable too.

- Lockscreen: You can customize lock screen short cuts and even hide camera app on lock screen.Lock screen has new unlock method called gesture unlock.Draw a gesture to unlock instead of entering pin or drawing pattern.If you choose pin as a protection then there is an option to shuffle number displayed during unlock.
- Volume keys can be used to unlock your device.
- Privacy guard from cyangenmod rom too is included in this rom along with super user integration.
- You can configure rotation too.
- Traffic meter: You can see traffic passing through your device using traffic monitor.Both download speeds and upload speeds are display on status bar in real time.
- Wake lock blocker is built in too.

- Performance settings: This lets you control your cpu and gpu behaviour like you can choose governors or adjust max and min cpu frequency.
- Slim's heads up notification system in also present.
- Brightens slider can be disabled from status bar and notification count too is present.
- Screen recorder too is present.


Disclaimer:
We all are aware that it is a risky process and we take not responsibly for all volcanic eruptions that arise in your heart if it fails to boot after flashing and if you hard brick it even light from mars cannot save you.So be careful while flashing.
Before proceeding further:
- Check Model: As we know we have two variants of tablet check which variant of tablet you are using.
- Root:You must have root access on your Sony Xperia Z2 tablet .
- Battery: Charge your Xperia Z2 tablet to at least 90% so that you wont encounter any battery related issues while flashing this.
- Backup:Backup all your data which includes apps,contacts,photos videos etc everything to computer or any cloud storage as installing crdroid rom on sony Xperia Z2 tablet will will wipe all your data.
- Lock Gps:Lock your gps position on your current rom.If you use this a lot then you have to lock it so that it could work even after flashing other roms.Its easy to lock gps .Turn on gps in settings and find your current location in google maps and now now have locked on to gps.
- Backup Efs partitions: Backup all your efs partition of your sony Xperia Z2 tablet on current Rom.Just in case if you loose signal you can just restore it back.
- Custom recovery: You need a custom recovery(Twrp or cwm) installed on your Xperia Z2 tablet .Without it you can not flash roms at all.
- You must have a unlocked bootloader.
- Downloads: crdroid rom for castor (androidfilehost mirror) and crdroid for castor_windy( androidfilehost mirror) if needed.Transfer them to internal storage.
Flash Crdroid on Xperia z2 tablet using Twrp recovery:
- Download crdroid rom for your specific variant of tablet and Gapps transfer it to sdcard or internal storage of your device.
- Power of device completely and wait for few seconds to confirm that it is off completely.
- Press power button and when device boots up leave power button.
- While your Xperia Z2 tablet is powering up you you will notice led light blinks.When this happens you have to press either volume up or down continuously until it boots into recovery mode.
- Sony Xperia Z2 tablet boots into twrp recovery.
- Once you are in twrp click on backup and select all partitions which you want to backup. It might take about 5 minutes for backup to complete. Don't interrupt backup process.
- Once backup of your existing rom is completed click on back button.Wipe data,cache and dalvik cache and wipe system partition too.
- Now select Install and navigate to location where you have placed your Rom and gapps zip files.
- Flashing rom might take about 5 minutes or so.Once flashing is complete do a factory reset again.
- Now reboot to system.Wait at least 15 minutes for initial boot to complete and once done you can explore Rom features.
This a tablet which is completely sealed outside which means you cannot remove battery when it enters bootloop.IF roms doesn't boot then press and hold power button for 15 seconds and you will notice that it goes off completely.now using button combinations reboot to recovery and do a factory reset again.
Even after factory reset if it fails to boot then reboot to recovery and restore backup.Don't try to flash wifi variant rom on lte one as it might brick it.If you have any other queries in flashing Crdroid custom rom On Sony Xperia Z2 tablet (Castor and Castor_windy) leave a comment below.
Install Cyanogenmod 12.1 custom rom on Sony Xperia U kumquat ST25I
Install latest version of android lollipop on Sony xperia U kumquat with the help of cyanogenmod 12.1 custom rom.It was released back in 2012 and was one of cutest looking phones.It is powered by a a dual core nova thor chipset with 512mb of ram.Since it has half a gig of ram you might be thinking that it is underpowered to run lollipop but you should not forget that lollipop is optimized by google itself to run on low ram devices.
This cyanogenmod rom with lollipop base is compiled by a xda senior member "AGONTUK", a big thanks to him for bring this rom for xperia U.This is not an official cm 12.1 but will have all features that cm has to offer which is a good news for us.
Device specific code name for Sony Xperia U is "Kumquat" and has a model number of "ST25i".
Cyanogenmod 12.1 rom for Sony Xperia U kumquat:
About cyanogenmod for Xperia U:
As this is compiled using ice cream sandwich kernel sources it is very hard to bring a fully working rom.Most of features that are essential for daily usage aer working just fine but there seems to have a problem with video recording,wifi direct and some other small issues which you can ignore for sake of lollipop.
 Cyanogenmod is one of the best custom roms available in android development ecosystem.They support lot of devices.This is based on android open source project with lot of added features.IT uses android 5.1.1 lollipop as base for now and will be updated to later versions of android when available.
This cyanogenmod rom with lollipop base is compiled by a xda senior member "AGONTUK", a big thanks to him for bring this rom for xperia U.This is not an official cm 12.1 but will have all features that cm has to offer which is a good news for us.
Device specific code name for Sony Xperia U is "Kumquat" and has a model number of "ST25i".
Cyanogenmod 12.1 rom for Sony Xperia U kumquat:
About cyanogenmod for Xperia U:
As this is compiled using ice cream sandwich kernel sources it is very hard to bring a fully working rom.Most of features that are essential for daily usage aer working just fine but there seems to have a problem with video recording,wifi direct and some other small issues which you can ignore for sake of lollipop.

General features of Cm 12.1:
- Software Updates: Cyanogenmod is usually available in three types one s nightlies which gets updated with new features every night and are quite stable for daily usage.second one is the snapchat which is monthly build version which will be stable version and other one is the release candidate.Some times nightlies are considered must stable than the snapshots. As of now we have android lollipop 5.1.1 in form on CM 12.1.
- Trebuchet: This is the default launcher that ships with cyanogenmod. But if you flash gapps then you might loose this.It doesn't have too many features like nova or other launchers but its simple and fast.
- Performance control:A default CPU manager app to control frequencies and governors . You can adjust cpu frequencies and also set them on boot too.
- Status bar Tweaks:Status bar has lot of tweaks which include a brightness slider.Slide in status bar to adjust brightness of the screen.Double tap on status bar to sleep device and also network speed indicator for on going traffic info.
- Theme engine: Theme engine is from the cyanogenmod custom rom which basically changes the look user interface from lock screen to ring tones all the way up to boot animations.The speciality of the theme engine is the ability to choose individual elements of every theme you have installed.So you like the ring tons and wallpapers of one theme and icons of other theme then you can have them at a time.Just open the theme chooser and you will understand how to do it..
- If you are missing root functionality or all your root apps are not working properly then to developer settings and check if root permissions are set properly.
These are key features of cyanogenmod and you can explore other features by flashing this rom on your Sony Xperia U kumquat.
Prerequisites:
- Battery: Charge your xperia U to at least 90% so that you wont encounter any battery related issues while flashing this.
- You must have updated your xperai U to latest firmware available.
- Custom recovery: You need a custom recovery like philz or cwm installed on your xpria P.Without it you can not flash at all.
- Backup:Backup all your data which includes apps,contacts,photos videos etc everything to computer or any cloud storage as flashing Cyanogenmod on Sony xperia U will erase all your data.
- Backup Efs partitions: Backup all your efs partition of your sony xperia U on current Rom.If you loose signal you can just restore it back.
- You must have a Unlocked bootloader for sure.
- Downloads:Cm 12.1 rom by aguntuk for xperia u and google apps. Transfer them to internal storage of your device.
Flash Cyanogenmod on Xperia U using recovery:
- Download Cm 12.1 for Xperia U and Gapps transfer it to sdcard or internal storage of Xperia u.
- Power of device completely and wait for few seconds to confirm that it is off completely.
- Press power button and when device boots up leave power button.
- While you Xperia U is powering up you you will notice led light blinks.When this happens you have to press either volume up or down continuously until it boots into recovery mode.
- Sony xperia u boots into cwm recovery.
- Once you are in cwm click on backup and select all partitions which you want to backup. It might take about 5 minutes for backup to complete. Don't interrupt backup process.
- Once backup of your existing rom is completed click on back button.Wipe data,cache and dalvik cache and wipe system partition too.
- Now select Install and navigate to location where you have placed your Rom and gapps zip files.
- Flashing rom might take about 5 minutes or so.Once flashing is complete do a factory reset again.
- Now reboot to system.Wait at least 15 minutes for initial boot to complete and once done you can explore Rom features.
Once you are recovery wipe all partitions except efs and internal storage and flash rom again.This time it should boot for sure.If you have any other queries regarding cm 12.1 rom for Sony Xperia U don't forget to leave a comment below.
Install Android lollipop based xenonhd custom rom on Sony Xperia M Nicki
Sony didnt provide android lollipop update for xperia M (Nicki) but still you can enjoy flavours of android lollipop with the help of custom roms. Thanks to the developer "Smartagent47" on xda who compiled xenonhd custom rom for Sony xperia M.Device specific code name for xperia m is "Nicki".
About Sony Xperia M: It comes with a 4 inch display with 480x854 resolution display.Under the hood there is a dual core snapdragon s4 plus processor powering it which is clocked at 1ghz.It has 1gb of ram with 4gb of internal storage.Primary camera on this device is 5mp which can record videos only at 720p while secondary camera is vga.It was released with dual sims too.Single Sim device has model numbers C1904 and C1905 while the dual sim one model numbers are C2004 and c2005.
Install xenonhd custom rom on Sony xperia M Nicki:
Prerequisites:
About Sony Xperia M: It comes with a 4 inch display with 480x854 resolution display.Under the hood there is a dual core snapdragon s4 plus processor powering it which is clocked at 1ghz.It has 1gb of ram with 4gb of internal storage.Primary camera on this device is 5mp which can record videos only at 720p while secondary camera is vga.It was released with dual sims too.Single Sim device has model numbers C1904 and C1905 while the dual sim one model numbers are C2004 and c2005.
Install xenonhd custom rom on Sony xperia M Nicki:

XenonHd custom rom:
This rom is based on android open source project with lot of features.Their aim is providing a custom firmware which is fast,stable and has better performance with decent battery life.This rom is very stable and smooth according to developer.It seems to working fine on C1904 and C1905 models but on dual sime models like C2004 and C2005 are having issues.So I advice you not to try this on dual sim models for now.


Features:
- Personalization: There is a separate tab for personalaztion where all the feature of this rom are grouped together in there options.Home,status bar and miscellaneous.
- Status bar: You can enable or disable brightness slider from notification panel.You can enable quick pull down to access full notification panel with just one swipe.Notification count is also available which displays number of notifications on status bar.
- Weather report: This feature displays weather on status bar itself.When you pull down notification panel it displays weather.
- Network traffic: If you want to know your download of upload speeds or network speed of your carrier while you are on Internet then enable this option.It displays ongoing network speed in status bar.You can adjust time interval too.
- Clock and date: Enable or disable clock on status bar.It also displays am/pm and you can Align your clock in three position on status bar.You can also modify colors too.
- Battery mods: Choose your batter icon style on status bar which includes circle,percentage,bar or even hide it.
- Quick settings: Change order of quick toggles in status bar and you have the option to enable or disable haptik feed back for touches.All notification can be displayed in expanded mode.
- Navigation bar: Navigation bar size can be adjusted or you can even disable it forever.Button positions can be rearranged too.
- Notification: "Heads up" takes care of your notifications.You can even disable it if you don't like it.Do not disturb mode is also available.If you want to exclude some apps from showing notification you can blacklist them.Time delay for notifications can also be adjusted.
- Expanded mode: You must be familiar with this too if you are using lollipop rom.This rom lets you to choose what apps you can run in expanded mode.
- Double to sleep on status bar is also available.
- Buttons: This let you add or modify hardware button actions. Long pressing power button will display screen shot,reboot recovery or boot loader besides normal power actions.Volume buttons can also be used to wake the device.
- Privacy Guard: If you don't like apps to access your personal information you can block it using privacy guard.
- Layers pro: Its a theme engine similar to that of cyanogenmod theme engine.
You can explore rest of the features by flashing this rom on you sony xperia M nicki.
- Backup:Backup all your data which includes apps,contacts,photos videos etc everything to computer or any cloud storage as flashing Xenonhd custom Rom on Sony xperia M nicki will erase all your data.
- Battery: Charge your Sony xperia M nicki to at least 90% so that you wont encounter any battery related issues while flashing this.
- Backup Efs partitions: Backup all your efs partition of your sony xperia M Nicki on current Rom.If you loose signal you can just restore it back.
- Custom recovery: You need a custom recovery like twrp or cwm installed on your xperia M . Without it you can not flash roms at all.
- Downloads: Xenonhod rom for xperia M and google apps. Transfer them to internal storage of your device.
Flash Xenonhd rom on Xperia M Nicki using recovery:
- Download Xenonhd rom for xperia M nicki and Gapps transfer it to sdcard or internal storage of device.
- Power of device completely and wait for few seconds to confirm that it is off completely.
- Press power button and when device boots up leave power button.
- While you xperia m is powering up you you will notice led light blinks.When this happens you have to press either volume up or down continuously until it boots into recovery mode.
- Sony xperia M nicki boots into Twrp or cwm recovery.
- Once you are in twrp or cwm click on backup and select all partitions which you want to backup. It might take about 5 minutes for backup to complete. Don't interrupt backup process.
- Once backup of your existing rom is completed click on back button.Wipe data,cache and dalvik cache and wipe system partition too.
- Now select Install and navigate to location where you have placed your Rom and gapps zip files.
- Flashing rom might take about 5 minutes or so.Once flashing is complete do a factory reset again.
- Now reboot to system.Wait at least 15 minutes for initial boot to complete and once done you can explore Rom features.
Once your sony xperia M boots up you can enjoy latest version on android lollipop on your device.If you have doubts regarding Xenonhd custom rom for sony xperia M nicki c1904 and c1905 then leave a comment below.
Subscribe to:
Posts (Atom)