Showing posts with label xenonhd. Show all posts
Showing posts with label xenonhd. Show all posts
Friday, December 11, 2015
Install Android lollipop based xenonhd custom rom on Sony Xperia M Nicki
Sony didnt provide android lollipop update for xperia M (Nicki) but still you can enjoy flavours of android lollipop with the help of custom roms. Thanks to the developer "Smartagent47" on xda who compiled xenonhd custom rom for Sony xperia M.Device specific code name for xperia m is "Nicki".
About Sony Xperia M: It comes with a 4 inch display with 480x854 resolution display.Under the hood there is a dual core snapdragon s4 plus processor powering it which is clocked at 1ghz.It has 1gb of ram with 4gb of internal storage.Primary camera on this device is 5mp which can record videos only at 720p while secondary camera is vga.It was released with dual sims too.Single Sim device has model numbers C1904 and C1905 while the dual sim one model numbers are C2004 and c2005.
Install xenonhd custom rom on Sony xperia M Nicki:
Prerequisites:
About Sony Xperia M: It comes with a 4 inch display with 480x854 resolution display.Under the hood there is a dual core snapdragon s4 plus processor powering it which is clocked at 1ghz.It has 1gb of ram with 4gb of internal storage.Primary camera on this device is 5mp which can record videos only at 720p while secondary camera is vga.It was released with dual sims too.Single Sim device has model numbers C1904 and C1905 while the dual sim one model numbers are C2004 and c2005.
Install xenonhd custom rom on Sony xperia M Nicki:

XenonHd custom rom:
This rom is based on android open source project with lot of features.Their aim is providing a custom firmware which is fast,stable and has better performance with decent battery life.This rom is very stable and smooth according to developer.It seems to working fine on C1904 and C1905 models but on dual sime models like C2004 and C2005 are having issues.So I advice you not to try this on dual sim models for now.


Features:
- Personalization: There is a separate tab for personalaztion where all the feature of this rom are grouped together in there options.Home,status bar and miscellaneous.
- Status bar: You can enable or disable brightness slider from notification panel.You can enable quick pull down to access full notification panel with just one swipe.Notification count is also available which displays number of notifications on status bar.
- Weather report: This feature displays weather on status bar itself.When you pull down notification panel it displays weather.
- Network traffic: If you want to know your download of upload speeds or network speed of your carrier while you are on Internet then enable this option.It displays ongoing network speed in status bar.You can adjust time interval too.
- Clock and date: Enable or disable clock on status bar.It also displays am/pm and you can Align your clock in three position on status bar.You can also modify colors too.
- Battery mods: Choose your batter icon style on status bar which includes circle,percentage,bar or even hide it.
- Quick settings: Change order of quick toggles in status bar and you have the option to enable or disable haptik feed back for touches.All notification can be displayed in expanded mode.
- Navigation bar: Navigation bar size can be adjusted or you can even disable it forever.Button positions can be rearranged too.
- Notification: "Heads up" takes care of your notifications.You can even disable it if you don't like it.Do not disturb mode is also available.If you want to exclude some apps from showing notification you can blacklist them.Time delay for notifications can also be adjusted.
- Expanded mode: You must be familiar with this too if you are using lollipop rom.This rom lets you to choose what apps you can run in expanded mode.
- Double to sleep on status bar is also available.
- Buttons: This let you add or modify hardware button actions. Long pressing power button will display screen shot,reboot recovery or boot loader besides normal power actions.Volume buttons can also be used to wake the device.
- Privacy Guard: If you don't like apps to access your personal information you can block it using privacy guard.
- Layers pro: Its a theme engine similar to that of cyanogenmod theme engine.
You can explore rest of the features by flashing this rom on you sony xperia M nicki.
- Backup:Backup all your data which includes apps,contacts,photos videos etc everything to computer or any cloud storage as flashing Xenonhd custom Rom on Sony xperia M nicki will erase all your data.
- Battery: Charge your Sony xperia M nicki to at least 90% so that you wont encounter any battery related issues while flashing this.
- Backup Efs partitions: Backup all your efs partition of your sony xperia M Nicki on current Rom.If you loose signal you can just restore it back.
- Custom recovery: You need a custom recovery like twrp or cwm installed on your xperia M . Without it you can not flash roms at all.
- Downloads: Xenonhod rom for xperia M and google apps. Transfer them to internal storage of your device.
Flash Xenonhd rom on Xperia M Nicki using recovery:
- Download Xenonhd rom for xperia M nicki and Gapps transfer it to sdcard or internal storage of device.
- Power of device completely and wait for few seconds to confirm that it is off completely.
- Press power button and when device boots up leave power button.
- While you xperia m is powering up you you will notice led light blinks.When this happens you have to press either volume up or down continuously until it boots into recovery mode.
- Sony xperia M nicki boots into Twrp or cwm recovery.
- Once you are in twrp or cwm click on backup and select all partitions which you want to backup. It might take about 5 minutes for backup to complete. Don't interrupt backup process.
- Once backup of your existing rom is completed click on back button.Wipe data,cache and dalvik cache and wipe system partition too.
- Now select Install and navigate to location where you have placed your Rom and gapps zip files.
- Flashing rom might take about 5 minutes or so.Once flashing is complete do a factory reset again.
- Now reboot to system.Wait at least 15 minutes for initial boot to complete and once done you can explore Rom features.
Once your sony xperia M boots up you can enjoy latest version on android lollipop on your device.If you have doubts regarding Xenonhd custom rom for sony xperia M nicki c1904 and c1905 then leave a comment below.

Lollipop based xenonhd custom rom for Htc one X endeavoru
Install Xenonhd custom rom on your htc one x endeavoru and update it latest version of android lollipop.One x received its last update as 4.1.1 jellybean and from then custom roms took over. This is one of best android devices that htc ever built and is much popular in android development community.
As a result there were lot of roms available for this device.Most of them were kitkat and slowly developers shifting their base to lollipop.There are less lollipop based roms available and good news is that availale one are stable for daily usage.
Xenonhd custom rom is quite stable and you can use it as a daily driver.If you are still stuck on stock jellybean and want to taste latest version of android lollipop then flash this rom.If you don't know what Endeavoru is,its the device specific code name for htc one x.
We know that flashing a custom rom is risky process and if you trying this for the first time then we advice you no to flash this until you know more about flashing,rooting stuff.We take no responsible if you brick endeavoru by flashing this one.
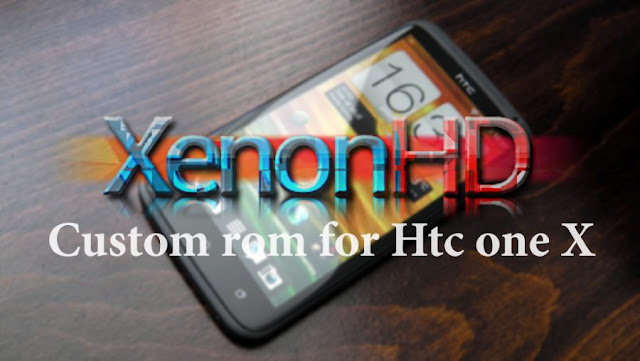 About XenonHd custom rom:
Prerequisites:
As a result there were lot of roms available for this device.Most of them were kitkat and slowly developers shifting their base to lollipop.There are less lollipop based roms available and good news is that availale one are stable for daily usage.
Xenonhd custom rom is quite stable and you can use it as a daily driver.If you are still stuck on stock jellybean and want to taste latest version of android lollipop then flash this rom.If you don't know what Endeavoru is,its the device specific code name for htc one x.
We know that flashing a custom rom is risky process and if you trying this for the first time then we advice you no to flash this until you know more about flashing,rooting stuff.We take no responsible if you brick endeavoru by flashing this one.
Xenonhd custom rom for Htc one X endeavoru:
This rom is based on android open source project with lot of features.They aim at providing a custom firmware which is fast,stable and has better performance with decent battery life.Htc one x is officially supported by "team horizon" which build xenonhd rom.

Remember that this rom is built using kernel sources of jellybean which you can expect some minor bugs for sure but you can ignore them for sure as they don't hinder performance or user experience.
Remember that this rom is built using kernel sources of jellybean which you can expect some minor bugs for sure but you can ignore them for sure as they don't hinder performance or user experience.
Features:
- Network traffic: If you want to know your download of upload speeds or network speed of your carrier while you are on Internet then enable this option.It displays ongoing network speed in status bar.You can adjust time interval too.

- Personalization: There is a separate tab for personalization where all the feature of this rom are grouped together in there options.Home,status bar and miscellaneous.
- Status bar: You can enable or disable brightness slider from notification panel.You can enable quick pull down to access full notification panel with just one swipe.Notification count is also available which displays number of notifications on status bar.
- Layers pro: Its a theme engine similar to that of cyanogenmod theme engine.
- Weather report: This feature displays weather on status bar itself.When you pull down notification panel it displays weather.
- Clock and date: Enable or disable clock on status bar.It also displays am/pm and you can align your clock in three position on status bar.You can also modify colors too.
- Battery mods: Choose your batter icon style on status bar which includes circle,percentage,bar or even hide it.
- Quick settings: Change order of quick toggles in status bar and you have the option to enable or disable haptik feed back for touches.All notification can be displayed in expanded mode.
- Notification: "Heads up" takes care of your notifications.You can even disable it if you don't like it.Do not disturb mode is also available.If you want to exclude some apps from showing notification you can blacklist them.Time delay for notifications can also be adjusted.
- Expanded mode: You must be familiar with this too if you are using lollipop rom.This rom lets you to choose what apps you can run in expanded mode.
- Double to sleep on status bar is also available.
- Buttons: This let you add or modify hardware button actions. Long pressing power button will display screenshot,reboot recovery or bootloader besides normal power actions.Volume buttons can also be used to wake the device.
- Navigation bar: Navigation bar size can be adjusted or you can even disable it forever.Button positions can be rearranged too.
- Privacy Guard: If you don't like apps to access your personal information you can block it using privacy guard.
These are some of the features of xenonhd custom rom and you can explore rest of the features by flashing this rom on your htc one x endeavoru.
- Install all Htc one x drivers on your computer if you don't have any recovery installed.
- You must have updated it to latest official software version that is android jellybean.
- Root:You must have root access on your Htc one x.
- Battery: Charge your One x to at least 70% so that you wont encounter any battery related problems while flashing this rom.
- Backup Efs partitions: Backup all your efs partition of your htc one x on current Rom or firmware.Just in case if you loose signal you can just restore it back.
- Backup:Backup all your data which includes contacts,apps,photos videos etc everything to computer or any cloud networks as flashing xenonhd rom on htc one x wipes all your data.
- Custom recovery: You need a custom recovery installed on your device.Without it you can not flash roms at all.
- You must have a unlocked bootloader.
- Downloads: Xenonhd for htc one x endeavoru (androidfilehost)and google apps and transfer them to internal storage.
If you don't have any custom recovery installed or you are still on stock without unlocking bootloader then follow below guide and then proceed to flashing using twrp recovery.
Unlock bootloader and flash twrp recovery:
- Enable usb debugging on your htc one x.
- Now power off the device completely and wait for few seconds.
- Hold volume down and power button at same time for few seconds.When you see hboot (boot loader) release buttons.Using volume keys for navigation select "fastboot" and click on power button to reboot into recover.
- Once you are in fastboot mode connect it to computer using usb cable.
- Download fast boot on our laptop or computer and install it.
- open the fastboot folder which you can find it in "c:\programming files".Right click on empty space by holding shift and you see an option "open cmd here".
- Once you are in fastboot window type "fastboot devices" and press enter.If your device is detected you will get a serial number in list of devices attached.If not uninstall drivers and install them again.
- Now type the command "fastboot oem get_identifier_token" and hit enter.You will get a serial key.Copy that key.
- Now open htcdev.com and click on unlock bootloader options and select your device properly and submit your key there.
- They will email you a unlock_code.bin file. Download it and move it to fastboot folder.
- Now type the command "fastboot flash unlockcode unlock_code.bin" and hit enter.You will get a notification on one x to confirm unlocking bootloader.click on yes.This will unlock bootloder and also erases all data on htc one x.
- Now download twrp recovery for htc one x and paste it in fastboot folder.Rename img file which you have copied to fastboot folder as recovery.
- Type the command "fastboot flash recovery recovery.img".This will install recovery on your htc one x.
- Once you have installed recovery reboot it and copy xenonhd rom which you have downloaded on your computer to one x and proceed as below.
Flash Xenonhd rom using twrp recovery:
- Download Xenonhd rom for htc one x and Gapps transfer it to sdcard or internal storage of your device.
- Power of device completely and wait for few seconds to confirm that it is off completely.
- Hold volume down and power button at same time for few seconds.
- When you see hboot (boot loader) release buttons.Using volume keys for navigation select recovery and click on power button to reboot into recover.
- Once you are in twrp click on backup and select all partitions which you want to backup. It might take about 5 minutes for backup to complete. Don't interrupt backup process.
- Once backup of your existing rom is completed click on back button.Wipe data,cache and dalvik cache and wipe system partition too.
- Now select Install and navigate to location where you have placed your cm 12.1 Rom and gapps zip files.
- Flashing this might take about 5 minutes or even less.Once flashing is complete do a factory reset again.
- Now reboot to system.Wait at least 15 minutes for initial boot to complete and once done you can explore its features.
This is step by step by guide explaining you to install xenonhd custom rom on your htc one x endeavoru.If you have any other queries regarding this guide don't forget to leave a comment below.
Xenonhd custom rom motorola moto g 1st gen falcon
Slowly we are seeing a lot of lollipop based custom Roms for Motorola moto g 1st gen aka falcon . Xenon hd rom is one of them which offers lot of features too besides stability and performance.This rom comes with encryption so if you are non encrypted rom by flashing this rom you will have a encryption enabled bt default and you cannot disable also.
prerequisites:
 XenonHd custom rom:
prerequisites:
- Backup:Backup all your data which includes apps,contacts,photos videos etc everything to computer or any cloud storage as flashing Xenonhd custom Rom on Motorola moto G 2013 aka falcon will erase all your data.
- Battery: Charge your Mote G 2013 falcon to at least 90% so that you wont encounter any battery related issues while flashing this.
- Backup Efs partitions: Backup all your efs partition of your Moto G on current ROM.If you loose signal you can just restore it back.
- Lock Gps:Lock your gps position on your current rom.If you use this a lot then you have to lock it so that it could work even after flashing other roms. It's easy to lock gps .Turn on gps in settings and find your current location in google maps and now now have locked on to gps.
- Custom recovery: You need a custom recovery like twrp installed on your Moto G 2013 .Without it you can not flash roms at all.
- Downloads: official Xenonhd rom falcon and google apps.Transfer them to internal storage of your device
Install Xenonhd custom rom on Moto g 1st gen falcon:

This rom is based on android open source project with lot of features.They aim at providing a custom firmware which is fast,stable and has better performance with decent battery life.Moto g falcon is officially supported by "team horizon" which build xenonhd rom.
Features:
- Personalization: There is a separate tab for personalization where all the feature of this rom are grouped together in there options.Home,status bar and miscellaneous.
- Status bar: You can enable or disable brightness slider from notification panel.You can enable quick pull down to access full notification panel with just one swipe.Notification count is also available which displays number of notifications on status bar.
- Weather report: This feature displays weather on status bar itself.When you pull down notification panel it displays weather.
- Network traffic: If you want to know your download of upload speeds or network speed of your carrier while you are on Internet then enable this option.It displays ongoing network speed in status bar.You can adjust time interval too.
- Clock and date: Enable or disable clock on status bar.It also displays am/pm and you can align your clock in three position on status bar.You can also modify colors too.
- Battery mods: Choose your batter icon style on status bar which includes circle,percentage,bar or even hide it.
- Quick settings: Change order of quick toggles in status bar and you have the option to enable or disable hap tic feed back for touches.All notification can be displayed in expanded mode.
- Navigation bar: Navigation bar size can be adjusted or you can even disable it forever.Custom actions can also be set.
- Notification: "Heads up" takes care of your notifications.You can even disable it if you don't like it.Do not disturb mode is also available.If you want to exclude some apps from showing notification you can blacklist them.Time delay for notifications can also be adjusted.
- Expanded mode: You must be familiar with this too if you are using lollipop rom.This rom lets you to choose what apps you can run in expanded mode.
- Double to sleep on status bar is also available.
- Buttons: This let you add or modify hardware button actions. Long pressing power button will display screen shot,reboot recovery or boot loader besides normal power actions.Volume buttons can also be used to wake the device.
- Privacy Guard: If you don't like apps to access your personal information you can block it using privacy guard.
- Layers pro: Its a theme engine similar to that of cyanogenmod theme engine.
These are some of the features of xenon hd custom rom for motorola moto g 1st gen aka falcon you can explore rest of the features by flashing this Rom on your device.
Flash Xenonhd rom using twrp or cwm recovery:
Flashing instructions for all the roms are similar.You need to have a custom recovery installed on your device.
- Download Xenonhd rom and Gapps transfer it to sdcard or internal storage of device.
- Power of the device completely and wait for few seconds to confirm that it is off completely.
- Press volume up,power button and Volume down simultaneously and once you see boot loader screen release buttons.
- Using volume down as a navigation button move to recovery and click on Volume up to confirm action.
- Moto G boots into Twrp or cwm recovery.
- Once you are in twrp or cwm click on backup and select all the partitions which you want to backup. . It might take about 5 minutes for backup to complete. Don't interrupt backup process.
- Once backup of your existing rom is completed click on back button.Wipe data,cache and dalvik cache and wipe system partition too.
- Now select Install and navigate to location where you have placed your Rom and gapps zip files.
- Flashing rom might take about 5 minutes or so.Once flashing is complete do a factory reset again.
- Now reboot to system.Wait at least 15 minutes for initial boot to complete and once done you can explore ROM features.
Since this is a official Xenonhd rom you will not experience any bugs if at all they will be solved much quickly.If you experience any boot loop after flashing this rom then just wipe all partitions correctly and flash it again.
By following the above procedure you will be able to enjoy Xenonhd rom on Motorola moto g first gen aka falcon.If you have any problem just leave a comment below.
By following the above procedure you will be able to enjoy Xenonhd rom on Motorola moto g first gen aka falcon.If you have any problem just leave a comment below.
Subscribe to:
Posts (Atom)