Showing posts with label cwm. Show all posts
Showing posts with label cwm. Show all posts
Friday, December 11, 2015
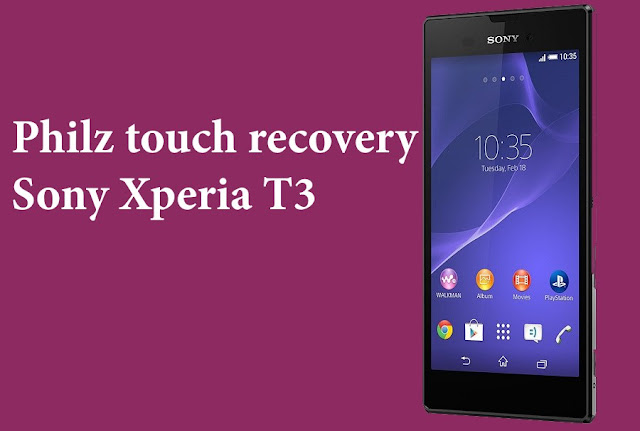
Install Philz touch Cwm recovery on Sony Xperia T3 D5103 D5102
CWM based philz touch recovery is already available for Sony xperia t3 with model numbers D5103 and D5102. IT was released back in 2014 but still there is not much development going on as result only few roms are available for this device.
If you take look at its specifications it comes with a snapdragon 400 processor clocked at 1.4gh with 1gb of and 8gb internal storage.Primary camera has 8mp sensor while secondary has just 1.1mp.It is available in 3g and 4g lte variants.We have 3 models depending on network and chipset.D5102 is 3g variant with chipset Qualcomm MSM8228 while D5103 and D5106 are lte variants with chipset Qualcomm MSM8228-2.
This recovery which you are going to flash is only for D5103 and D5102 model of xperia t3 and we take no responsibility if you have bricked your device after flashing this on D5106.
About Philz Touch cwm recovery:
This is originally developed by a xda senior member and recognised contributor phil3769 and has abandoned this project.Though recovery uses cwm as base and draws inspiration from other popular recovery too.
This recovery is compiled by Siddhesh.K15 for D5102 and by Xenon1978 for D5103, a big thanks to them for bring this recovery for our xperia T3.
Features:
Prerequisites:
If you take look at its specifications it comes with a snapdragon 400 processor clocked at 1.4gh with 1gb of and 8gb internal storage.Primary camera has 8mp sensor while secondary has just 1.1mp.It is available in 3g and 4g lte variants.We have 3 models depending on network and chipset.D5102 is 3g variant with chipset Qualcomm MSM8228 while D5103 and D5106 are lte variants with chipset Qualcomm MSM8228-2.
This recovery which you are going to flash is only for D5103 and D5102 model of xperia t3 and we take no responsibility if you have bricked your device after flashing this on D5106.
Philz touch cwm recovery on Xperia t3 D5102 & D5103:

About Philz Touch cwm recovery:
This is originally developed by a xda senior member and recognised contributor phil3769 and has abandoned this project.Though recovery uses cwm as base and draws inspiration from other popular recovery too.
This recovery is compiled by Siddhesh.K15 for D5102 and by Xenon1978 for D5103, a big thanks to them for bring this recovery for our xperia T3.
Features:
- Touch interface: User interface is completely touch driven and is very similar to cwm in navigation.
- Backup and restore:Just like twrp this recovery allows us to backup and restore individual partitions.
- Supports theme:This recovery too is based on configurable GUI which means you can flash themes if you don't like its interface.
- Modes:There are four modes to navigate between options.One is by simple touch and others double tap or semi touch and last being no touch in which you have to use volume buttons to navigate and power button to confirm.
- You can make adjustments to scrolling speed,touch accuracy and menu height.
- Set custom image as background.
- Screen brightness can be adjusted easily. you can turn off display and can adjust delay,set colours to individual elements.
- you can hide on screen button if you don't like them.
- Twrp back and restore support too is added.
- Create a custom zip file.
- set a lock to recovery so that no one can mess with it without your permissions.
- Now can now create efs backups from recovery itself.
- Aroma file manager too is available and has terminal command support too.
These are some of the features of philz touch recovery and you can explore rest you installing this on your Sony xperia t3 D5103 or D5102.
- Check Model: As we know we have three variants of xperia t3 check which variant you are using.
- You must have a unlocked bootloader.Don't try this on locked one as you might end in bricking it up.
- Battery: Charge your Xperia t3 to at least 90% so that you wont encounter any battery related issues while flashing this.
- Backup:Backup all your data which includes apps,contacts,photos videos etc everything to computer or any cloud storage as installing philz recovery might erase data on your xperia t3.
- Download:Philz recovery for xperia T3 D5103(androidfilehost ) and Xperia T3 D5102(androidfilehost mirror).
Flash CWM Philz recovery using adb or fastboot:
- Make sure that you installed adb or fast boot on our laptop or computer.
- You must be familiar with basics adb and fastboot commands to try this method.
- Enable usb debugging on your Sony xperia t3.Go to settings and then to about device.You will find build number there.Tap on it continuously until you see a toast message you are now a developer.Go back and you will find developer options.Click on it and scroll down and you will find usb debugging,mark on it.
- Now open fastboot folder and copy and paste recovery images for respective model numbers which you have downloaded and rename it to boot.img.This file is actually a modified kernel with philz recovery installed.
- Type the command "adb devices" and you will notice a pop on your xperia t3 to grant access to your device.Grant permissions .
- Now type the command "adb reboot-booloader" and press enter and device enters boot loader mode.If it fails to boot into bootloader disconnect it from computer and power off it completely.Now hold volume up button and connect it to computer.
- Once you are in boot loader mode type the command "fastboot devices" to know if your device is detected.If your device is detected you will get a key before list of devices.If not reinstall fast boot drivers.
- Now Type the command " fastboot flash boot boot.img" and recovery will be flashed on your phone.
- Once your device boots into recovery you can now flash roms,kernels or any other mods.
How to reboot to recovery?
Once you have it installed on your xperia t3.You cam enter recovery using fastboot or by button combinations.
- If you are using fastboot type the command "fastboot reboot-recovery" and hit enter.Device boots into recovery.
- If you don't want to use fasboot then power off the device completely and wait for few seconds to confirm that it is completely off.
- Press power button and release it as soon as you feel vibration.
- When you notice Sony boot logo continuously press volume down button until it boots into recovery.
By following the above guide you will be able to install philz recovery on your Sony xperia t3 d5103 and d5102 and remember that you cannot use it on D5106.If you have any other queries don't forget to leave a comment below.

Install Twrp and CWM dual recovery on Sony Xperia T2 Ultra Dual Sim D5322
Sony Xperia T2 Dual sim ultra has been updated to lollipop and now it has also received developer love in form of twrp and cwm recovery.You can now flash a custom recovery on D5322 and can mess with it provided that you made a nandroid backup.
In order to flash custom roms you need recovery and in this post we will guide you to install dual recovery that is both cwm and twrp on your xperia t2 ultra.This is specific to dual sim variant which has model number as D5322. So before proceeding further check you device model number.Open settings app and then proceed to about device.you will have your phone mobel number there.Confirm that you are using same variant as mentioned above.
Flashing this recovery on other variants of xperia t2 ultra might brick it and hold no responsibility for that.Though this can be flashed on D5322 we take no responsibility if you pet run away from your home in case of brick.So proceed at your own risk.

This dual recovery is compiled by a xda senior member "abcdjdj" for compiling this recovery for our device.Before this on your xperia t2 ultra dual sim let me elaborate you about them.
About Twrp recovery:
Team win recovery project abbreviated as Twrp is one first recovery to offer a completely touch driven interface.The ui is completely xml based so you can customise the interface with different themes and also this is only recovery that supports themes.Unlike the clockworkmod recovery this recovery has the option to wipe all the data,cache,dalvik,system,internal with just only one swipe.Of course you have to choose what to be wiped on the device.
Features of Twrp:
Now that you have both cwm and twrp installed on your xperia t2 ultra d5322 you have to verify if both of them are actually present or not.
In order to flash custom roms you need recovery and in this post we will guide you to install dual recovery that is both cwm and twrp on your xperia t2 ultra.This is specific to dual sim variant which has model number as D5322. So before proceeding further check you device model number.Open settings app and then proceed to about device.you will have your phone mobel number there.Confirm that you are using same variant as mentioned above.
Flashing this recovery on other variants of xperia t2 ultra might brick it and hold no responsibility for that.Though this can be flashed on D5322 we take no responsibility if you pet run away from your home in case of brick.So proceed at your own risk.
Twrp & cwm dual recovery for Xperia T2 ultra D5322:

This dual recovery is compiled by a xda senior member "abcdjdj" for compiling this recovery for our device.Before this on your xperia t2 ultra dual sim let me elaborate you about them.
About Twrp recovery:
Team win recovery project abbreviated as Twrp is one first recovery to offer a completely touch driven interface.The ui is completely xml based so you can customise the interface with different themes and also this is only recovery that supports themes.Unlike the clockworkmod recovery this recovery has the option to wipe all the data,cache,dalvik,system,internal with just only one swipe.Of course you have to choose what to be wiped on the device.
Features of Twrp:
- Touch interface:It is the first recovery to offer a complete touch driven interface which makes navigation much easier and later cwm also had touch interface.
- Individual Backups: Creating a completely backup is a must for any flasher but this occupies a lot of portion of your internal or external storage.Twrp will let you to backup individual portions of rom, this saves lot of space on your android device.This feature comes handy when you are flashing kernels.You can backup boot img alone if you want and can restore it when flashing kernel fails.
- Advanced wipe:There are two options for wiping your device partitions one is wipe and other is advanced wipe.If you choose just wipe option it factory resets while advance wipe option will allow you to choose what to wipe and what not.
- Theme Engine: This is one of the best feature and is only available in Twrp only.Since ui of twrp is xml based you can customize its ui with already available themes or you can create your own theme if you can.
- Multi rom:As the name says you can boot more than two roms on your device and is exclusive to twrp only as of now.This feature may not be available from official twrp team and booting more than one rom requires a modified kernel by your rom developer.
About Cwm recovery:
Clockworkmod recovery is one the first recoveries developed in the android community which was based on android 2.1 recovery image. This was the first recovery which had a file manger built in to flash the files and had adb support.
Features of cwm:
- Backup: This is a common feature in all recoveries.You can perform complete rom backup.
- Restore: Restore backups which you have made earlier incase of bootloops or in any other situations.
- Non touch and touch interface:This recovery is available in two versions.Standard one comes with non touch interface which means you have to use hardware keys to navigate.You can have paid version too which uses touch interface.
- Filemanger:Default managers makes easy to locate files easily.
- You can use rom manager app to install this recovery.
These are standard features of both the recoveries and if you think we missed something leave a comment below.
Prerequisites:
- Check Model: As we know we have three variants of xperia t2 ultra check which variant you are using.
- You have to be on latest lollipop firmware otherwise there are chances of bootloop.
- You must have a unlocked bootloader.Don't try this on locked one as you might end in bricking it up.
- Battery: Charge your Xperia t2 ultra to at least 90% so that you wont encounter any battery related issues while flashing this.
- Backup:Backup all your data which includes apps,contacts,photos videos etc everything to computer or any cloud storage as installing philz recovery might erase data on your xperia t2 ultra.
- Download:Download dual recovery for t2 ultra d5322.
Flash CWM or twrp recovery using adb or fastboot:
- You need to have installed adb or fast boot on our laptop or computer.
- Learn some basics adb and fastboot commands first.Easy to try and use these commands.
- Now open fastboot folder and copy and paste recovery images for respective model numbers which you have downloaded and rename it to boot.img.This file is actually a modified kernel with philz recovery installed.
- Enable usb debugging on your Sony xperia t2 ultra.Go to settings and then to about device.You will find build number there.Tap on it continuously until you see a toast message you are now a developer.Go back and you will find developer options.Click on it and scroll down and you will find usb debugging,mark on it.
- Type the command "adb devices" and you will notice a pop on your xperia t2 ultra to grant access to your device.Grant permissions .
- Now type the command "adb reboot-booloader" and press enter and device enters boot loader mode.If it fails to boot into bootloader disconnect it from computer and power off it completely.Now hold volume up button and connect it to computer.
- Once you are in boot loader mode type the command "fastboot devices" to know if your device is detected.If your device is detected you will get a key before list of devices.If not reinstall fast boot drivers.
- Now Type the command " fastboot flash boot boot.img" .In few seconds both twrp and cwm recoveries will be flashed on your Xperia t2 ultra D5322.
- Once your device boots into recovery you can now flash roms,kernels or any other mods.
How to boot into recoveries?
- Power off the device completely.
- When you notice Sony boot logo, continuously press volume down button until it boots into twrp.
- If you want it to boot into cwm recovery press camera shutter button continuosly at sony boot logo.
Subscribe to:
Posts (Atom)