Showing posts with label Recovery. Show all posts
Showing posts with label Recovery. Show all posts
Friday, December 11, 2015
Install Twrp recovery on Htc One Max (gsm,sprint and verizon)
If you want to install custom roms on your htc one max then you need a recovery installed first.There are two major recoveries available for this device.One is Cwm and other is twrp.Both recoveries are the best that you can have on any android device.
Htc one max being a flagship is available in three different models.One is international or gsm model and other two are carrier one that is sprint and verizon.While flashing these you have to keep in mind that you are not suppose to choose the recovery which is not meant for your model.
Flashing custom recovery requires knowledge of some basic fastboot terms.If you are new to this we have a separate guide for you which Will help you to learn some of those commands which are used frequently.You don't need to be an expert in using these commands.They are easy to learn.
As flashing is risky process which we all know about that.So if any thing happens to your htc one max while flashing this we take no responsibility at all.So proceed at your own risk.
Before proceeding further you have to know device specific codes of each available model of current device.Gsm variant has codename as "t6ul",sprint one has "t6spr" as codename and finally verizon has "t6vzw".
About Twrp recovery:
Team win recovery project abbreviated as Twrp is one first recovery to offer a completely touch driven interface.The ui is completely xml based so you can customise the interface with different themes and also this is only recovery that supports themes.Unlike the clockworkmod recovery this recovery has the option to wipe all the data,cache,dalvik,system,internal with just only one swipe.Of course you have to choose what to be wiped on the device.
Features of Twrp:
If you have any other queries regarding twrp for htc one max (gsm,sprint and verizon) then leave a comment below.
Htc one max being a flagship is available in three different models.One is international or gsm model and other two are carrier one that is sprint and verizon.While flashing these you have to keep in mind that you are not suppose to choose the recovery which is not meant for your model.
Flashing custom recovery requires knowledge of some basic fastboot terms.If you are new to this we have a separate guide for you which Will help you to learn some of those commands which are used frequently.You don't need to be an expert in using these commands.They are easy to learn.
As flashing is risky process which we all know about that.So if any thing happens to your htc one max while flashing this we take no responsibility at all.So proceed at your own risk.
Before proceeding further you have to know device specific codes of each available model of current device.Gsm variant has codename as "t6ul",sprint one has "t6spr" as codename and finally verizon has "t6vzw".
Twrp recovery for Htc One Max (gsm,sprint,verizon):
 |
| Twrp recovery on Htc One Max (gsm,sprint and verizon) |
Team win recovery project abbreviated as Twrp is one first recovery to offer a completely touch driven interface.The ui is completely xml based so you can customise the interface with different themes and also this is only recovery that supports themes.Unlike the clockworkmod recovery this recovery has the option to wipe all the data,cache,dalvik,system,internal with just only one swipe.Of course you have to choose what to be wiped on the device.
 |
| twrp recovery |
Features of Twrp:
- Touch interface:It is the first recovery to offer a complete touch driven interface which makes navigation much easier and later cwm also had touch interface.
- Individual Backups: Creating a completely backup is a must for any flasher but this occupies a lot of portion of your internal or external storage.Twrp will let you to backup individual portions of rom, this saves lot of space on your android device.This feature comes handy when you are flashing kernels.You can backup boot img alone if you want and can restore it when flashing kernel fails.
- Advanced wipe:There are two options for wiping your device partitions one is wipe and other is advanced wipe.If you choose just wipe option it factory resets while advance wipe option will allow you to choose what to wipe and what not.
- Theme Engine: This is one of the best feature and is only available in Twrp only.Since ui of twrp is xml based you can customize its ui with already available themes or you can create your own theme if you can.
- Multi rom:As the name says you can boot more than two roms on your device and is exclusive to twrp only as of now.This feature may not be available from official twrp team and booting more than one rom requires a modified kernel by your rom developer.
Prerequisites:
- Check you model device variant first.This is essential as we don't have a universal one so that it can be flashed on all models without any issues.You have to download according to your variant.
- Make sure that Htc one max drivers that is sync is already installed on your computer.If you don't have a recovery installed as we are it to bridge connect between pc on device.
- You must have updated it to latest official software version that is available.
- Root:Do you have root access on your Htc one max if yes its fine.If not then also don't worry as we are going to start from scratch.
- Battery: Charge your one max to 100% so that you wont encounter any battery related problems while flashing this rom.
- Backup:Backup all your data which includes contacts,apps,photos videos etc everything to computer or any cloud networks as flashing twrp recovery requires bootloader unlock which wipes entire data on your device.
- You must have a unlocked bootloader.If not ,no worries.Follow our first step for this.
- .Downloads: Twrp recovery for gsm one max t6ul, Twrp recovery for sprint one max t6spr, Twrp recovery for verizon one max t6vzw .
#1: Unlock bootloader of htc one max
This is first step is to unlock bootloader which you have go through before installing any custom rom and is a simple process but it requires a computer with Internet connection.
- Download and install htc drivers on your computer if you don,t have.
- Now power off the device completely and wait for few seconds to confirm that it is completely off.
- Hold volume down and power button at same time for few seconds.When you see hboot release buttons.Using volume down for navigation select "fastboot" and click on power button to reboot into fastboot.
- Once you are in fastboot mode connect it to computer through usb cable and if you notice any driver installation process let it complete first.
- Download fastboot on our laptop or Pc and install it.You can install it any where but choose location as c: which is default location.
- open the fastboot folder which is located in "c:\programming files".Right click on empty space by holding shift and you see an option "open cmd here".
- If you don't find this option then press windows and R buttons at same time ,Run pops up and type cmd to open command prompt.
- Now go to fastboot folder and copy the location of it which you can see in address bar of folder.
- In command prompt type the command "Cd location of fastboot folder" and press enter.You will notice that fastboot appears in command line.To paste location right click on empty space in cmd and several pops up.Select paste.
- One you press enter you have to notics minimal adb and fastboot in command line instead of c or some thing.
- Once you are in fastboot window type "fastboot devices" and press enter.If your device is detected you will get a serial number in list of devices attached.If not uninstall drivers and install them again.
- Now type the command "fastboot oem get_identifier_token" and hit enter.You will get a serial key.Copy that key.
- Now open htcdev.com and register with a valid email id.
- One you sign up there.Log in to your account and you will find three options if you explore.
- Click on unlock bootloader option and select your other supported devices.
- Proceed all other steps as mentioned and you are are asked to submit Submit your key there.
- You will receive a mail from Htc which includes a unlock_code.bin file. Download it and move it to fastboot folder which is located in programming files.
- Now type the command "fastboot flash unlocktoken unlock_code.bin" and hit enter.Check your device ,you will notice a notification on one max to confirm unlocking bootloader. Click on yes.This will unlock bootloder and also erases all data of your Htc one max.
- You have a unlocked bootloader device which is ready to accept a recovery to be flashed.
#2: Install Twrp recovery on Htc one max
- Now download twrp recovery for htc one max for respective model from above link and paste it in fastboot folder.Rename img file which you have copied to fastboot folder as recovery so that it will be easy to type command.
- Put the device in fastboot mode again using button compinations.
- Type the command "fastboot flash recovery recovery.img".This will install latest twrp recovery on your htc one max .
One you have installed it just reboot it.Now that you have twrp recovery installed it time for you to try cyanogenmod 12.1 custom rom on your htc one max.
If you have any other queries regarding twrp for htc one max (gsm,sprint and verizon) then leave a comment below.

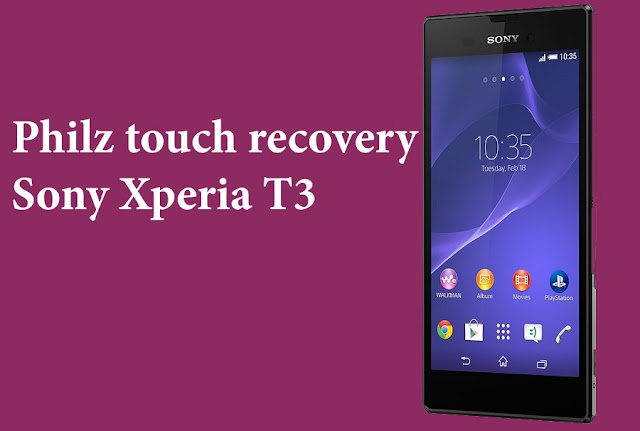
Install Philz touch Cwm recovery on Sony Xperia T3 D5103 D5102
CWM based philz touch recovery is already available for Sony xperia t3 with model numbers D5103 and D5102. IT was released back in 2014 but still there is not much development going on as result only few roms are available for this device.
If you take look at its specifications it comes with a snapdragon 400 processor clocked at 1.4gh with 1gb of and 8gb internal storage.Primary camera has 8mp sensor while secondary has just 1.1mp.It is available in 3g and 4g lte variants.We have 3 models depending on network and chipset.D5102 is 3g variant with chipset Qualcomm MSM8228 while D5103 and D5106 are lte variants with chipset Qualcomm MSM8228-2.
This recovery which you are going to flash is only for D5103 and D5102 model of xperia t3 and we take no responsibility if you have bricked your device after flashing this on D5106.
About Philz Touch cwm recovery:
This is originally developed by a xda senior member and recognised contributor phil3769 and has abandoned this project.Though recovery uses cwm as base and draws inspiration from other popular recovery too.
This recovery is compiled by Siddhesh.K15 for D5102 and by Xenon1978 for D5103, a big thanks to them for bring this recovery for our xperia T3.
Features:
Prerequisites:
If you take look at its specifications it comes with a snapdragon 400 processor clocked at 1.4gh with 1gb of and 8gb internal storage.Primary camera has 8mp sensor while secondary has just 1.1mp.It is available in 3g and 4g lte variants.We have 3 models depending on network and chipset.D5102 is 3g variant with chipset Qualcomm MSM8228 while D5103 and D5106 are lte variants with chipset Qualcomm MSM8228-2.
This recovery which you are going to flash is only for D5103 and D5102 model of xperia t3 and we take no responsibility if you have bricked your device after flashing this on D5106.
Philz touch cwm recovery on Xperia t3 D5102 & D5103:

About Philz Touch cwm recovery:
This is originally developed by a xda senior member and recognised contributor phil3769 and has abandoned this project.Though recovery uses cwm as base and draws inspiration from other popular recovery too.
This recovery is compiled by Siddhesh.K15 for D5102 and by Xenon1978 for D5103, a big thanks to them for bring this recovery for our xperia T3.
Features:
- Touch interface: User interface is completely touch driven and is very similar to cwm in navigation.
- Backup and restore:Just like twrp this recovery allows us to backup and restore individual partitions.
- Supports theme:This recovery too is based on configurable GUI which means you can flash themes if you don't like its interface.
- Modes:There are four modes to navigate between options.One is by simple touch and others double tap or semi touch and last being no touch in which you have to use volume buttons to navigate and power button to confirm.
- You can make adjustments to scrolling speed,touch accuracy and menu height.
- Set custom image as background.
- Screen brightness can be adjusted easily. you can turn off display and can adjust delay,set colours to individual elements.
- you can hide on screen button if you don't like them.
- Twrp back and restore support too is added.
- Create a custom zip file.
- set a lock to recovery so that no one can mess with it without your permissions.
- Now can now create efs backups from recovery itself.
- Aroma file manager too is available and has terminal command support too.
These are some of the features of philz touch recovery and you can explore rest you installing this on your Sony xperia t3 D5103 or D5102.
- Check Model: As we know we have three variants of xperia t3 check which variant you are using.
- You must have a unlocked bootloader.Don't try this on locked one as you might end in bricking it up.
- Battery: Charge your Xperia t3 to at least 90% so that you wont encounter any battery related issues while flashing this.
- Backup:Backup all your data which includes apps,contacts,photos videos etc everything to computer or any cloud storage as installing philz recovery might erase data on your xperia t3.
- Download:Philz recovery for xperia T3 D5103(androidfilehost ) and Xperia T3 D5102(androidfilehost mirror).
Flash CWM Philz recovery using adb or fastboot:
- Make sure that you installed adb or fast boot on our laptop or computer.
- You must be familiar with basics adb and fastboot commands to try this method.
- Enable usb debugging on your Sony xperia t3.Go to settings and then to about device.You will find build number there.Tap on it continuously until you see a toast message you are now a developer.Go back and you will find developer options.Click on it and scroll down and you will find usb debugging,mark on it.
- Now open fastboot folder and copy and paste recovery images for respective model numbers which you have downloaded and rename it to boot.img.This file is actually a modified kernel with philz recovery installed.
- Type the command "adb devices" and you will notice a pop on your xperia t3 to grant access to your device.Grant permissions .
- Now type the command "adb reboot-booloader" and press enter and device enters boot loader mode.If it fails to boot into bootloader disconnect it from computer and power off it completely.Now hold volume up button and connect it to computer.
- Once you are in boot loader mode type the command "fastboot devices" to know if your device is detected.If your device is detected you will get a key before list of devices.If not reinstall fast boot drivers.
- Now Type the command " fastboot flash boot boot.img" and recovery will be flashed on your phone.
- Once your device boots into recovery you can now flash roms,kernels or any other mods.
How to reboot to recovery?
Once you have it installed on your xperia t3.You cam enter recovery using fastboot or by button combinations.
- If you are using fastboot type the command "fastboot reboot-recovery" and hit enter.Device boots into recovery.
- If you don't want to use fasboot then power off the device completely and wait for few seconds to confirm that it is completely off.
- Press power button and release it as soon as you feel vibration.
- When you notice Sony boot logo continuously press volume down button until it boots into recovery.
By following the above guide you will be able to install philz recovery on your Sony xperia t3 d5103 and d5102 and remember that you cannot use it on D5106.If you have any other queries don't forget to leave a comment below.
Install Twrp recovery and root Oneplus X(opx ,onyx)-How to
Oneplus surely changed how the mid range and affordable smartphone should be with their new handset,Oneplus X but its invite system makes it hard to grab one.But one of big advantage of getting a android device with high end specifications is that a lot of developers get attracted to them and we could possibly get improved android roms much earlier than other handsets at the same price.
But android development for any device usually starts with bootloader unlocking and then later it proceeds further to "Rooting it" and then to custom recoveries or roms. Being a developer friendly device unlocking bootloader of Oneplus X is fairly easy and we have covered it in a separate guide.Link that guide is mentioned below.
If you have already unlocked bootloader of oneplus X (opx or onyx) and want to root it then you have to first install a custom recovery.Even though there is no support for Official Twrp recovery unofficial one is already available which can installed on it without any issues.
But as you know installing recovery is a risky process and that too an unofficial twrp, we hold no responsibility at all if you have bricked it.With that in mind proceed further to know how to install twrp recovery and root Oneplus X (opx or onyx).
Before proceeding further:
Install Twrp recovery and root Oneplus X(opx ,onyx):
About Twrp recovery:
Team win recovery project abbreviated as Twrp is one first recovery to offer a completely touch driven interface.The ui is completely xml based which means you can customise the interface with different themes and also it is only recovery that supports themes.Unlike the clockworkmod recovery this recovery has the option to wipe all the data,cache,dalvik,system,internal with just only one swipe.Of course you have to choose what to be wiped on the device.Twrp officially does not support oneplus x it might take some time for official one to come into existence.
Checkout the features of Twrp:
But android development for any device usually starts with bootloader unlocking and then later it proceeds further to "Rooting it" and then to custom recoveries or roms. Being a developer friendly device unlocking bootloader of Oneplus X is fairly easy and we have covered it in a separate guide.Link that guide is mentioned below.
If you have already unlocked bootloader of oneplus X (opx or onyx) and want to root it then you have to first install a custom recovery.Even though there is no support for Official Twrp recovery unofficial one is already available which can installed on it without any issues.
But as you know installing recovery is a risky process and that too an unofficial twrp, we hold no responsibility at all if you have bricked it.With that in mind proceed further to know how to install twrp recovery and root Oneplus X (opx or onyx).
Before proceeding further:
- Though there is no need to backup any data, we still recommend you to backup apps and other data on your device to computer or cloud.If you didn't unlock bootloader then you have to unlock it first.
- Install drivers on your computer so that it is recognised in fastboot mode.
- You have to install adb or fastboot on your computer without which you can flash twrp at all.
- Unlocked bootloader of oneplus x.
- Battery: Charger your oneplus X to at least 60% .
- Download Trwp recovery for Oneplus X(googledrive mirror) and transfer it to minimal adb and fastboot folder.
Must Check: How to Unlock bootloader of Oneplus X
Rooting Oneplus X is done in three stages.In Stage one we will be unlocking bootloader.In stage 2 we will install twrp recovery on oneplus x and in final stage we will be flashing chain-fire superuser through recovery to gain root access.
 |
| Install Twrp recovery and root Oneplus X(opx ,onyx) |
Team win recovery project abbreviated as Twrp is one first recovery to offer a completely touch driven interface.The ui is completely xml based which means you can customise the interface with different themes and also it is only recovery that supports themes.Unlike the clockworkmod recovery this recovery has the option to wipe all the data,cache,dalvik,system,internal with just only one swipe.Of course you have to choose what to be wiped on the device.Twrp officially does not support oneplus x it might take some time for official one to come into existence.
 |
| Twrp recoveryfor root Oneplus X |
- Touch interface:It is one of the first if not he first recovery to offer a complete touch based user interface which makes navigation a lot easier and later cwm also introduced touch based recovery.
- Individual Backups: Creating a complete backup is a must for any flasher but it eats up a lot of space of your internal or external storage.Twrp will let you to backup individual portions of rom, this saves lot of space on your android device.This feature comes handy when you are flashing kernels.If You can backup just boot img before flashing a kernel if it fails you can restore just boot img instead of complete nandroid backup.
- Advanced wipe:There are two options for wiping your device partitions one is wipe and other is advanced wipe.If you choose just wipe option it factory resets while advance wipe option will allow you to choose what to wipe and what not.
- Theme Engine: This is one of the best feature and is only available in Twrp only.Since ui of twrp is XML based you can customize its ui with already available themes or you can create your own theme if you can.
- Multi rom:As the name says you can boot more than two roms on your device and is exclusive to twrp only as of now.This feature may not be available from official twrp team and booting more than one rom requires a modified kernel by your rom developer.
Since twrp recovery doesn't supports oneplus X officially there might be bugs in this unofficial builds.It might take some time for the official builds to come out but till then you have to rely on this one only to root your handset.Proceed to the next step only if you have unlocked bootloader.
Install Twrp recovery on Oneplus X (opx ,onyx):
- Download and install oneplus X (onyx) drivers on your computer if you haven't done it before.
- Now power off the device completely and wait for few seconds to confirm that it is completely off.
- Hold volume down/up(only one) and power button at same time for few seconds to boot into fastboot mode.If you are requested to chose a language while booting into fastboot.
- If you are unable to boot into fastboot mode manually then you can do it using advanced reboot option which you have to enable it in developer options.
- Once you are in fastboot mode connect it to computer through usb cable and if you notice any driver installation process let it complete first.
- Download fastboot on our laptop or Pc and install it.You can install it any location but choose location as c: which is default location.
- open the fastboot folder which is located in "c:\programming files".Right click on empty space by holding shift and you see an option "open cmd here".
- If you don't find this option then press windows and R buttons at same time ,Run pops up and type cmd to open command prompt.
- Now go to fastboot folder and copy the address location of it which you can see in address bar of folder.
- In command prompt type the command "Cd location of fastboot folder" and press enter.You will notice that fastboot appears in command line.To paste location right click on empty space in cmd and several pops up.Select paste.
- Once you press enter you have to notice minimal adb and fastboot in command line instead of c or some thing.
- Once you are in fastboot window type "fastboot devices" and press enter.If your device is detected you will get a serial number in list of devices attached.If not uninstall drivers and install them again.
- Download twrp recovery image from the above link and transfer it to the minimal adb and fastboot folder.
- Rename Opx recovery img file to "recovery",so that you can type the command easily.
- Connect the device to system using usb cable again by keeping it in fastboot mode.
- Now type the command "fastboot devices " to see if it is detected.If it is not detected by fastboot reboot the device and enable usb debugging and see if it is detected.
- If detected type the command "fastboot flash recovery recovery.img" to flash the recovery permanently.Hit enter to flash it.
Once you hit enter twrp recovery will be flashed in 2-3 seconds.Once it is flashed you can proceed to next step to root Oneplus X.
#1 How To Root Oneplus X(opx or onyx):
- If you have installed twrp recovery just reboot it by typing the command "fastboot reboot".
- Now download supersu zip file and transfer it to internal storage of your device.
- Now power off your handset and boot into recovery mode using button combinations.
- Once you are in twrp recovery,click on backup and make a complete nandroid backup.It is essential for you to make a backup as there is no other way to bring back soft bricked to normal working state for now.
- Once you have backed up just click on restore and check if backup is available or not.
- If backup is available you are good to go.
- Click on install and then navigate to location where you have placed supersu zip file and select it.
- Swipe to confirm flash and then reboot to system once it is done.
- Once you reboot the device you will supersu application in app drawer.
- To confirm if it rooted or not download root checker app from playstore and run it.
- If it asks for root permissions then your oneplus x is rooted.
#2 Root Oneplus X without flashing recovery:
If you don't want to flash twrp recovery but still want to root your Oneplus x then follow below steps to do so.But you need to have bootloader unlocked for this procedure to work.
By following any one of two procedures which are listed above you will achieve root access for sure.If you have any doubts about installing Twrp recovery on Oneplus X then leave a comment below.- Download latest version of supersu and transfer it to internal storage o
- Put your Oneplus X in bootloader mode and connect it to computer using usb cable.
- Download twrp recovery image file from above google drive link and then transfer it to minimal adb and fastboot folder.
- Now open fastboot and type the command "fastboot devices" to confirm if your oneplus x is detected by it or not.
- Once detected you need to type the command "fastboot boot recovery recovery.img" and hit enter.You will notice that device boots into twrp recovery.
- Once you are in twrp recovery click on install and flash the supersu zip file and reboot it.
- Once Oneplus X reboots you will find supersu app in app drawer which means you have rooted it successfully.
Final words on rooting Oneplus X (opx or onyx):
Install Twrp recovery and root Htc one E8
One E8 is new samrphone from Htc which has similar specs to that of one M8 but has a poly carbonate shell instaed of unibody alluminium design.If you are an android enthusiast then after buying this E8 you might play with some time and then search for custom roms.But before playing with custom roms you have too root One E8 and you need a twrp recovery to flash roms. Though this device is new to android development community there isnt ay custom roms yet but we already have twrp recovery available.
If you dont know how to install ywrp recovery on your htc one E8 then dont worry we are here to help you.We will guide you to install twrp recovery on as well as root one e8 so that you can take advantage of root apps till custom roms arrives for this device.Device specific codename for Htc one e8 is simply e8.
Install Twrp and root Htc one E8:
 About Twrp recovery:
Twrp stands for team win recovery project.It is one first recovery to offer a completely touch driven interface.The ui is completely xml based so you can customise the interface with different themes and also this is only recovery that supports themes.Unlike the clockworkmod recovery this recovery has the option to wipe all the data,cache,dalvik,system,internal with just only one swipe.Of course you have to choose what to be wiped on the device.
There are two reasons why this recovery has to be chosen over other clockworkmod.First reason being the ability to restore the individual portions of the complete nandroid backup and other being the multi rom support.Only twrp has the multi rom support for now.
Prerequisites:
This is easiest way to install twrp on your Htc one E8 but this method require root access.
If you dont know how to install ywrp recovery on your htc one E8 then dont worry we are here to help you.We will guide you to install twrp recovery on as well as root one e8 so that you can take advantage of root apps till custom roms arrives for this device.Device specific codename for Htc one e8 is simply e8.
Install Twrp and root Htc one E8:

Twrp stands for team win recovery project.It is one first recovery to offer a completely touch driven interface.The ui is completely xml based so you can customise the interface with different themes and also this is only recovery that supports themes.Unlike the clockworkmod recovery this recovery has the option to wipe all the data,cache,dalvik,system,internal with just only one swipe.Of course you have to choose what to be wiped on the device.
There are two reasons why this recovery has to be chosen over other clockworkmod.First reason being the ability to restore the individual portions of the complete nandroid backup and other being the multi rom support.Only twrp has the multi rom support for now.
Prerequisites:
- You must have unlocked your device boot loader on htc.
- Enable usb debugging on your device.GO to settings and then to about device.Tap continuosly on build number until you see a toast message you are now a developer.Go back and you will find developer options click on it and mark on usb debugging.
- Download twrp for one e8 on your desktop and renemae it to recovery.img so that you can easily type the command in fastboot mode.
- Charge your htc one e8 to atleast 60%.
- Backup all your apps and data before proceeding further.
You can install twrp on your htc one m8 in many ways but here we will show to three effective methods to flash recovery.
Method 1: Using fastboot:
- Make sure that you installed adb or fast boot on our computer.
- You must be familiar with basics adb and fastboot commands to try this method.
- After enabling usb debugging on your htc one e8 and connect it to computer using a usb cable.
- Now open fastboot folder and copy and paste recovery image which you have download in from their official website..
- Type the command "adb devices" and you will notice a pop on your note 3 neo to grant access to your device.Grant permissions .
- Now type the command "adb reboot-booloader" and press enter and device enters boot loader mode.
- Once you are in boot loader mode type the command "fastboot devices" to know if your device is detected.If your device is detected you will get a key before list of devices.If not reinstall fast boot drivers.
- Now Type the command " fastboot flash recovery recovery.img" and recovery will be flashed on your phone.
- Disconnect phone from computer and using volume down key select recovery and click volume up button to confirm to boot into recovery.
- Once your device boots into recovery you can now flash roms,kernels or any other mods.
Method 2: Using DD method
- This methods requires root access along with unlocked bootloader.Since you didn't have root access yet you have to stick with first method only.
- Go to play store and search for a app call "terminal emulator".You will flooded with lot of apps just download any one of them.
- Download twrp recovery mg file from above link and place it on your internal storage.Do not place it it any folder,just copy to roots of your internal storage.If you are confused then just copy and paster in internal storage and rename it to twrp.
- Open terminal emulator and type the command "su".If you are requested to grant super user permissions then frant them.
- Type the command "dd if=/sdcard/twrp.img of=/dev/block/platform/msm_sdcc.1/by-name/recovery".
- Recovery will be flashed in few seconds just keep calm and wait for process to complete.
Method 3: Using official Twrp manager app
- Open playstore app and search for twrp maanger app.
- Download app and open it.
- Grant super user permission when asked.
- Once you grant the permissions do a swipe from the left and you will find several options.
- Choose the options "Install twrp" and you will be greeted with two more options.One being device name and other to install.
- Click device name and scroll down and you will find Htc one E8.Choose right variant of your device.
- Now choose which version to be installed and then click on install recovery.
- App downloads the recovery and flashes it.
- Once done you can reboot to recovery from the app itself.
Already by following any one of the above methods you will have twrp installed on your htc one e8.If you haven rooted your device yet then don't worry we have solution for that too.
How to root Htc one E8:
Once you have unlocked one E8 bootloader and flashed twrp recovery sing method one then its time for you to root your device.
- Download latest super user and place it in internal storage of device.
- Power off the device completely and wait for at least 10 seconds to make sure that it is completely of.
- Now using button combinations put your htc one e8 into recovery.
- Once you are in twrp recovery you will see various options, click on back up and select all the partitions and swipe to confirm backup.
- Backup process may take some time don't interrupt process in any way and it is necessary for you to make a backup for sure as we don't have stock img as of now.
- Once process is completed go back and click on "install".
- Select install from sdcard and navigate to location where you have placed supersu zip file.Select zip file and swipe to confirm flash and wait for few seconds.
- Once supersu is flashed reboot to system.
As device boots up you will have root access on your one e8.If you have queries regarding flashing twrp and rooting your htc one e8 just leave a comment below.
Install Twrp recovery on Lg g2 D801,D802 and D800
If you own lg g2 you might know that this is one of the best devices that lg made and is also well received by android development community.g2 sports a snapdragon 800 chipset which is clocked at 2.26ghz and has 2gb of ram with 16 or 32gb internal storage options.Primary camera on this device is 13mp unit while the secondary camera is 2.1mp which can record videos up to 1080p.There is a 300mah battery which powers the device.
Lg g2 is flagship device which means it will be released in many variants depending on carrier and region of availability.Model numbers of different variants are D800, D801, D802, D805, Vs980, Ls980, F320,l320,S320.
If you want to flash custom roms on your lg g2 then you have to first flash a custom recovery first.If you don't know how to install a custom recovery on your lg g2 D801,D802 and D800 then you are on right place in this post we will guide you to install Twrp recovery on your lg g2 in three easy steps which you have to follow them carefully.
As you know modifying android device using recoveries or custom roms is a risk process and there are chances of brick if you do it wrong.So we are not responsible if you brick your lg g2 while flashing recovery, you have to proceed at your own risk.
prerequisites:
About Twrp recovery:
Team win recovery project abbreviated as Twrp is one first recovery to offer a completely touch driven interface.The ui is completely xml based so you can customise the interface with different themes and also this is only recovery that supports themes.Unlike the clockworkmod recovery this recovery has the option to wipe all the data,cache,dalvik,system,internal with just only one swipe.Of course you have to choose what to be wiped on the device.Twrp officially supports lg g2 d802 which is international variant and d800 which is at&t and d801 which is t-mobile,vs980 which is Verizon.
Features of Twrp:
By following the above procedure you will be able to install twrp recovery on lg g2 D801,D802 and D800 and some other carrier variants too as mentioned above.If you have any other queries don't forget to leave a comment below.
Lg g2 is flagship device which means it will be released in many variants depending on carrier and region of availability.Model numbers of different variants are D800, D801, D802, D805, Vs980, Ls980, F320,l320,S320.
If you want to flash custom roms on your lg g2 then you have to first flash a custom recovery first.If you don't know how to install a custom recovery on your lg g2 D801,D802 and D800 then you are on right place in this post we will guide you to install Twrp recovery on your lg g2 in three easy steps which you have to follow them carefully.
As you know modifying android device using recoveries or custom roms is a risk process and there are chances of brick if you do it wrong.So we are not responsible if you brick your lg g2 while flashing recovery, you have to proceed at your own risk.
prerequisites:
- Check you Lg G2 model number by going into about device and confirm that you are using D802,D801 and D800.This recovery is actually flashable on all variants of this device.
- Make sure that lg mobile utility drivers are already installed on your computer.If you don't have then do install them.
- You must have updated it to official kitkat or lollipop that is already available if you are starting from scratch.
- Root: You need to have root access on your lg g2 to install twrp recovery. .
- Backup:Backup all your data which includes contacts,apps,photos videos etc everything to computer or any cloud networks as Flashing twrp recovery on lg g2 might erase all the data on your device.
- Backup Efs partitions: Backup all your efs partition of your Lg lg g2 on existing rom.Just in case if you loose signal or imei you can just restore it back.
- Battery: Charge your Lg G2 85% so that you wont encounter any battery related problems while updating it.
- You must have a unlocked bootloader on lg g2 to flash twrp recovery.
- Downloads:Twrp recovery for lg g2 on your computer or device.
- Recovery: You need a custom recovery like cwm or philz installed on your device so that you can flash twrp zip file.
Install Twrp recovery on lg g2 D801,D802 and D803:
 |
| Install Twrp recovery on Lg g2 D801,D802 and D800 |
Team win recovery project abbreviated as Twrp is one first recovery to offer a completely touch driven interface.The ui is completely xml based so you can customise the interface with different themes and also this is only recovery that supports themes.Unlike the clockworkmod recovery this recovery has the option to wipe all the data,cache,dalvik,system,internal with just only one swipe.Of course you have to choose what to be wiped on the device.Twrp officially supports lg g2 d802 which is international variant and d800 which is at&t and d801 which is t-mobile,vs980 which is Verizon.
 |
| twrp recovery lg g2 |
- Touch interface:It is one of the first if not he first recovery to offer a complete touch based user interface which makes navigation a lot easier and later cwm also introduced touch based recovery.
- Individual Backups: Creating a complete backup is a must for any flasher but it eats up a lot of space of your internal or external storage.Twrp will let you to backup individual portions of rom, this saves lot of space on your android device.This feature comes handy when you are flashing kernels.If You can backup just boot img before flashing a kernel if it fails you can restore just boot img instead of complete nandroid backup.
- Advanced wipe:There are two options for wiping your device partitions one is wipe and other is advanced wipe.If you choose just wipe option it factory resets while advance wipe option will allow you to choose what to wipe and what not.
- Theme Engine: This is one of the best feature and is only available in Twrp only.Since ui of twrp is xml based you can customize its ui with already available themes or you can create your own theme if you can.
- Multi rom:As the name says you can boot more than two roms on your device and is exclusive to twrp only as of now.This feature may not be available from official twrp team and booting more than one rom requires a modified kernel by your rom developer.
Since twrp recovery officially supports lg g2 you can expect much faster bug fixes and new updates.Before flashing recovery you have to first root your device and then install it.
Read read: Resurrection remix rom Lg g2 D802 and D801
#1 How to root LG g2 D802,D801 and D800:
Read read: Resurrection remix rom Lg g2 D802 and D801
#1 How to root LG g2 D802,D801 and D800:
- Download towel root apk on your lg g2 and install it.
- Enable usb debugging on your smart phone.Go to settings and then to about device.You will find build number there.Tap on it until you see a toast message yo are now a developer.Go back and you will find developer options.Click on it and mark on enable usb debugging.
- Open towel root apk and you will notice a tab which says make it ra 1n.Click on it and wait for the process to complete.
- Once the process completes just reboot the device.
- Download and install busy box and super user from playstore for full root access.
Read also: Miui v7 custom rom lg g2 D802,D801
#2 Installing Twrp on lg g2 :
- Open playstore on your lg g2 and search for an app called freegee.
- Install app and run it.If it asks root access grant permission always.It downloads supported devices list and let it be done.
- Once list is downloaded you will see various options select backup efs first.
- Now select twrp recovery and confirm to flash it.
- Once it is flashed yo can reboot to recovery.Freegee might not install latest one so yo need to flash latest official one again using official app.For a latest recovery follow below steps.
- Open playstore app and search for twrp manager app.
- Download app and open it.
- If you are asked to grant super user permissions.Simply grant always.
- Once you grant the permissions do a swipe from the left and you will find several options.
- Choose the options "Install twrp" and you will be greeted with two more options.One is device name and other to install.
- Click device name and scroll down and you will find lg g2 D802,D801 and D800 Click on it.
- Now choose which version to be installed and then click on install recovery.
- App downloads it and flashes it.
- Once done you can reboot to recovery from the app itself.
Install Twrp and CWM dual recovery on Sony Xperia T2 Ultra Dual Sim D5322
Sony Xperia T2 Dual sim ultra has been updated to lollipop and now it has also received developer love in form of twrp and cwm recovery.You can now flash a custom recovery on D5322 and can mess with it provided that you made a nandroid backup.
In order to flash custom roms you need recovery and in this post we will guide you to install dual recovery that is both cwm and twrp on your xperia t2 ultra.This is specific to dual sim variant which has model number as D5322. So before proceeding further check you device model number.Open settings app and then proceed to about device.you will have your phone mobel number there.Confirm that you are using same variant as mentioned above.
Flashing this recovery on other variants of xperia t2 ultra might brick it and hold no responsibility for that.Though this can be flashed on D5322 we take no responsibility if you pet run away from your home in case of brick.So proceed at your own risk.

This dual recovery is compiled by a xda senior member "abcdjdj" for compiling this recovery for our device.Before this on your xperia t2 ultra dual sim let me elaborate you about them.
About Twrp recovery:
Team win recovery project abbreviated as Twrp is one first recovery to offer a completely touch driven interface.The ui is completely xml based so you can customise the interface with different themes and also this is only recovery that supports themes.Unlike the clockworkmod recovery this recovery has the option to wipe all the data,cache,dalvik,system,internal with just only one swipe.Of course you have to choose what to be wiped on the device.
Features of Twrp:
Now that you have both cwm and twrp installed on your xperia t2 ultra d5322 you have to verify if both of them are actually present or not.
In order to flash custom roms you need recovery and in this post we will guide you to install dual recovery that is both cwm and twrp on your xperia t2 ultra.This is specific to dual sim variant which has model number as D5322. So before proceeding further check you device model number.Open settings app and then proceed to about device.you will have your phone mobel number there.Confirm that you are using same variant as mentioned above.
Flashing this recovery on other variants of xperia t2 ultra might brick it and hold no responsibility for that.Though this can be flashed on D5322 we take no responsibility if you pet run away from your home in case of brick.So proceed at your own risk.
Twrp & cwm dual recovery for Xperia T2 ultra D5322:

This dual recovery is compiled by a xda senior member "abcdjdj" for compiling this recovery for our device.Before this on your xperia t2 ultra dual sim let me elaborate you about them.
About Twrp recovery:
Team win recovery project abbreviated as Twrp is one first recovery to offer a completely touch driven interface.The ui is completely xml based so you can customise the interface with different themes and also this is only recovery that supports themes.Unlike the clockworkmod recovery this recovery has the option to wipe all the data,cache,dalvik,system,internal with just only one swipe.Of course you have to choose what to be wiped on the device.
Features of Twrp:
- Touch interface:It is the first recovery to offer a complete touch driven interface which makes navigation much easier and later cwm also had touch interface.
- Individual Backups: Creating a completely backup is a must for any flasher but this occupies a lot of portion of your internal or external storage.Twrp will let you to backup individual portions of rom, this saves lot of space on your android device.This feature comes handy when you are flashing kernels.You can backup boot img alone if you want and can restore it when flashing kernel fails.
- Advanced wipe:There are two options for wiping your device partitions one is wipe and other is advanced wipe.If you choose just wipe option it factory resets while advance wipe option will allow you to choose what to wipe and what not.
- Theme Engine: This is one of the best feature and is only available in Twrp only.Since ui of twrp is xml based you can customize its ui with already available themes or you can create your own theme if you can.
- Multi rom:As the name says you can boot more than two roms on your device and is exclusive to twrp only as of now.This feature may not be available from official twrp team and booting more than one rom requires a modified kernel by your rom developer.
About Cwm recovery:
Clockworkmod recovery is one the first recoveries developed in the android community which was based on android 2.1 recovery image. This was the first recovery which had a file manger built in to flash the files and had adb support.
Features of cwm:
- Backup: This is a common feature in all recoveries.You can perform complete rom backup.
- Restore: Restore backups which you have made earlier incase of bootloops or in any other situations.
- Non touch and touch interface:This recovery is available in two versions.Standard one comes with non touch interface which means you have to use hardware keys to navigate.You can have paid version too which uses touch interface.
- Filemanger:Default managers makes easy to locate files easily.
- You can use rom manager app to install this recovery.
These are standard features of both the recoveries and if you think we missed something leave a comment below.
Prerequisites:
- Check Model: As we know we have three variants of xperia t2 ultra check which variant you are using.
- You have to be on latest lollipop firmware otherwise there are chances of bootloop.
- You must have a unlocked bootloader.Don't try this on locked one as you might end in bricking it up.
- Battery: Charge your Xperia t2 ultra to at least 90% so that you wont encounter any battery related issues while flashing this.
- Backup:Backup all your data which includes apps,contacts,photos videos etc everything to computer or any cloud storage as installing philz recovery might erase data on your xperia t2 ultra.
- Download:Download dual recovery for t2 ultra d5322.
Flash CWM or twrp recovery using adb or fastboot:
- You need to have installed adb or fast boot on our laptop or computer.
- Learn some basics adb and fastboot commands first.Easy to try and use these commands.
- Now open fastboot folder and copy and paste recovery images for respective model numbers which you have downloaded and rename it to boot.img.This file is actually a modified kernel with philz recovery installed.
- Enable usb debugging on your Sony xperia t2 ultra.Go to settings and then to about device.You will find build number there.Tap on it continuously until you see a toast message you are now a developer.Go back and you will find developer options.Click on it and scroll down and you will find usb debugging,mark on it.
- Type the command "adb devices" and you will notice a pop on your xperia t2 ultra to grant access to your device.Grant permissions .
- Now type the command "adb reboot-booloader" and press enter and device enters boot loader mode.If it fails to boot into bootloader disconnect it from computer and power off it completely.Now hold volume up button and connect it to computer.
- Once you are in boot loader mode type the command "fastboot devices" to know if your device is detected.If your device is detected you will get a key before list of devices.If not reinstall fast boot drivers.
- Now Type the command " fastboot flash boot boot.img" .In few seconds both twrp and cwm recoveries will be flashed on your Xperia t2 ultra D5322.
- Once your device boots into recovery you can now flash roms,kernels or any other mods.
How to boot into recoveries?
- Power off the device completely.
- When you notice Sony boot logo, continuously press volume down button until it boots into twrp.
- If you want it to boot into cwm recovery press camera shutter button continuosly at sony boot logo.
Root and install Twrp recovery on Lg optimus g pro E980 and E988
After a huge response for optimus g, lg released g pro with bigger better display along with over clocked quad core snapdragon s4 pro processor which is clocked at 1.7ghz.If you take look at rest of the device specifications it comes with 2gb of ram with 16 or 32 gb internal storage options.But important thing for the rom flashers is the device model number.
Just like any flagship it comes in many model numbers like E980,E985 , E986 and E988.But this post that is root and install twrp recovery on lg optimus g pro is specific to model E980 and E988.If you own a Korean version or any carrier variant rooting procedure might work but flashing twrp recovery might result in bricking.
If you have owned a lg flagship device you might know that they come with a locked bootloader and lg didn't response to unlocking requests but this didn't stop developers from unlocking,rooting and there by installing custom recoveries.
One the biggest advantage of buying optimus g pro for and android enthusiast is that you can root and install recovery on this device with just few clicks that too with out a computer.Rooting and installing recovery is a risky process and we are not responsible for all the nuclear war that go in your heart if this process bricks your device.So proceed further as if you don't care if your device dies in middle of process.
About Twrp recovery:
Team win recovery project abbreviated as Twrp is one first recovery to offer a completely touch driven interface.The ui is completely xml based so you can customise the interface with different themes and also this is only recovery that supports themes.Unlike the clockworkmod recovery this recovery has the option to wipe all the data,cache,dalvik,system,internal with just only one swipe.Of course you have to choose what to be wiped on the device.
Features of Twrp:
Just like any flagship it comes in many model numbers like E980,E985 , E986 and E988.But this post that is root and install twrp recovery on lg optimus g pro is specific to model E980 and E988.If you own a Korean version or any carrier variant rooting procedure might work but flashing twrp recovery might result in bricking.
If you have owned a lg flagship device you might know that they come with a locked bootloader and lg didn't response to unlocking requests but this didn't stop developers from unlocking,rooting and there by installing custom recoveries.
One the biggest advantage of buying optimus g pro for and android enthusiast is that you can root and install recovery on this device with just few clicks that too with out a computer.Rooting and installing recovery is a risky process and we are not responsible for all the nuclear war that go in your heart if this process bricks your device.So proceed further as if you don't care if your device dies in middle of process.
Root and install twrp recovery on lg optimus g Pro E980 and E988:
 |
| Root and install Twrp recovery on Lg optimus g pro E980 and E988 |
Team win recovery project abbreviated as Twrp is one first recovery to offer a completely touch driven interface.The ui is completely xml based so you can customise the interface with different themes and also this is only recovery that supports themes.Unlike the clockworkmod recovery this recovery has the option to wipe all the data,cache,dalvik,system,internal with just only one swipe.Of course you have to choose what to be wiped on the device.
 |
| Twrp recovery on Lg optimus g pro E980 and E988 |
- Touch interface:It is one of the first if not he first recovery to offer a complete touch based user interface which makes navigation a lot easier and later cwm also introduced touch based recovery.
- Individual Backups: Creating a complete backup is a must for any flasher but it eats up a lot of space of your internal or external storage.Twrp will let you to backup individual portions of rom, this saves lot of space on your android device.This feature comes handy when you are flashing kernels.If You can backup just boot img before flashing a kernel if it fails you can restore just boot img instead of complete nandroid backup.
- Advanced wipe:There are two options for wiping your device partitions one is wipe and other is advanced wipe.If you choose just wipe option it factory resets while advance wipe option will allow you to choose what to wipe and what not.
- Theme Engine: This is one of the best feature and is only available in Twrp only.Since ui of twrp is xml based you can customize its ui with already available themes or you can create your own theme if you can.
- Multi rom:As the name says you can boot more than two roms on your device and is exclusive to twrp only as of now.This feature may not be available from official twrp team and booting more than one rom requires a modified kernel by your rom developer.
Since twrp recovery officially supports lg optimus g pro E980 and E988 you can expect much faster bug fixes and new updates.Before flashing recovery you have to first root your device and then install it.
Before proceeding:
Before proceeding:
- Check you Lg optimus G pro model number by going into about device and confirm that you are using either of E980 and E988.This is essential as flashing Twrp recovery on other variants harm your device or even brick it.Make sure that lg mobile utility drivers are already installed on your computer.If you don't have then do install them
- You must have updated it to latest official software version that is available if you are starting from scratch.
- Root: You need to have root access on your optimus G pro to flash recovery.
- Backup:Backup all your data which includes contacts,apps,photos videos etc everything to computer or any cloud networks as flashing Twrp recovery on optimus g pro E980 and E988 might erase all the data on your device.
- Backup Efs partitions: This is for those who already have twrp installed.Backup all your efs partition of your Lg optimus G Pro on current Rom or firmware.Just in case if you loose signal or imei you can just restore it back.
- Battery: Charge your Lg E980 or E988 to 100% so that you wont encounter any battery related problems while flashing it.
- You must have a unlocked bootloader to flash recovery.
- Downloads:Towel root apk on your device or roottool kitkat zip file on your computer.Download trwp recovery for e980/E988 on your device.
Root Lg optimus g pro E980 nd E988:
You can root your device in two ways.One requires a computer while other dont.Rooting with app is the safest and easiest method.Root optimus g pro using towel root:
- Download towel root apk on your device and install it.
- Enable usb debugging on your smartphone.Go to settings and then to about device.You will find build number there.Tap on it until you see a toast message yo are now a developer.Go back and you will find developer options.Click on it and mark on enable usb debugging.
- Open towel root apk and you will notice a tab which says make it ra 1n.Click on it and wait for the process to complete.

root lg optimus g pro e988 e980 - Once the process completes just reboot the device.
- Download and install busy box and super user from playstore for full root access.
Root optimus g pro using roottool kit:
- This method is applicable only for kitkat based device.
- Download and the roottool kitkat zip file on your computer and extract it.You will notice a file called startroot.bat.
- Install lg usb drivers on your computer.
- Enable usb debugging on you device and connect it pc using usb cable.
- If its first time you are connect your device to pc let the driver installation complete.
- Now click on the batch file and command window prompts up.Press any key to continue .
- you will notice that G pro boots into recovery.
- Click on side load option and select install zip and choose root.zip file and flash it.
- Once the process complete you will have a rooted device.
- Download root checker app from play store and check if your device has root access.
Must check: Cyanogenmod 12.1 for optimus g pro
Install Twrp recovery using Freegee:
Recovery can be installed on your optimus g pro E980 and E988 using freegee app.You can download this app from playstore and this app requires root access.
- Open playstore on your smarphone and search for an app called freegee.
- Install app and run it.When it asks root access grant permission.It download supported devices it and let it be done.
- Once list is downloaded you will see various options select backup efs first.
- Now select twrp recovery and confirm to flash it.
- Once it is flashed yo can reboot to recovery.Freegee might not install latest one so yo need to flash latest official one again using officail app.
Also read: Miui V7 for optimus g pro E980 and E988
Flash Twrp recovery using official app:
- This method only works when you have root access and an unlocked bootloader.That means you have to flash twrp using freegee first.
- Open playstore app and search for twrp manager app.
- Download app and open it.
- If you are asked to grant super user permissions.Simply grant always.
- Once you grant the permissions do a swipe from the left and you will find several options.
- Choose the options "Install twrp" and you will be greeted with two more options.One is device name and other to install.
- Click device name and scroll down and you will find optimus g pro e980 or e988. Click on it.
- Now choose which version to be installed and then click on install recovery.
- App downloads it and flashes it.
- Once done you can reboot to recovery from the app itself.
Must check: Resurrection remix for rom optimus g pro
Flash using dd method:
- This method too requires root access and bootloader unlocked.
- Go to play store and search for a app call "terminal emulator".You will flooded with lot of apps just download any one of them.
- Download twrp recovery img file from above link and place it on your internal storage.Do not place it it any folder,just copy to roots of your internal storage.If you are confused then just copy and paste in internal storage and rename it to twrp.
- Open terminal emulator and type the command "su".If you are requested to grant super user permissions then grant them.
- Type the command "dd if=/sdcard/twrp.img of=/dev/block/platform/msm_sdcc.1/by-name/recovery".
- Recovery will be flashed in few seconds just keep calm and wait for process to complete.
By following the above procedure you will be able to root and install twp recovery on your lg optimus G pro E980 and E988.If you have any other queries do leave a comment below.
Install Twrp recovery on samsung galaxy note 3 neo hltexx
Flashing a custom rom requires a recovery installed on your samsung galaxy note 3 neo.If you want flash roms on your note 3 neo and enjoy variety of custom firmwares then recovery is must.In this post we will guide you to install Twrp recovery on galaxy note 3.Device specific code name for note 3 neo is hlltexx.
 About Twrp recovery:
Twrp stands for team win recovery project.It is one first recovery to offer a completely touch driven interface.The ui is completely xml based so you can customise the interface with different themes and also this is only recovery that supports themes.Unlike the clockworkmod recovery this recovery has the option to wipe all the data,cache,dalvik,system,internal with just only one swipe.Of course you have to choose what to be wiped on the device.
There are two reasons why this recovery has to be chosen over other clockworkmod.First reason being the ability to restore the individual portions of the complete nandroid backup and other being the multi rom support.Only twrp has the multi rom support for now.
Prerequisites:
Method 1: Using Odin:
Twrp recovery for galaxy note 3 neo:

Twrp stands for team win recovery project.It is one first recovery to offer a completely touch driven interface.The ui is completely xml based so you can customise the interface with different themes and also this is only recovery that supports themes.Unlike the clockworkmod recovery this recovery has the option to wipe all the data,cache,dalvik,system,internal with just only one swipe.Of course you have to choose what to be wiped on the device.
There are two reasons why this recovery has to be chosen over other clockworkmod.First reason being the ability to restore the individual portions of the complete nandroid backup and other being the multi rom support.Only twrp has the multi rom support for now.
Prerequisites:
- You must have rooted your samsung galaxy note 3 neo.
- Enable usb debugging on your device.GO to settings and then to about device.Tap continuosly on build number until you see a toast message you are now a developer.Go back and you will find developer options click on it and mark on usb debugging.
- Download twrp for note 3 neo on your desktop.
- Download latest version of odin on your computer
- Download the latest odin and place it on desktop.
- Now download recovery tar file for the respective device and place it on desktop for easy access.
- Power off your note 3 neo completely and wait for few seconds.
- Now put the device in download mode by holding volume down,home key and power button at the same time.Once the device enters download mode using volume keys to navigate and press on continue.
- Now note 3 neo is ready to grab the files through Odin.
- Open the Odin on your desktop or computer.
- Connect the device to a computer using usb cable.
- Once the device is connected you will notice a blue tab in Odin with message added.
- Now click on pda and navigate to the file which you have placed before.
- Make sure you tick auto reboot and reset time and leave rest of them untick.
- Now click on start and wait till the flashing is completed.
- Once the flashing is done you will see a green tab with message pass and device should reboot automatically.
- Now you have twrp recovery on installed on your note 3 neo.
Method 2: Using fastboot:
- Make sure that you installed adb or fast boot on our computer.
- You must be familiar with basics adb and fastboot commands to try this method.
- After enabling usb debugging on your note 3 neo connect it to computer using a usb cable.
- Now open fastboot folder and copy and paste recovery image which you have download in from their official website..
- Type the command "adb devices" and you will notice a pop on your note 3 neo to grant access to your device.Grant permissions .
- Now type the command "adb reboot-booloader" and press enter and device enters boot loader mode.
- Once you are in boot loader mode type the command "fastboot devices" to know if your device is detected.If your device is detected you will get a key before list of devices.If not reinstall fast boot drivers.
- Now Type the command " fastboot flash recovery recovery.img" and recovery will be flashed on your phone.
- Disconnect phone from computer and using volume down key select recovery and click volume up button to confirm to boot into recovery.
- Once your device boots into recovery you can now flash roms,kernels or any other mods.
Method 3: Using Official twrp app
This is easiest way to install twrp on your galaxy note 3 neo but this method require root access.
- Open playstore app and search for twrp maanger app.
- Download app and open it.
- Grant super user permission when asked.
- Once you grant the permissions do a swipe from the left and you will find several options.
- Choose the options "Install twrp" and you will be greeted with two more options.One is device name and other to install.
- Click device name and scroll down and you will find samsung galaxy note 3 neo.Choose right variant of your device.
- Now choose which version to be installed and then click on install recovery.
- App downloads the recovery and flashes it.
- Once done you can reboot to recovery from the app itself.
Final words on twrp Recovery for galaxy note 3 neo:
By following any one of the above method you will be able to install twrp recovery on your samsung galaxy note 3 neo Hlltexx.Since flashing is a risky process we hold no responsibility if you brick the device in anyone of the process.If you have any other queries just leave a comment below.
Install Twrp recovery on sony Xperia T mint and Lt30p
If you want to flash custom roms on your sony xperia T then it is must that you have to flash a custom recovery first.One of most used recoveried in android is twrp and is officially available for sony xperia T.
If you are here searching for a custom recovery for your xperia T then we will guide you to install twrp recovery on your xperia T.But before flashing you have follow some steps so that you dont encounter any troubles before or after flashing recovery.
Since flashing recovery is a risky process we are not responsible for any earthquakes or tsunamis that arise in your heart if you brick it.So be careful and flash at your own risk.
 About Twrp recovery:
Team win recovery project abbreviated as Twrp is one first recovery to offer a completely touch driven interface.The ui is completely xml based so you can customise the interface with different themes and also this is only recovery that supports themes.Unlike the clockworkmod recovery this recovery has the option to wipe all the data,cache,dalvik,system,internal with just only one swipe.Of course you have to choose what to be wiped on the device.
Features of Twrp:
Prerequisites:
If you are here searching for a custom recovery for your xperia T then we will guide you to install twrp recovery on your xperia T.But before flashing you have follow some steps so that you dont encounter any troubles before or after flashing recovery.
Since flashing recovery is a risky process we are not responsible for any earthquakes or tsunamis that arise in your heart if you brick it.So be careful and flash at your own risk.
Twrp recovery for sony xperia t mint and Lt30p:

Team win recovery project abbreviated as Twrp is one first recovery to offer a completely touch driven interface.The ui is completely xml based so you can customise the interface with different themes and also this is only recovery that supports themes.Unlike the clockworkmod recovery this recovery has the option to wipe all the data,cache,dalvik,system,internal with just only one swipe.Of course you have to choose what to be wiped on the device.
Features of Twrp:
- Touch interface:It is the first recovery to offer a complete touch driven interface which makes navigation much easier and later cwm also had touch interface.
- Individual Backups: Creating a completely backup is a must for any flasher but this occupies a lot of portion of your internal or external storage.Twrp will let you to backup individual portions of rom, this saves lot of space on your android device.This feature comes handy when you are flashing kernels.You can backup boot img alone if you want and can restore it when flashing kernel fails.
- Advanced wipe:There are two options for wiping your device partitions one is wipe and other is advanced wipe.If you choose just wipe option it factory resets while advance wipe option will allow you to choose what to wipe and what not.
- Theme Engine: This is one of the best feature and is only available in Twrp only.Since ui of twrp is xml based you can customize its ui with already available themes or you can create your own theme if you can.
- Multi rom:As the name says you can boot more than two roms on your device and is exclusive to twrp only as of now.This feature may not be available from official twrp team and booting more than one rom requires a modified kernel by your rom developer.
Coming To twrp Recovery for Sony Xperia T you can flash it on in may ways and we disucuss some of them here.
- Battery: Charge your xperia T mint or Lt30P to at least 90% so that you wont encounter any battery related issues while flashing this.
- You must have updated your xperai T to latest firmware available.
- Backup:Backup all your data which includes apps,contacts,photos videos etc everything to computer or any cloud storage though flashing twrp recovery on Sony xperia T will erase all your data.
- Backup Efs partitions: Backup all your efs partition of your sony xperia U on current Rom.If you loose signal you can just restore it back.
- You must have a Unlocked bootloader for sure.
- Downloads:Download Twrp for Xperia T mint and Twrp for xperia T ls30pTransfer them to internal storage of your device or to fastboot folder depending on method you use.
Method 1 using Twrp manager app:
This is easiest method of flashing twrp on your Sony Xperia t Mini and Lt30P and this rewuired an unlocked bootloader with root access.- Open play store app and search for twrp maanger.
- Download app and open it.
- Grant super user permission when asked.
- Once you grant the permissions do a swipe from the left and you will find several options.
- Choose the options "Install twrp" and you will be greeted with two more options.One being device name and other to installed version.
- Tap on device name.Scroll down and you will find Sony Xperia T mint and Lt30p.Choose right variant of your device.
- Now choose which version to be installed and then click on install recovery.
- Download begins and you have wait till it finished downloading and flashing.Minimizing app might alter download and will not flash twrp recivery.
- Once done you can reboot to recovery from the app itself or use button combinations.
Method 2:Flash twrp using adb and fastboot
This method is quite hard for a newbie but we recommand this method so that you can get used to it.In order to try this method you have to unlock xperia T bootloader.Download recovery from twrp.me and follow below flashing guide.
- Install adb or fast boot on our computer.
- You must be familiar with basics adb and fastboot commands to try this method.If you dont know about those command do check out our guide.
- Enable usb debugging on your sont Xperia T mint or Lt30p.Go to settings and then to about device you will build number there.Tap on it ocntinuosly until you see a toast messgae "you are now a developer".Go back and click on developer options and mark on enable usb debugging.
- Connect your Xperia T to computer.
- Now open fastboot folder and copy and paste recovery image which you have download in from their official website.
- Type the command "adb devices" and you will notice a pop on your note 3 neo to grant access to your device.Grant permissions.
- Now type the command "adb reboot-booloader" and press enter and device enters boot loader mode.
- Once you are in boot loader mode type the command "fastboot devices" to know if your device is detected.If your device is detected you will get a key before list of devices.If not reinstall fast boot drivers.
- Now Type the command " fastboot flash recovery recovery.img" and recovery will be flashed on your phone.
- Disconnect phone from computer and using volume down key select recovery and click volume up button to confirm to boot into recovery.
- Once your device boots into recovery you can now flash roms,kernels or any other mods.
Method 3: flash twrp using DD method
This method requires root access and you can use terminal command app on your xperia T.
- Go to play store and search for a app call "terminal emulator".You will flooded with lot of apps just download any one of them.
- Download twrp recovery img file from above link and place it on your internal storage.Do not place it it any folder,just copy to roots of your internal storage.If you are confused then just copy and paster in internal storage and rename it to twrp.
- Open terminal emulator and type the command "su".If you are requested to grant super user permissions then grant them.
- Type the command "dd if=/sdcard/twrp.img of=/dev/block/mmcblk0p11".
- Recovery will be flashed in few seconds just keep calm and wait for process to complete.
There are the 3 method with which you can flash twrp recovery on your Xperia T mini or lt30p.If you have any other queries regarding flashing twrp on xperia T do leave a comment below.
Install twrp recovery on samsung galaxy note 3 snapdragon,exynos,t-mobile,sprint,us-cellular,verizon
Flashing a custom rom on samsung galaxy note 3 requires Twrp recovery installed first .Samsung galaxy note 3 is one of the best phablets that you can buy.It comes with a snapdragon 800 processor clocked at 2.30 ghz with 3gb of ram and 16/32/64gb internal storage.It sports a 5.7 inch full hd display which is protected by a corning gorilla glass 3 layer on top.Primary camera on this device is a 13mp while secondary camera is 2mp which can record videos upto 720p.Under the hood a 3200mah battery is powering it which gets you a day easily which one charge.
Since it is typical samsung flagship it comes with another processor too.It has a samsung in house processor Exynos 5 octa core 5420.All rest of specs of the device remains same and each carrier has its own version of note 3.Snapdragon variant support lte while exynos doesn't. International Snapdragon variant has a chipset number as Hlte while exynos is Ha3g.Carrier variant include t-mobile,sprint,us-cellular,verizon.
The first thing after rooting your galaxy note 3 is to install android apps with root access and final thing is to flash a custom rom which is fast and stable enough for daily usage.But flashing a custom rom or kernel requires a custom recovery installed on your note 3.Good new is that we already have twrp for all variants of galaxy note 3.So whether you are using an internal version or carrier versions you can install twrp recovery.
But before installing twrp recovery on galaxy note 3 you have to check your device model number.To check your device model number go to settings and then to about device.You will find your device model number confirm a specific variant of note which we have specified below.
Prerequisites:

Twrp recovery:
Twrp stands for team win recovery project.It is one first recovery to offer a completely touch driven interface.The ui is completely xml based so you can customise the interface with different themes and also this is only recovery that supports themes.Unlike the clockworkmod recovery this recovery has the option to wipe all the data,cache,dalvik,system,internal with just only one swipe.Of course you have to choose what to be wiped on the device.

There are two reasons why this recovery has to be chosen over other clockworkmod.First reason being the ability to restore the individual portions of the complete nandroid backup and other being the multi rom support.Only twrp has the multi rom support for now.coming to twrp for note 3 You can install it in three ways.
Supported devices:

2.Now download recovery tar file for the respective device and place it on desktop for easy access.
3.Power off the device completely and wait for few seconds.
4.Now put the device in download mode by holding volume down,home key and power button at the same time.Once the device enters download mode using volume keys to navigate and press on continue.
5.Now the device is ready to grab the files through Odin.
6.Open the Odin on your desktop or computer.
7.Connect the device to a computer using usb cable.
8.Once the device is connected you will notice a blue tab in Odin with message added.
9.Now click on pda and navigate to the file which you have placed before.
10.Make sure you tick auto reboot and reset time and leave rest of them untick.
11.Now click on start and wait till the flashing is completed.
12.Once the flashing is done you will see a green tab with message pass and device should reboot automatically.
13.Now you have twrp recovery on installed on your note 3.
There are three ways with which you can install twrp recovery on samsung galaxy note 3 on all variants including exynos,snapdragon,t-mobile,us cellular,sprint etc.If you are unable to follow any one of the above stated methods leave a comment below.
Since it is typical samsung flagship it comes with another processor too.It has a samsung in house processor Exynos 5 octa core 5420.All rest of specs of the device remains same and each carrier has its own version of note 3.Snapdragon variant support lte while exynos doesn't. International Snapdragon variant has a chipset number as Hlte while exynos is Ha3g.Carrier variant include t-mobile,sprint,us-cellular,verizon.
The first thing after rooting your galaxy note 3 is to install android apps with root access and final thing is to flash a custom rom which is fast and stable enough for daily usage.But flashing a custom rom or kernel requires a custom recovery installed on your note 3.Good new is that we already have twrp for all variants of galaxy note 3.So whether you are using an internal version or carrier versions you can install twrp recovery.
But before installing twrp recovery on galaxy note 3 you have to check your device model number.To check your device model number go to settings and then to about device.You will find your device model number confirm a specific variant of note which we have specified below.
Prerequisites:
- Charge your mobile to at least 80% so that you don't run into any problems.
- Backup all your apps and data on your device to external sdcard or computer as flashing twrp recovery on note 3 will not erase data on your device.
- Enable usb debugging on your note 3.To do this go to settings and then to about device.tap on build number continuously until you see a toast message you are now a developer.Go back and you will find developer options.click on it and check on "enable usb debugging".
- Download Twrp recovery on your computer and transfer it to your sdcard or internal storage of your note 3.
- Backup Efs and modem partitions of your samsung galaxy note 3.
Install Twrp recovery on samsung galaxy note 3:

Twrp recovery:
Twrp stands for team win recovery project.It is one first recovery to offer a completely touch driven interface.The ui is completely xml based so you can customise the interface with different themes and also this is only recovery that supports themes.Unlike the clockworkmod recovery this recovery has the option to wipe all the data,cache,dalvik,system,internal with just only one swipe.Of course you have to choose what to be wiped on the device.

There are two reasons why this recovery has to be chosen over other clockworkmod.First reason being the ability to restore the individual portions of the complete nandroid backup and other being the multi rom support.Only twrp has the multi rom support for now.coming to twrp for note 3 You can install it in three ways.
Supported devices:
- international snapdragon Htle.
- International exynos (Ha3g)
- Note 3 sprint (hltespr)
- note 3 t-mobile (hltetmo)
- note 3 us cellular (hlteusc)
- note 3 verizon (hltevzw)
Download twrp recovery for your note 3 from their official website.go to their official website teamwin.in/devices/ and typre "note 3".Select a variant of device which you have and download required files accordingly.

Flash Twrp on galaxy note 3 fastboot:
- Make sure that you installed adb or fast boot on our computer.
- You must be familiar with basics adb and fastboot commands to try this method.
- After enabling usb debugging on your phone connect it to computer using a usb cable.
- Now open fastboot folder and copy and paste recovery image which you have download in from their official website..
- Type the command "adb devices" and you will notice a pop on your phone to grant access to your device.Grant permissions .
- Now type the command "adb reboot-booloader" and press enter and device enters boot loader mode.
- Once you are in boot loader mode type the command "fastboot devices" to know if your device is detected.If your device is detected you will get a key before list of devices.If not reinstall fast boot drivers.
- Now Type the command " fastboot flash recovery recovery.img" and recovery will be flashed on your phone.
- Disconnect phone from computer and using volume down key select recovery and click volume up button to confirm to boot into recovery.
- Once your device boots into recovery you can now flash roms,kernels or any other mods.
Flash Twrp On galaxy note 3 Twrp manager App:
Note 3 is officially supported by twrp so you can actually install twrp on note 3 using their official app from play store called twrp manager.But using this app requires root access.If your device have root access you can try this flashing using this app and this is the easiest way to install twrp recovery on galaxy note 3.
1.Open playstore app and search for twrp maanger app.
2.Download the app and open it.
3.Grant super user permission when asked.
4.Once you grant the permissions do a swipe from the left and you will find several options.
5.Choose the options "Install twrp" and you will be greeted with two more options.One is device name and other to install.
6.Click device name and scroll down and you will find samsung galaxy note 3.Choose right variant of your device.
7.Now choose which version to be installed and then click on install recovery.
8.App downloads the recovery and flashes it.
9.Once done you can reboot to recovery from the app itself.
1.Download the latest odin and place it on desktop.1.Open playstore app and search for twrp maanger app.
2.Download the app and open it.
3.Grant super user permission when asked.
4.Once you grant the permissions do a swipe from the left and you will find several options.
6.Click device name and scroll down and you will find samsung galaxy note 3.Choose right variant of your device.
7.Now choose which version to be installed and then click on install recovery.
8.App downloads the recovery and flashes it.
9.Once done you can reboot to recovery from the app itself.
flash twrp recovery on galaxy note 3 using odin:
2.Now download recovery tar file for the respective device and place it on desktop for easy access.
3.Power off the device completely and wait for few seconds.
4.Now put the device in download mode by holding volume down,home key and power button at the same time.Once the device enters download mode using volume keys to navigate and press on continue.
5.Now the device is ready to grab the files through Odin.
6.Open the Odin on your desktop or computer.
7.Connect the device to a computer using usb cable.
8.Once the device is connected you will notice a blue tab in Odin with message added.
9.Now click on pda and navigate to the file which you have placed before.
10.Make sure you tick auto reboot and reset time and leave rest of them untick.
11.Now click on start and wait till the flashing is completed.
12.Once the flashing is done you will see a green tab with message pass and device should reboot automatically.
13.Now you have twrp recovery on installed on your note 3.
There are three ways with which you can install twrp recovery on samsung galaxy note 3 on all variants including exynos,snapdragon,t-mobile,us cellular,sprint etc.If you are unable to follow any one of the above stated methods leave a comment below.
Subscribe to:
Posts (Atom)